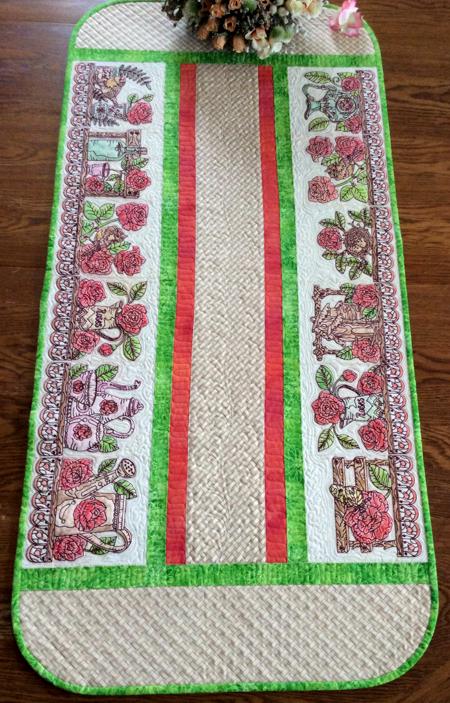
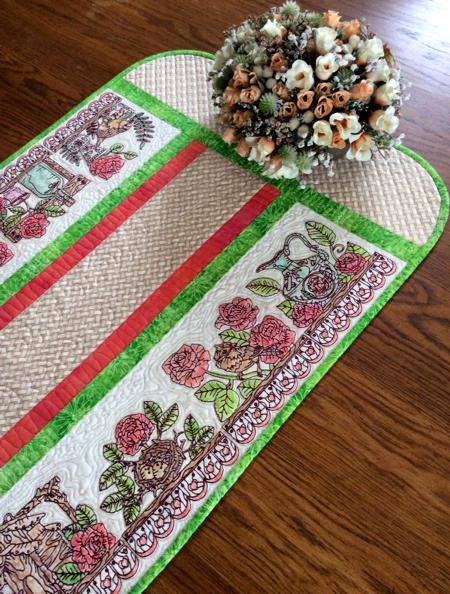
We used the designs from the One-Color Rose Border Set, to make this charming rustic-themed table runner.
We used designs for the large, 5" x 7" (130 x 180 mm), hoop.
|
The finished size of the table runner is about 20" x 42".
|
|
Besides embroidery thread (either polyester or rayon), you will need
- light-weight cut-away stabilizer;
- 1 yard of light colored cotton fabric for embroidery;
- about 1/4 yard of light-colored printed cotton fabric,
- 1/4 yard of bright green fabric,
- 1/8 yard of dark rose fabric;
- batting and fabric for the backing;
- fabric colors: you can use pencils, paints, inks or markers;
- quilting threads;
- quilter's ruler and rotary cutter (or a graphic pencil and sharp scissors).
|
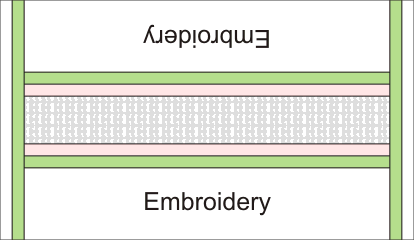
| Emboridery |
Embroider the One-Color Rose Border Set designs with dark burgundy thread on light-colored fabric. You will need all 12 stitch-outs. Use light-weight cut-away stabilizer for embroidery.
After the embroidery is finished, using a ruler and a rotary cutter, trim the stitch-outs leaving 1/2" on the sides of the embroidery. Do not trim the lower and upper edges.
Cut away the excess stabilizer around the embroidery. Do not remove the stabilizer under the embroidery. |
| Sew the stitch-outs in 2 strips, 6 stitch-outs in a row. Make sure that the motif at the bottom of each pattern is aligned to each other.. |

|
| Press the seam allowance. Color the stitch-outs using the fabric colors, following the manufacturer's recommendations. |

|
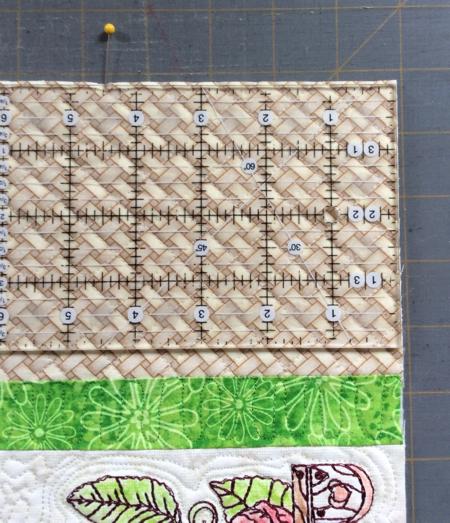
| Trim the rows to 6 1/2" wide and 31" long , leaving about 1" on the lower edge (we will trim this further after quilting). |
Cutting:
|
Out of light-colored fabric with print, cut
- 1 strip measuring 4 1/2" x 31", and
- 2 strips measuring 5" x 21"
Out of green fabric, cut
- 2 strips measuring 1 1/2" x 31",
- 2 strips measuring 1 1/2" x 21 and
- 4 strips measuring 2 1/2" and the length of the width of the fabric for the binding.
Out of dark rose fabric cut 2 strips measuring 1 1/2" x 31".
|
Assembly of the Top:
|
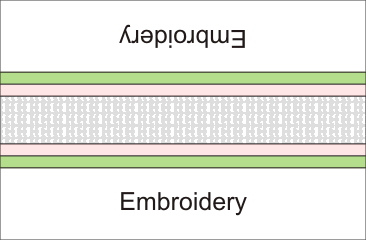
| Sew the 1 1/2" x 31" rose strips to the lower and upper edges of the light-colored 4 1/2" x 31" strip. |

|
| Sew the 1 1/2" x 31" green strips to the rose strips. |
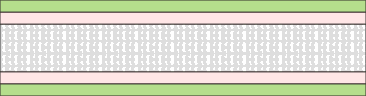 |
| Sew the embroidered borders to the upper and lower edges of the top. The rose should be oriented towards the center of the table runner, while the border motif is on the outer edge. |
 |
| Sew the green 1 1/2" x 21" strips to the left and right edges. |
 |
| Sew the light-colored 5" x 21" strips to the green strips. |
 |
| Quilting and Finishing: |
Now place the backing on a flat surface (table) face down. Cover with batting. Spread your working piece over it.
Pin all three layers together with 1" pins and start quilting. We quilted in a free motion style all over the table runner. |
After the quilting is finished, press the work with heavy steam and square the work -- all corners should be 90 degrees and opposite sides should be of the same length. Leave only 1/2" margin beyond the embroidery.
|
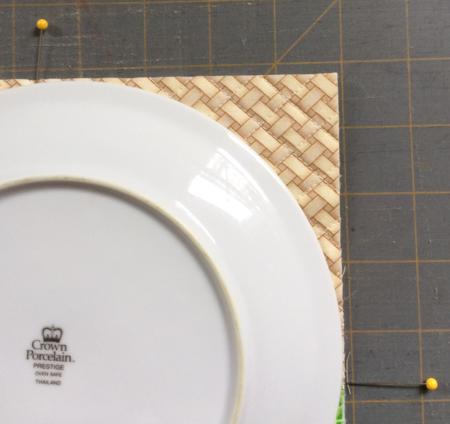
To round the corners of the tablerunner, we used a regular dinner plate.
|
|
|
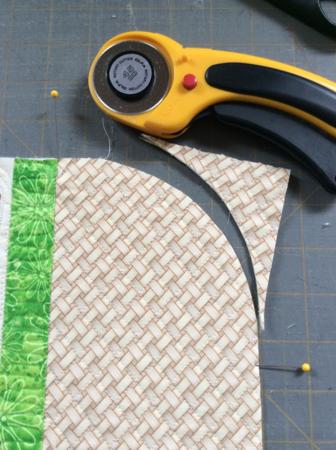
Cut along the line with the rotary cutter. If you do not use the rotary cutter, trace the arc of the plate with the graphic pencil and cut along it with the scissors.
|

|
| Repeat for all corbers of the table runner. |
|
| Finish the raw edges with the binding. |
|
Your table runner is ready. Enjoy!
|
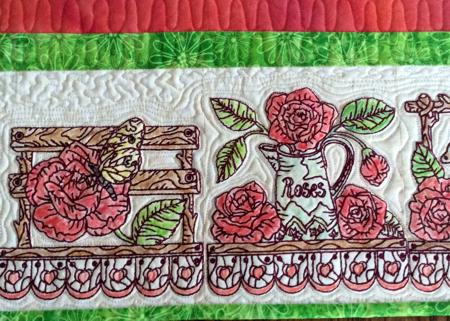
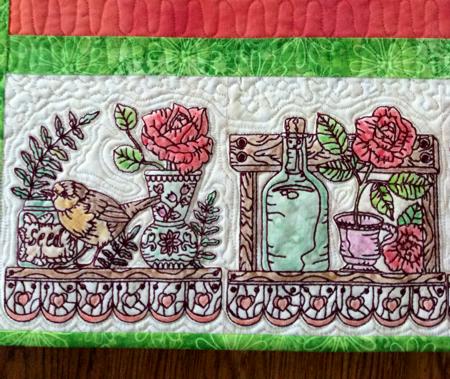
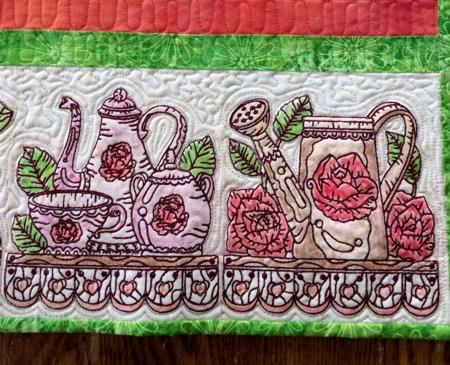
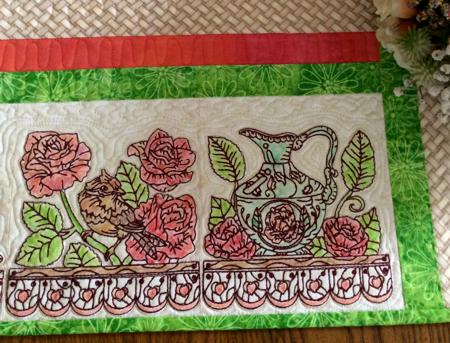
Here are some more close-ups of the table runner.
|
|
|
|
|
|
Enjoy!
|
|
Happy Stitching!
|
|
Back to One-Color Rose Border Set
|
Back to the Project Page
|


