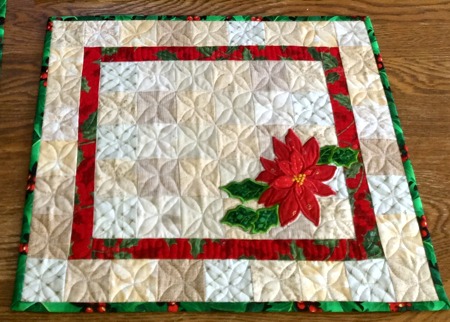
These are instructions on how to embroider the Poinsettia Applique. The design is available in 2 sizes for a large (5" x 7") and mega (10" x 12") hoops.
You will need
Mega Hoop:
Size: 168 x 294 mm (6.6" x 11.6")
Stitches: 21583
Colors: 6/16
Large Hoop:
Size: 106 x 177 mm (4.1" x 7")
Stitches: 13690
Colors: 6/16
Embroidery
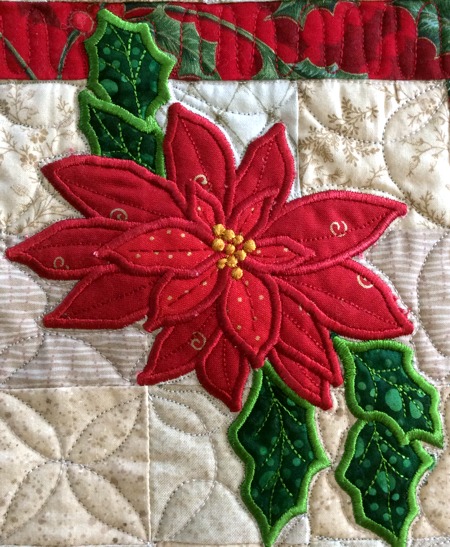
Step One: Hoop the base fabric with light-weight cut-away stabilizer. Upload the file. Start the machine. The first color will embroider the outline of two leaves.
Step Two: Place a piece of green fabric over the outline.
Start the machine. It will embroider the same outline and leaf veins over the fabric.
With a pair of sharp scissors, cut away the fabric around the outline as close to the stitches as possible. Take care not to cut through the stitches.
Start Three: Return the hoop to the machine, it will finish the raw edges of the leaves.
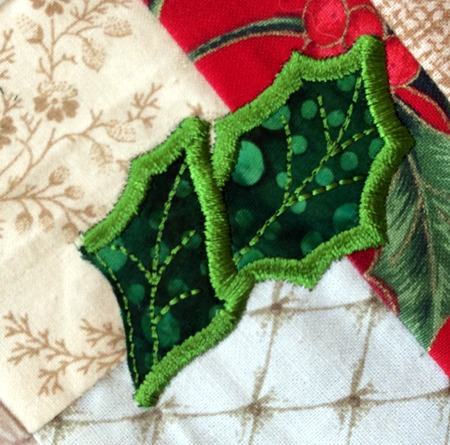
Step Four: Repeat Steps 1 through 3 to embroider all leaves. You can use the same green fabric or use shades of green fabric.
Colors 4 and 7 embroider the outlines. Colors 5 and 8 embroider the same outlines and leaf veins over the fabric. Colors 6 and 9 finish the raw edges of the leaves.
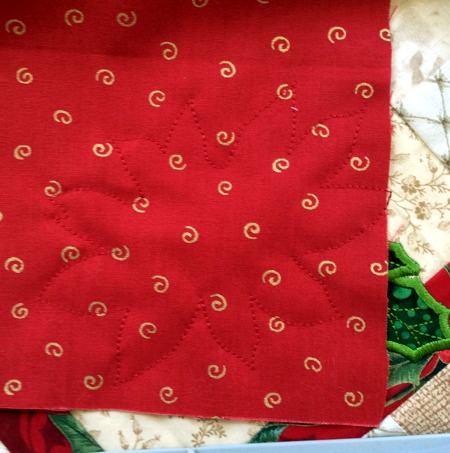
Step Five: Color 10 marks the position of the outer petals of the poinsettia flower. Cover the outline with a piece of red fabric and start the machine. It will embroider the same outline over the fabric (color 11).
Step Six: With a pair of sharp scissors cut away the fabric around the outline as close to the stitches as possible.
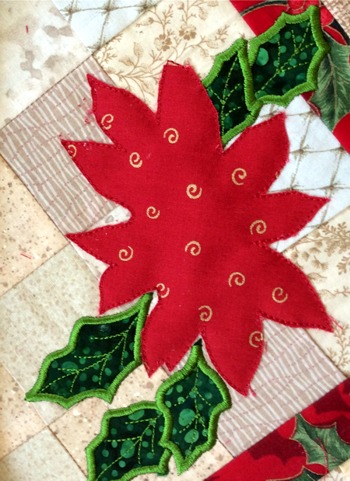
Step Seven: Start the machine, color 12 will finish the raw edges of the outer petals.
Step Eight: Color 13 will mark the position of the inner circle of petals. Cover it with a piece of red fabric (preferably of another shade) and color 14 will embroider the same outline and petal veins over the fabric.
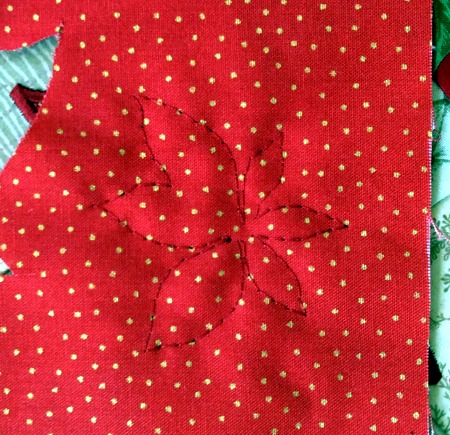
Step Nine: With a pair of sharp scissors cut away the fabric around the outline.
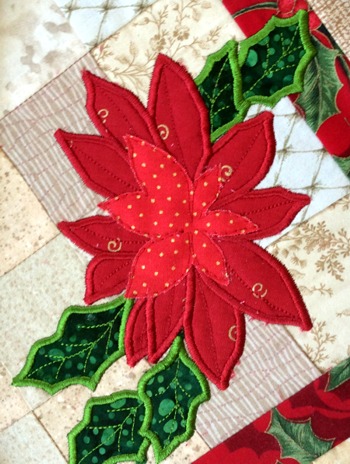
Step Ten: The next color (15) will finish the raw edges of the inner petals.
Step Eleven: The last color will embroider the center of the flower.