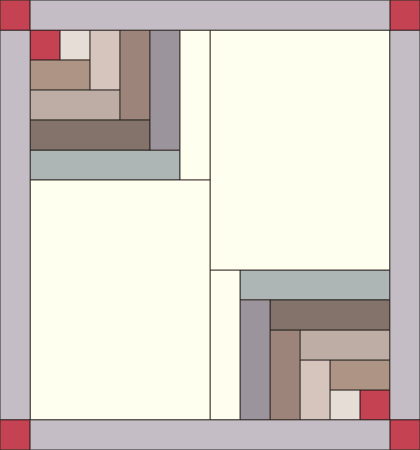
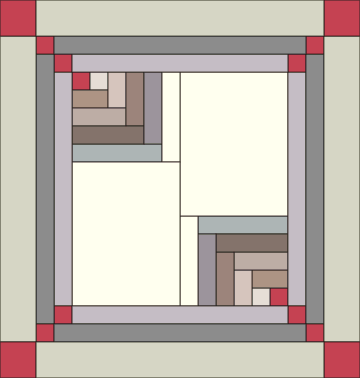
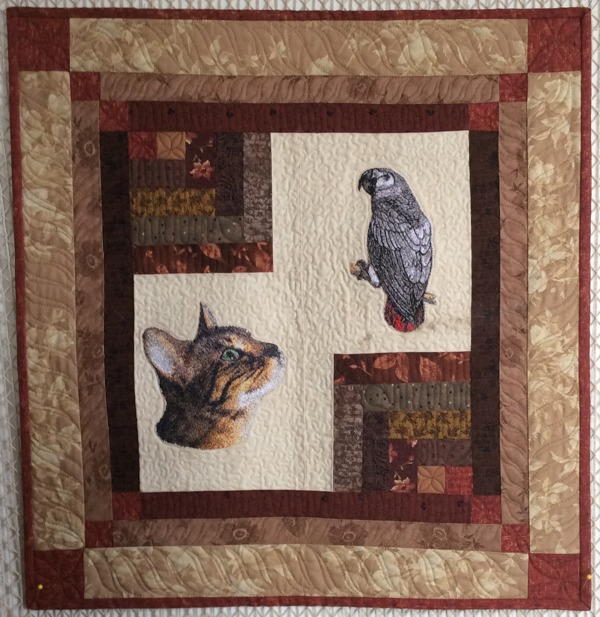
For this light-hearted quilt, we used scrap fabric from our stash. The finished size is about 20" x 21". The designs used are Bengal Cat and Grey Parrot.
|
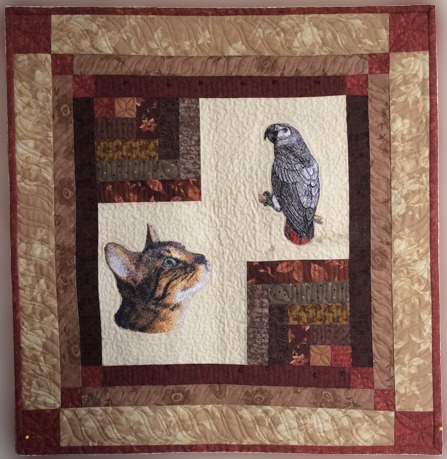
Click to enlarge
|
You will need
- embroidery thread (either polyester or rayon), as per the color cards of the designs,
- medium-weight iron-on cut-away stabilizer,
- about 1/4 yard of brick-red fabric for the corner squares and binding,
- scraps of 11 fabrics in beige-brown tones,
- a fat quarter of light-colored fabric for the embroidery,
- fabric for the backing and batting,
- paper, a pen/pencil and pins are optional but very helpful to mark the fabric pieces.
|
Cutting:
|
Out of the fabric for the background/embroidery, cut
- 2 rectangles measuring 6 1/2" x 8 1/2" and
- 2 strips measuring 1 1/2" x 5 1/2" (mark the strips as #10).
Out of the fabric for the corner squares and binding, cut
- 3 strips measuring 2 1/2" and the length of the width of the fabric for the binding,
- 10 squares measuring 1 1/2" x 1 1/2" (mark 2 of these as #1) and
- 4 squares measuring 2 1/2" x 2 1/2".
Out of scraps, cut
- 2 squares measuring 1 1/2" x 1 1/2", marked #2
- 4 strips measuring 1 1/2" x 2 1/2", marked #3
- 2 strips measuring 1 1/2" x 2 1/2", marked #4
- 2 strips measuring 1 1/2" x 3 1/2", marked #5
- 2 strips measuring 1 1/2" x 3 1/2", marked #6
- 2 strips measuring 1 1/2" x 4 1/2", marked #7
- 2 strips measuring 1 1/2" x 4 1/2", marked #8
- 2 strips measuring 1 1/2" x 5 1/2", marked #9
- 2 strips measuring 1 1/2" x 12 1/2" and 2 strips measuring 1 1/2" x 13 1/2" (note: these last 4 strips are for the first border. If you have enough fabric, you can cut them all out of the same fabric.)
- 2 strips measuring 1 1/2" x 14 1/2" and 2 strips measuring 1 1/2" x 15 1/2" (the second border)
- 2 strips measuring 2 1/2" x 16 1/2" and 2 strips measuring 2 1/2" x 17 1/2" (the third border).
|
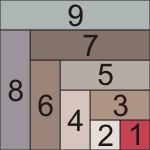
| Assembly of the Half Log Cabin Blocks: |
| Note: seam allowance is 1/4", press the seam immediately after you make it. |
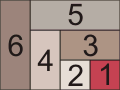
Sew the red-brick square #1 to square #2.
|

|
| Sew strip #3 to the upper edge of the working piece. Square #1 should be on the right side, square #2 on the left side. |

|
Sew strip #4 to the left edge of the working piece.
|

|
Sew strip #5 to the upper edge of the working piece.
|

|
| Sew strip #6 to the left edge of the working piece. |
|
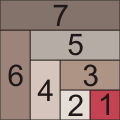
| Sew strip # 7 to the upper edge of the working piece. |
|
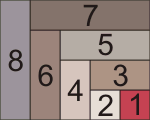
| Sew strip #8 to the left edge of the working piece. |
|
| Sew strip #9 to the upper edge of the working piece. |
|
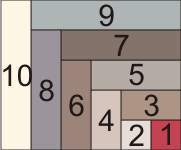
| Sew strip #10 to the left edge of the working piece. |
|
| Make 2 such blocks. |
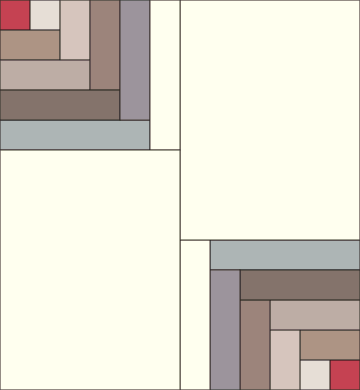
| Assembly of the Top: |
| Sew the 6 1/2" x 8 1/2" rectangles to the upper edges of both blocks. |

|
| Rotate one of the pieces 180 degrees. Sew them together. |
|
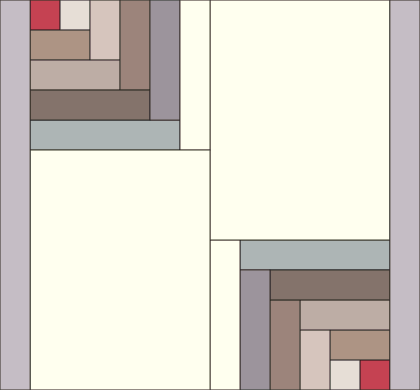
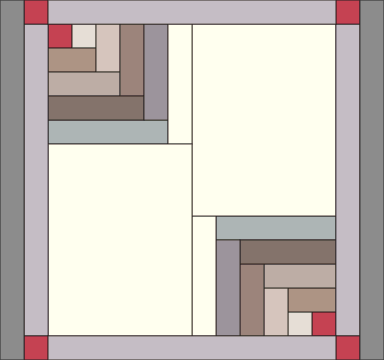
| Sew the 1 1/2" x 13 1/2" strips (first border), to the left and right edges of the working piece. |
|
| Sew the the red-brick 1 1/2" x 1 1/2" corner squares to the ends of the 1 1/2" x 12 1/2" strips. |

|
| Sew the new strips to the upper and lower edges of the working piece. |
|
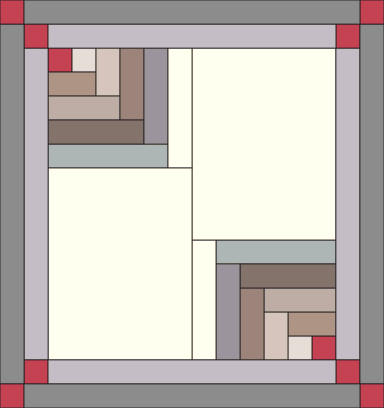
| Sew the 1 1/2" x 15 1/2" strips (second border) to the left and right edges of the working piece. |
|
| Sew the the red-brick 1 1/2" x 1 1/2" corner squares to the ends of the 1 1/2" x 14 1/2" strips. |

|
| Sew the new strips to the upper and lower edges of the working piece. |
|
| Sew the 2 1/2" x 17 1/2" strips (third border) to the left and right edges of the working piece. |
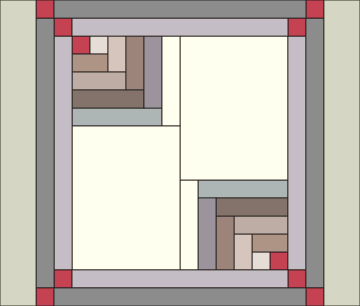
|
| Sew the the red-brick 2 1/2" x 2 1/2" corner squares to the ends of the 1 1/2" x 16 1/2" strips. |

|
| Sew the new strips to the upper and lower edges of the working piece. |
|
| Embroidery: |
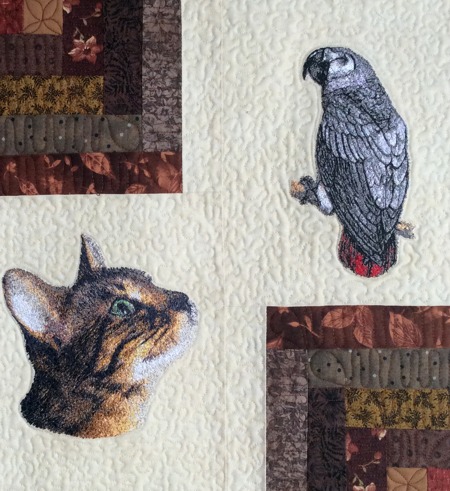
| One by one stabilize the light-colored spaces with iron-on cut-away stabilizer and do the embroidery - Bengal Cat in the bottom left corner and Grey Parrot in the top right corner. |
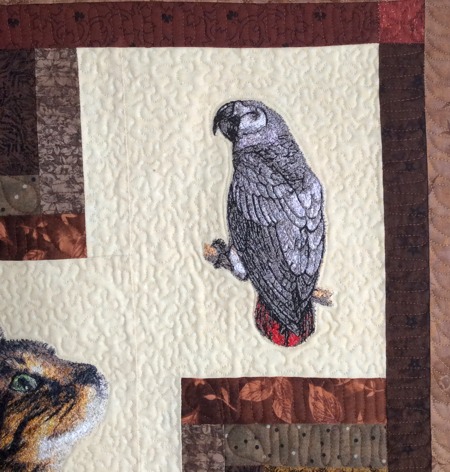
Grey Parrot |
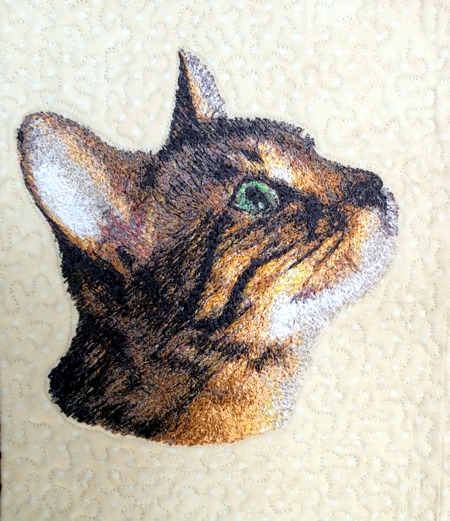
Bengal Cat |
|
|
| Quilting and Finishing: |
Now place the backing on a flat surface (table) face down. Cover with batting. Spread your working piece over it.
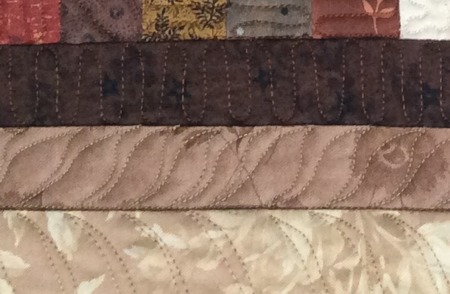
Pin all three layers together with 1" pins and start quilting. We quiltedin a free motion style all over the quilt: echo and meandering pattern around the embroidery feather pattern on the borders. |
|
|
After the quilting is finished, press the work with heavy steam and square the work -- all corners should be 90 degrees and opposite sides should be of the same length.
Finish the raw edges with the binding.
|
|
|
Your quilt is done. Enjoy!
|
|
Back to Bengal Cat and Grey Parrot.
|
Back to the Project Page
|


