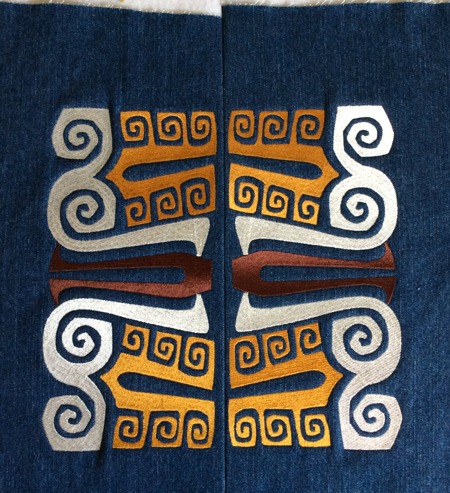
For this casual, every day tote bag, we used the design Art Nouveau Decorative Border III in the largest size (11.5" x 5.7"). This project makes full use of the capabilities of newer embroidery machines.
The finished size of the bag is about 14" (high) x 13" (wide) x 4 1/2" (deep).
|

|
You will need
- embroidery thread (either polyester or rayon),
- about 1 yard of medium-weight denim fabric,
- polyester craft felt for use as stabilizer,
- a piece of Pellon Peltex 71f interfacing (ultra firm one-sided fusible), or similar product,
- cotton fabric for the lining,
- 1 yard of webbing (we used faux leather webbing);
- jean and topstitch sewing needles (#14 and #16);
- all-purpose and jean sewing threads;
- pencil and quilter's ruler.
|
Embroidery:
|
Out of blue denim fabric, cut 2 pieces large enough to be securely hooped in the largest hoop of your machine.
Stabilize the pieces with polyester craft felt. Usually felt clings pretty well to fabric and does not require anything more to hold it in place. However you can use any temporary fabric adhesive to make a stronger bond.
Upload the Art Nouveau Decorative Border III into the machine. Embroider it.
You will need 2 stitch-outs.
|
| Cutting: |
Out of denim fabric cut a 18" x 18" square.
Out of Pellon Peltex cut 1 piece measuring 13" x 18".
Out of the fabric for the lining cut 2 pieces measuring 16" x 18" and a piece measuring 7" x 16" for the inner pocket.
Cut the webbing in half to get 2 handles, 18" long each. |
Assembly of the Top:
|
| Note: seam allowance for the top is 1/2". Press every seam immediately after you make it. Use all-purpose sewing thread and needle #14. |
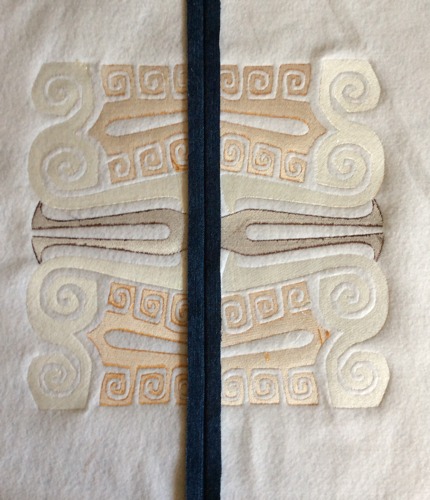
Trim one side of each stitch-out (the side where the stitch-outs will be sewn together) leaving a 3/4 margin. Position both stitch-outs face to face. Take your time to line the embroidery up. Pin and sew the stitch-outs together.
With small scissors cut away the felt from under the seam allowance.
Open and press the seam allowance.
|
|
| Topstitch on both sides, 1/8" from the seam. |
|
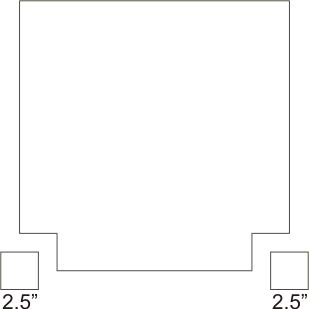
| Trim the piece to 18" x 18" square. |
| Cut 2 1/2" x 2 1/2" squares from the bottom corners of both denim squares (the embroidered square is the front panel, the plain denim square is the back panel). |
|
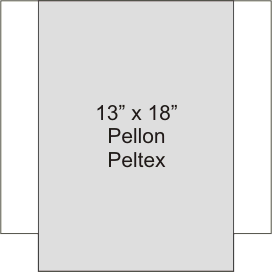
| Position a 13" x 18" Pellon Peltex piece on the back of the back panel between the corner cut-outs. Press from the fabric side to adhere the fabric to the interfacing. |
|
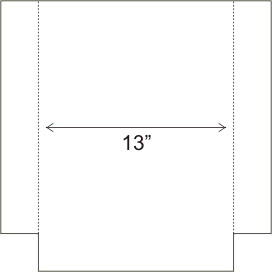
| With a graphic pencil and ruler, draw a line 2 1/2" from each edge of each panel. The distance between the lines is 13" inches. Cut away the excess felt between the lines and the edges of the panels. |
|
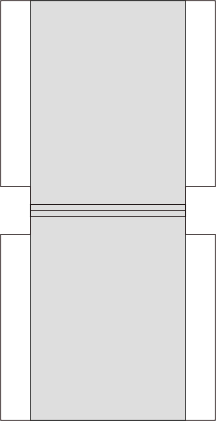
| Sew the bottoms of the panels together. Seam allowance is 1/2". Cut away the felt and interfacing from under the seam allowance. Unfold the seam, press, topstitch on both sides 1/4" from the seam. |
|
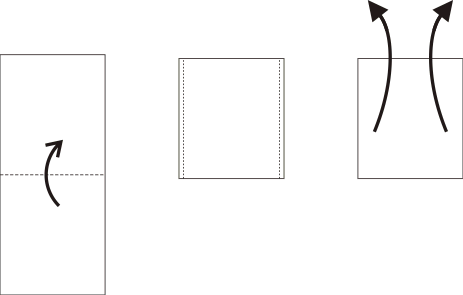
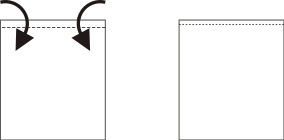
| Fold the upper edge of both panels 2" back and press. Unfold. |

|
Fold the working piece face inwards. Stitch the sides of the panels together, seam allowance 1/2". Open the seam and press. Topstitch 1/4" on both side of the seam.
Repeat for the other side. |
| To shape the bottom, pinch the corners as shown in the diagram below. Pin. Stitch them closed. |
|
| Fold the upper edge 2" back along the creased line. Topstitch 1/4 from the edge. |
|
| The Pocket and the Lining: |
| Note: for the lining use a #12 sewing needle. |
Fold the piece for the pocket (16" x 7") widthwise, face inwards. Stitch along the long sides. Seam allowance 1/4".
|
|
| Turn right side out. Press. Tuck the raw edges 1/2" inside and topstitch. |
|
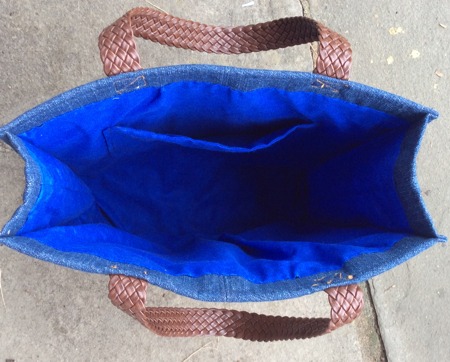
Position the pocket on one of the lining panels, about 3 1/2" from the upper edge and an equal distance from the sides. Pin.
Topstitch the pocket in place. |
Sew the lining in the same way as the outer bag.
Position the lining pieces face to face. Cut 2 1/2" x 2 1/2" squares in the lower coners.
Sew the bottom, unfold the seam and press.
Sew the sides, unfold the seams and press.
Sew the bottom corners. |
|
| Fold the upper edge of the lining 1/2" back and press. |
Insert the lining into the bag. Align bottom and side seams.
The upper edge of the lining should be approximately 1 1/2" shorter than the upper edge of the bag.
Hand-stitch the upper edge of the lining to the bag with a slip-stitch. |
|
| Finishing the Bag: |
Fold one side of the back panel around the edge of the interfacing of the back panel. Pin from the upper edge to the bottom. Topstitch along this edge 1/4" from the edge.
Repeat for the other 3 edges.
|

|
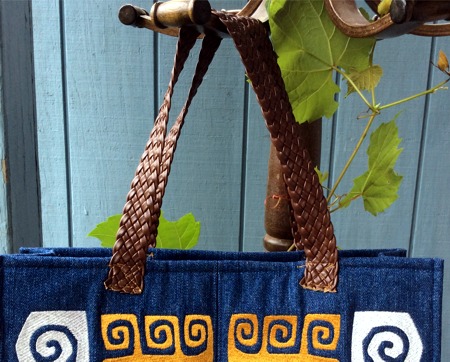
| With jeans thread and #16 needle, topstitch the webbing handles 3" from the sides. |
|
|
Your tote bag is done. Enjoy!
|
|
Back to Art Nouveau Decorative Border III
|
Back to the Project Page
|


