Mobile Menu IconMenu
Advanced Embroidery Designs -- Online Center for Machine Embroidery Designs
Easter Sale! 35% OFF EVERYTHING! Shop Now!

Quilted Wall Hanging with LOVE Roses

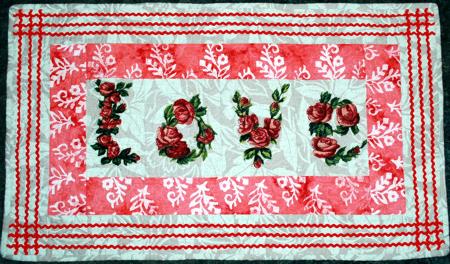
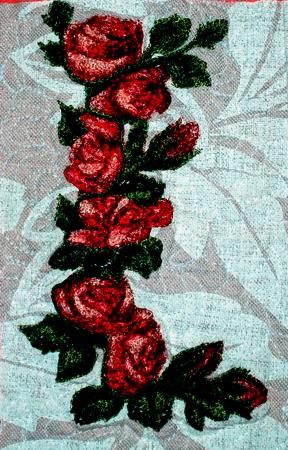
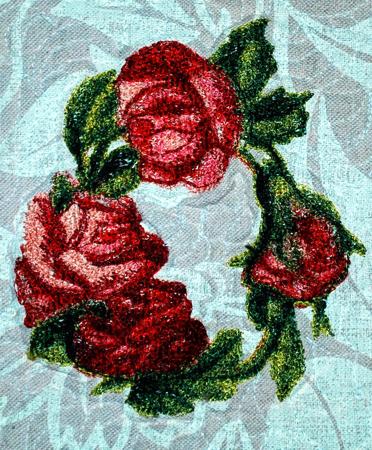
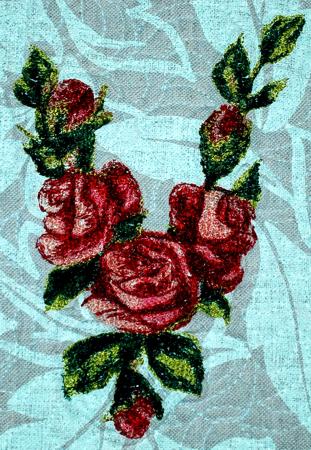
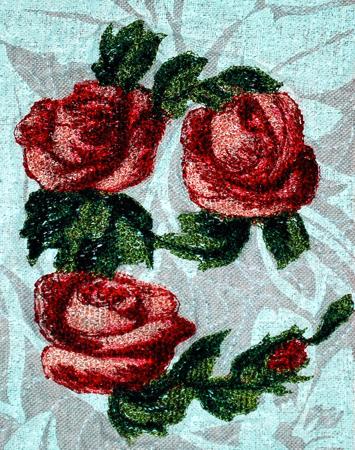
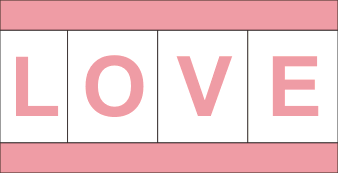
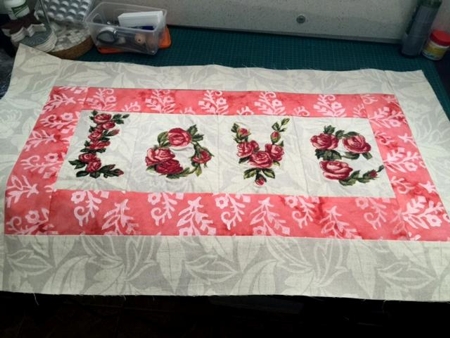
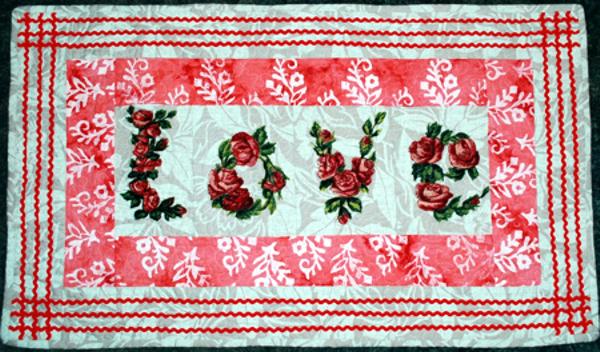
This cute wall hanging features the designs from the LOVE Rose Set for the large (5" x 7") hoop.

The finished size is about 35" x 20".

Quilted Wall Hanging with LOVE Roses image 1

Click to enlarge

You will need

  • embroidery thread (either polyester or rayon),
  • medium-weight cut-away stabilizer,
  • about 1 yard of light colored (cream, pale yellow or white) fabric for the background, borders and binding,
  • pink fabric for the border (select it after you made the embroidery),
  • batting and backing,
  • small-sized rick-rack tape (optional).

Embroidery:

Out of light-colored fabric, cut 4 pieces which you can hoop (about 8" x 10"). Embroider all the letters one by one.

Quilted Wall Hanging with LOVE Roses image 2

Quilted Wall Hanging with LOVE Roses image 3

Quilted Wall Hanging with LOVE Roses image 4

Quilted Wall Hanging with LOVE Roses image 5

After the embroidery is finished, trim the first stitch-out (the letter L) to 5" x 8" and all the other strich-outs to 6 1/2" x 8". Sew them into a strip.

LOVE Wall Quilt

Out of pink fabric cut 2 strips measuring 2 1/2" x 23" and sew them to the upper and lower edges of the embroidered strip.

LOVE Wall Quilt

Out of the same pink fabric, cut 2 strips measuring 2 1/2" x 12" and sew them to the left and right edges of the central part.

LOVE Wall Quilt

Out of light-colored fabric, cut 2 strips measuring 2 1/2" x 27 1/2" and 2 strips measuring 2 1/2" x 15 1/2". Sew the first pair to the upper and lower edges of the working piece and the second pair to its left and right edges .

Quilted Wall Hanging with LOVE Roses image 6

Quilting and Finishing:

Now place the backing on a flat surface (table) face down. Cover with batting. Spread your working piece over it.

Pin all three layers together with 1" pins and start quilting. We quilted around the letteres and all over the work in a free motion style.

After the quilting is finished, press the work with heavy steam and square the work -- all corners should be 90 degrees and opposite sides should be of the same length.

If you'd like to apply some trim as rick-rack tape, do it now before you finish the edges.

Finish the raw edges with the binding.

Quilted Wall Hanging with LOVE Roses image 7

Your quilt is done. Enjoy!

Back to LOVE Rose Set.

Back to the Project Page

Mailing List
Enter your e-mail for news, discounts and exclusive special offers.


Find us on Twitter

Special Offers
Bonus design on all orders over $25
Daffodils and Eggs Set

Shop Now!

Announcement
Best Project Contest
The results are in!
Featured Project
Check out our latest project Birds and Blooms Quilted Tablerunner
Tutorials
Never heard of photo stitch? - Check out our What is Photo Stitch? page
Most Popular Designs
|| Home || Shop || Free Designs || New Designs ||
|| Projects || Tutorials || Links || About Us || Contact Us ||
|| Store Policy || Licensing || Accessibility ||

Social Media:

Copyright © Advanced Embroidery Designs. All Rights Reserved.