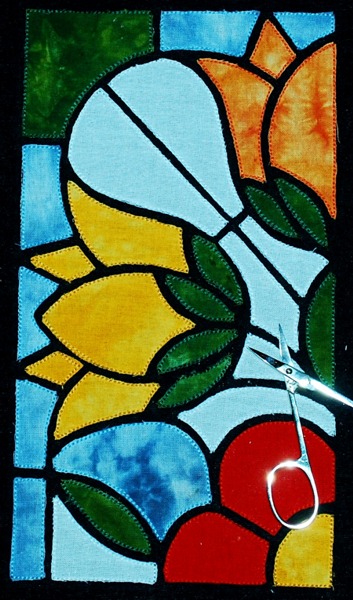
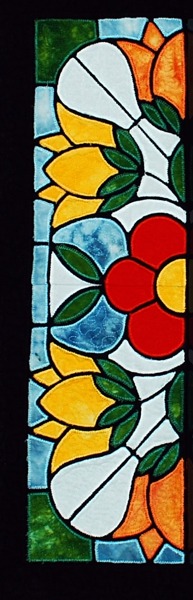
These are instructions on how to embroider and assemble the Stained Glass Applique Flower Panel.
The design comes in 3 sizes: for large hoop (5" x 7"), mega hoop (6" x 10"), and commercial hoop (10" x 12").
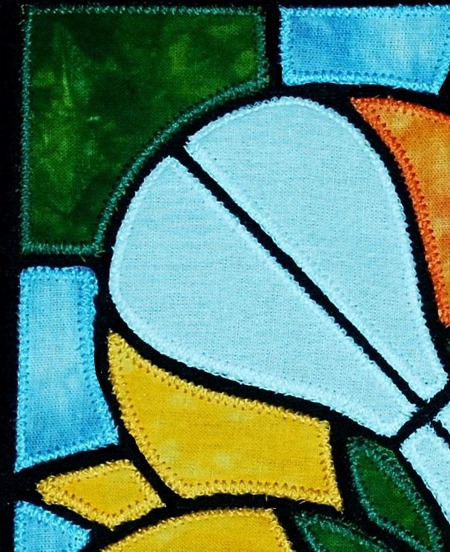
The design has a double zig-zag-stitch finish. We recommend to use cotton or polyester machine quilting threads for the finish.
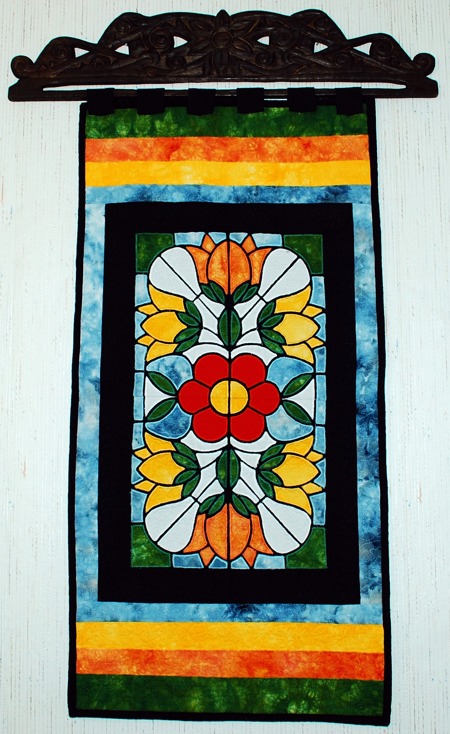
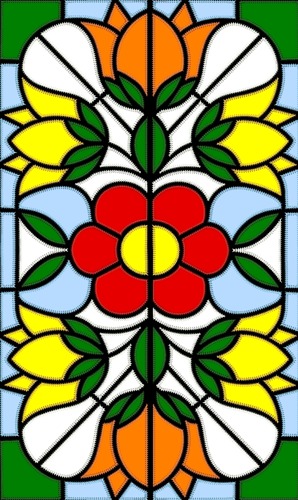
To make the panel you need to embroider the design 4 times and then sew the parts together. The final size of the panel is about 7 1/2" x 14" (large hoop), 11" x 22" (mega hoop) and 12 1/2" x 23 1/2" (commercial hoop).
You will need
Embroidery:
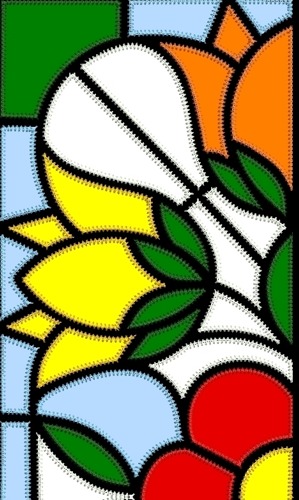
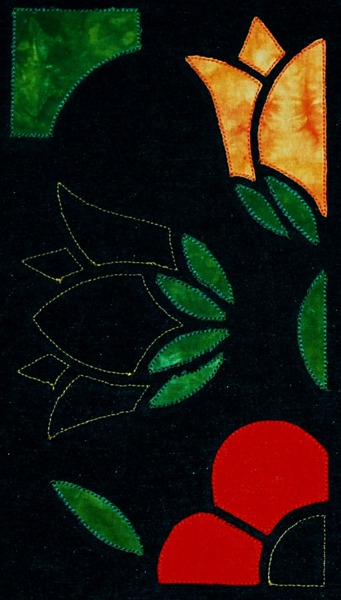
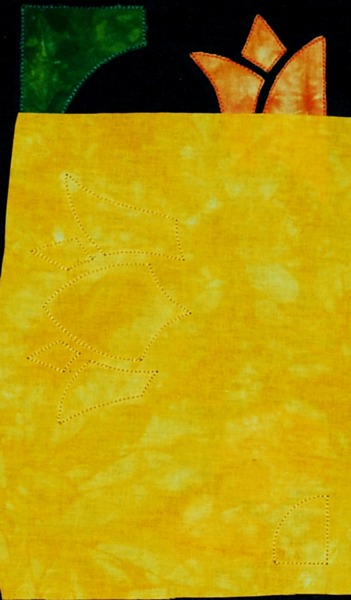
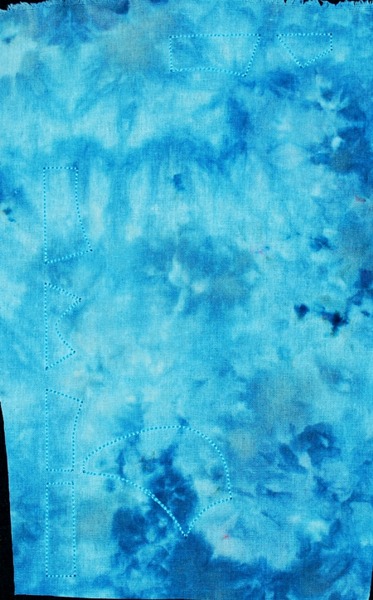
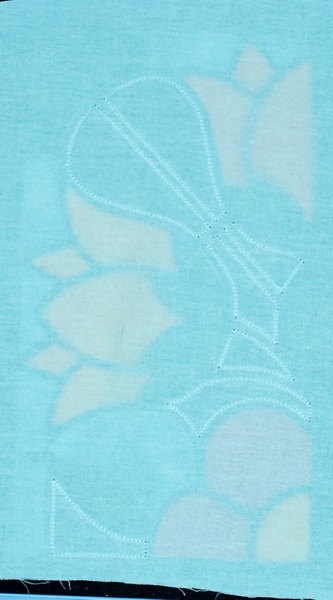
Upload the file into the machine. Stabilize and hoop the base fabric. Start the machine. It will embroider the outline for the first applique.
Cover the outline with green fabric. Start the machine. It will embroider the same outlines over the fabric.
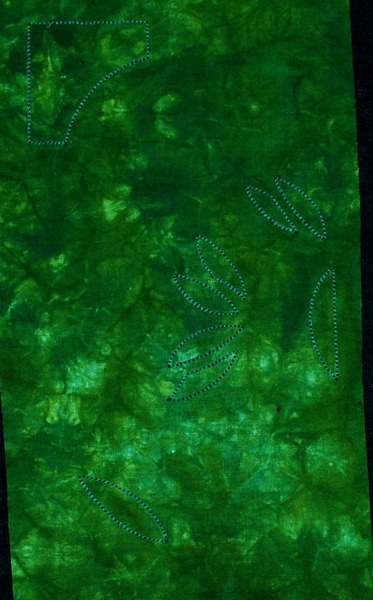
With a pair of sharp scissors cut away the fabric around the outlines.
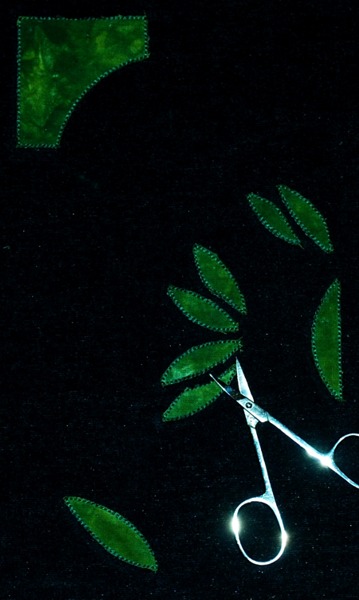
The next color will embroider the outline of the first flower.
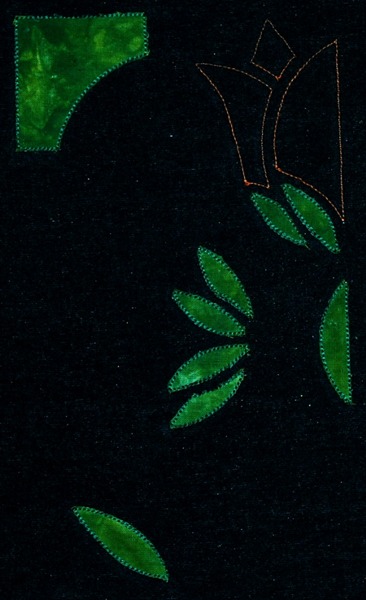
Cover the outline with applique fabric. We chose orange, but you can any color you like. Start the machine, it will embroider the same outline over the fabric.
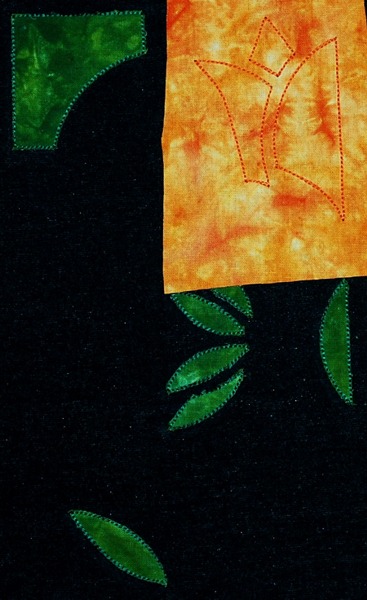
Cut away the fabric around the outline.
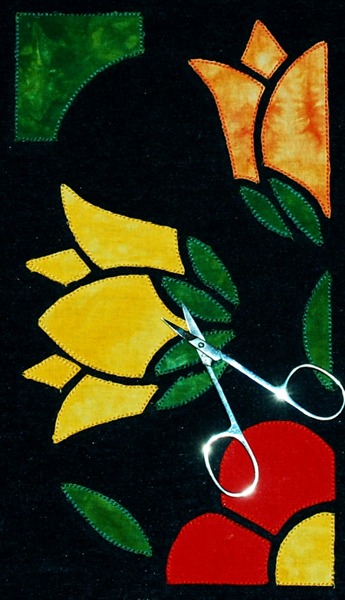
The next color will embroider the outline of the central flower.
Cover the outline with applique fabric.Start the machine, it will embroider the same outline over the fabric.
Cut away the fabric around the outlines.
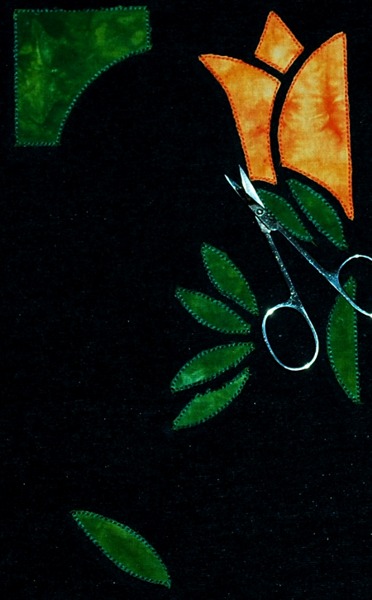
The next color will embroider the outline of the center of the flower and the petals of another flower.
Cover the outline with applique fabric. Start the machine, it will embroider the same outlines over the fabric.
Cut away the fabric around the outline.
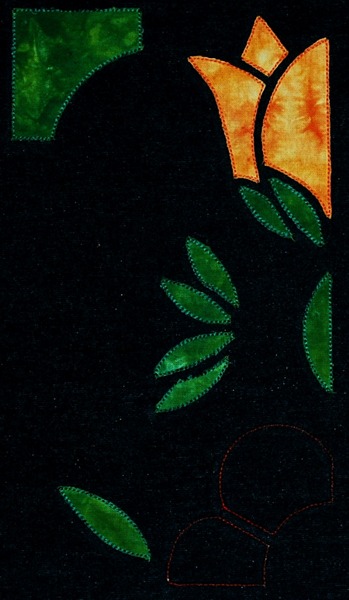
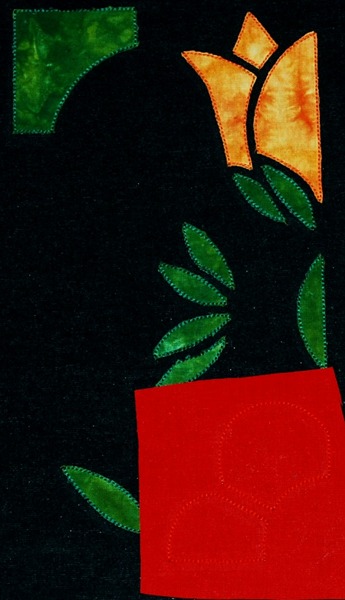
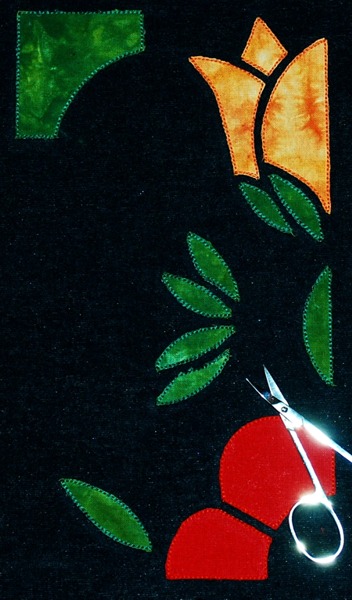
The next color will embroider the outline of different shapes that make up the border and background.
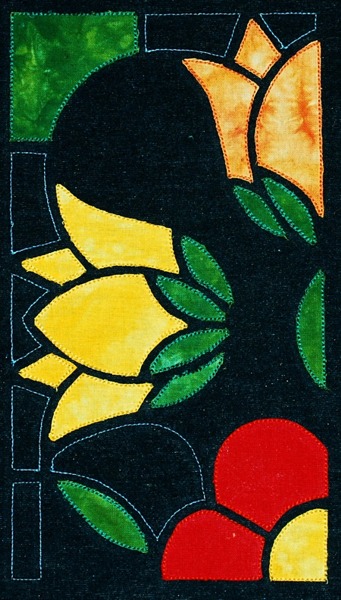
Cover the outlines with applique fabric, we used sky blue. Start the machine, it will embroider the same outlines over the fabric.
Cut away the fabric around the outline.
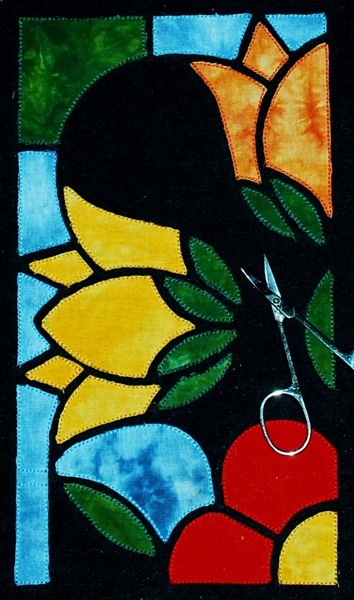
The next color will embroider the outline of different shapes and elements of the background.
Cover the outlines with applique fabric, we chose white. Start the machine, it will embroider the same outlines over the fabric.
Cut away the fabric around the outlines.
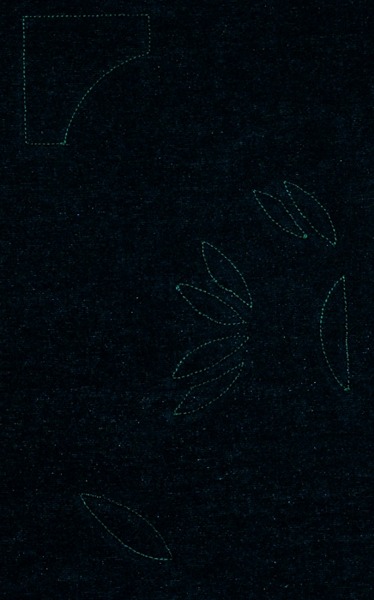
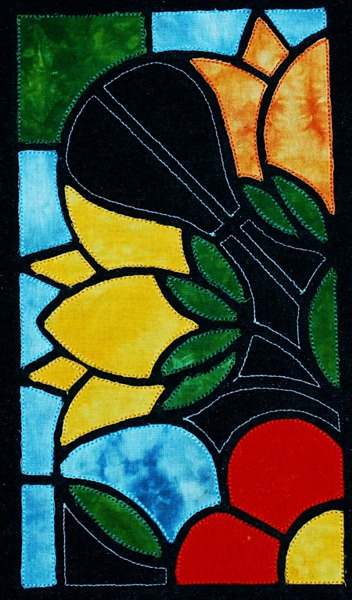
Return the hoop to the machine and finish embroidery. The designs have a double zig-zag stitch finish. We recommend to use cotton or polyester machine quilting threads for the finish. Change colors if needed.

Close-up of the zip-zag finish:
Assembly of the Panel
Embroider each file twice, so you have 4 stitch-outs.
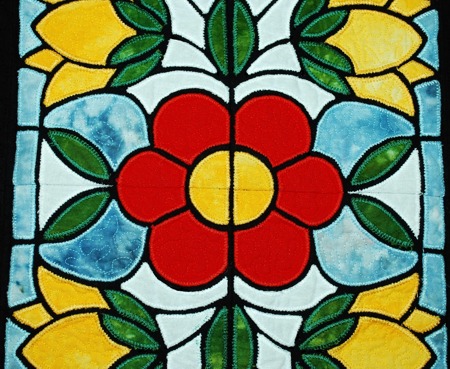
First we'll sew the left part of the panel.
Take 2 stitch-outs - the right one and its mirror image.
Trim the lower/upper edge of the stitch-outs leaving 1/4" of black background.
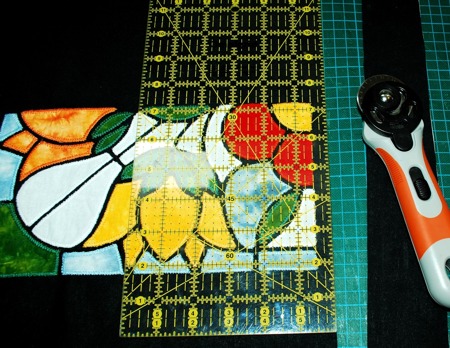
Cut the right edge of the stitch-outs leaving a 3/4" margin of black background.
Place the stitch-outs face to face, align the trimed edges. Sew along the short edge with seam allowance 1/2". Please note that this means that part of the applique will be inside the seam allowance.
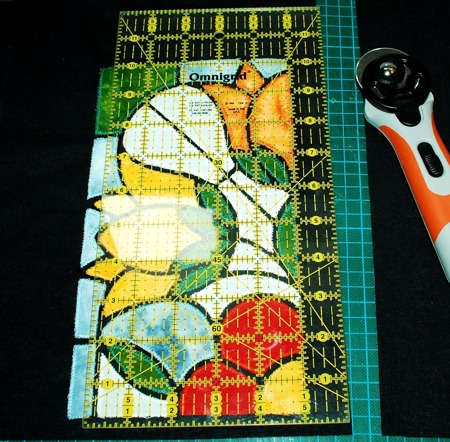
For the right side of the panel, trim and sew the second pair of stitch-outs in the same way. Press the seam open.
Place both parts face to face, align the long trimmed edge. Stitch with seam allowance 1/2". Press the seam open.
The panel is done. Enjoy!
We used the panel to make a bright and attractive wall hanging.