These are instructions on how to embroider and assemble the FSL Crochet Butterfly Border Set.
The parts of the FSL Crochet Butterfly Border Set are embroidered in the same way as our crochet-style freestandng lace.
Please read our Guide to Embroidering Crochet-Style FSL, if you haven't done so already.
Most Importantly: ALWAYS make a test stitch-out of the design. This helps you select the threads, needles, stabilizers and settings of your machine correctly.
Some points to remember from the General Guidelines:
Use Vilene water soluble stabilizer;
Use the same COTTON thread for the needle and bobbin.
DO NOT embroider several designs in one hoop.
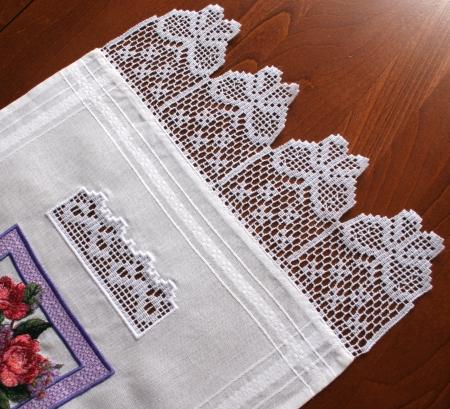
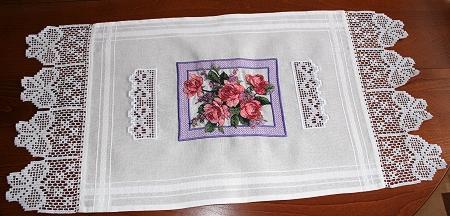
Step One: The set consists of five files - four files are use to make the edge lace and one file is used to make a lace insert.
With this set you can make the edge lace in two widths: 3 1/2" or 4 1/2". To make the lace 4 1/2" wide use the files Butterfly1 and Butterfly1b. To make the narrower 3 1/2" wide lace, use the files Butterfly2 and Buttefly2b.
Start with the file Butterfly1 (or Butterfly2) and embroider it once. Continue with the file Butterfly1b (or Butterfly2b) and embroider it as many times as you need.
Use 2 layers of Vilene-type water-soluble stabilizer. Use the same cotton thread for both the needle and bobbin.
Rinse the stabilizer, spread the parts evenly on a flat surface and leave to air dry.
Step Two: Press all parts with steam. On your working table, lay out the designs starting with part Butterfly1, then add parts Butterfly1b one by one. Thread a needle with the same thread that you used for the embroidery. Stitch the parts together, then stitch the edge lace to your working piece. Use a zig-zag stitch.
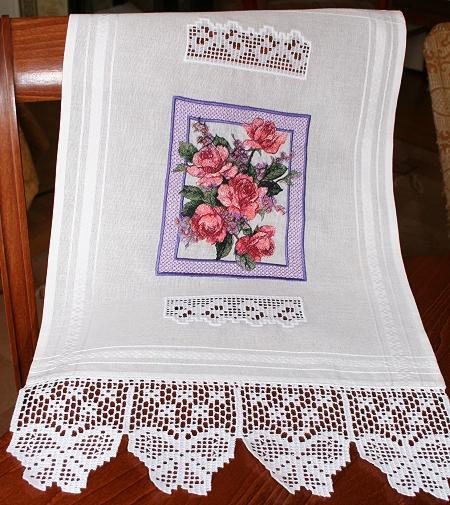
Step Three: To make the lace insert, use the file Butterfly3. Mark the place on the fabric where you want the insert. Hoop the fabric with the water-soluble Vilene stabilizer. Place the hoop in the machine. The machine will embroider the outline of the insert and stop.
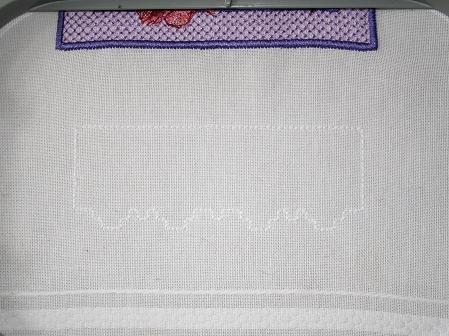
Take the hoop out, but DO NOT take the embroidery out of the hoop! With a pair of sharp scissors, cut out the fabric inside the outline.
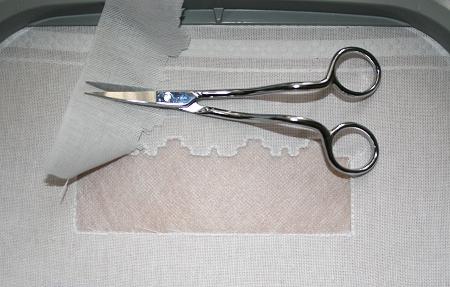
Return the hoop to the machine and finish the lace.
Use 2 layers of Vilene-type water-soluble stabilizer. Use the same cotton thread for both the needle and bobbin.
Rinse the stabilizer, spread the working piece evenly and leave to air dry. Press with steam.
Note: If you plan to have other embroidery on the piece, first make the embroidery, then make the lace inserts, and attach the edge lace as the last step.
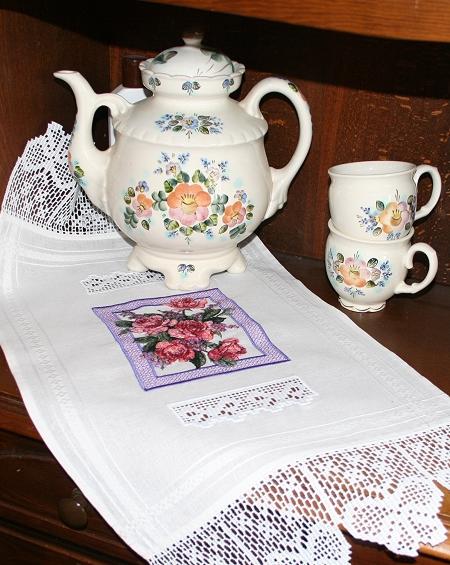
The photo stitch design in the center of the table runner is Pink Rose Bouquet.