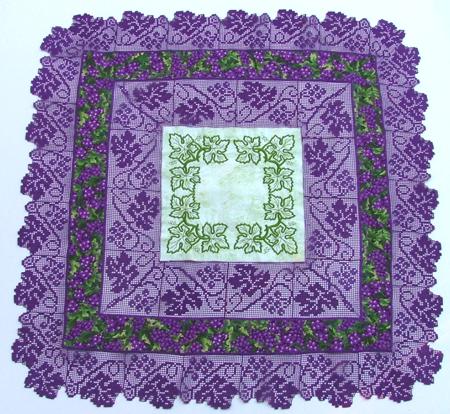
The FSL Crochet Grape Vine Border and Insert Set is a set of 5 machine embroidery designs. There are many things that you can do with these patterns, but we used them to create the charming little table topper you can see below.
The files "GrapeBorder1a", "GrapeBorder1 b" and "GrapeBorder 1c" have straight edges and can be used both as edge lace or as lace inserts. File 1c is for corners.
In order to make an insert like the one below, embroider the files 1a, 1b and 1c four times each.
The designs should be embroidered as we recommend in our General Guidelines and Step-by-Step Guide to Embroidering our Crochet-Style FSL designs.
Some points to remember from the General Guidelines:
Use Vilene water soluble stabilizer;
Use 30-, 40- or 50-weight COTTON thread;
Use the same thread for the needle and bobbin.
DO NOT embroider several designs in one hoop.
Make sure you use a sharp needle.
After you are done embroidering, connect the patterns with a zig-zag stitch.
Wash away the stabilizer. To make the lace soft, keep it in warm water for about an hour and change the water several times. Do not use hot water because the lace can shrink substantially! Spread the lace neatly on an even surface and let dry. Press the lace with steam.
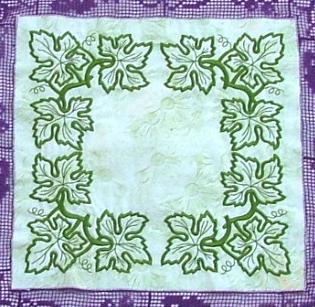
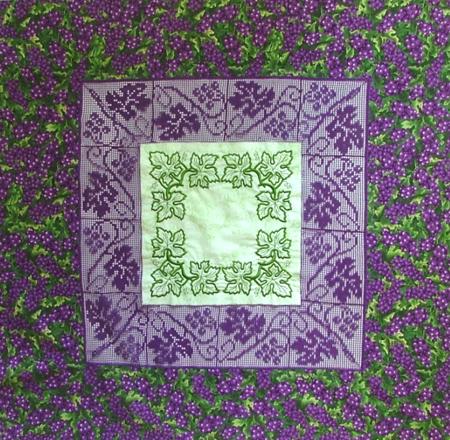
To make the central fabric square, cut out a square of fabric measuring 13" x 13".
If you want to embroider the central fabric square, mark a 13" x 13" square on the fabric you're going to use and make the embroidery. After that, cut the square out. For our central square we used the design of grape leaves from the Grapes and Vine Lace Set.
Place the lace frame on the fabric square, secure the inner edges of the lace with pins, baste if you like. Using short and not very dense zig-zag (we usually use 2:2), attach the frame to the fabric along the inner edge.
With a pair of sharp scissors, cut away the excess fabric, leaving 3/4" - 1" seam allowance. Fold and press the seam allowance towards the fabric.
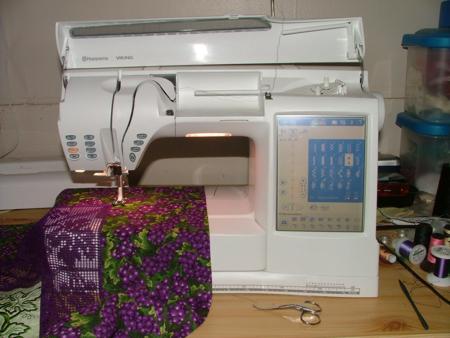
Return to your machine and secure the seam allowance to the fabric using any decorative stitch.
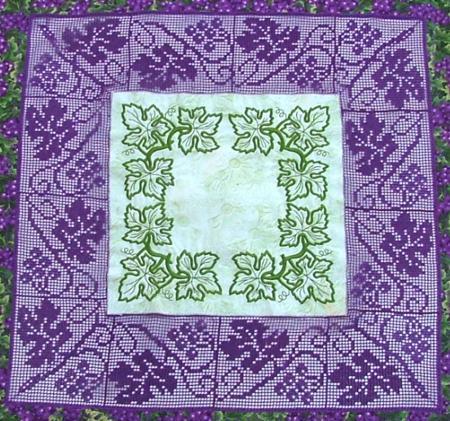
You're now done with the central square and the insert around it. Our table topper has an additional fabric border and a lace border.
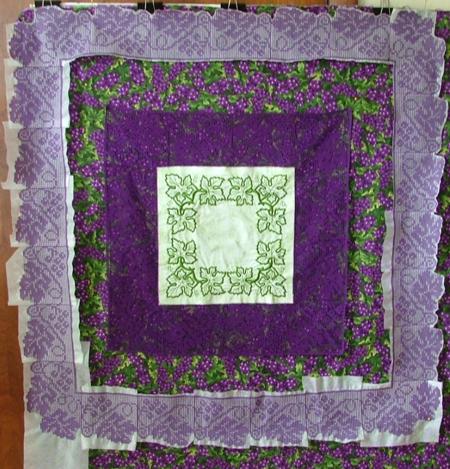
To make the fabric border, cut out a square of fabric measuring about 29" x 29". Place the working piece on the square and align the centers.
Spread the upper square evenly and pin both layers together all through the work, as shown in the picture below. Pin the edges of the lace to the fabric every 2".
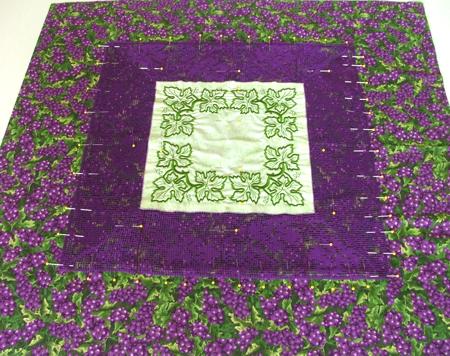
Using short and not very dense zig-zag, attach the lace to the fabric along the outer edges.
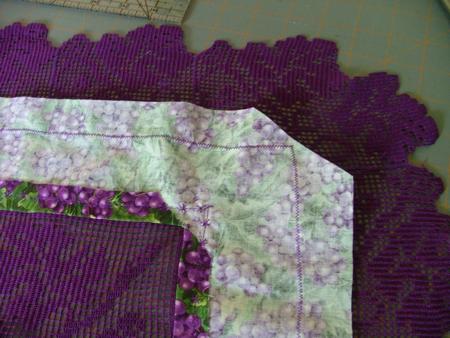
On a table, place the working piece face down. Using a graphic pen or a removable marker and a ruler, draw straight lines 3/4" - 1" from the zig-zag stitch.
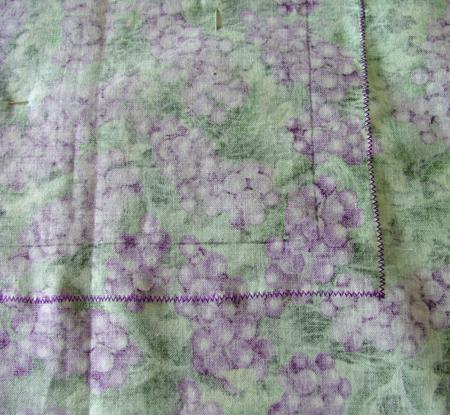
With scissors, cut away a fabric square along the marked lines. Cut through the corners as shown below.
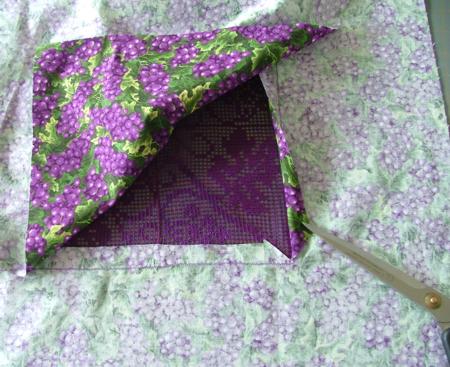
Fold back the seam allowance towards the fabric and press with steam.
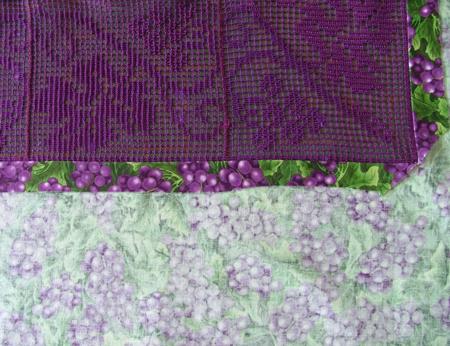
Using any decorative stitch from your machine, secure the seam allowance in place.
You can stop here. Just finish the raw edges of the fabric and you will get a beautiful 28" x 28" table topper with a lace insert.
To make a lace edge like we did, you need the files "GrapeBorder2a" and "GrapeBorder 2b". The file 2b is for the corner and should be embroidered 4 times. The file 2a should be embroidered as many times as you need to make the desired length.
We embroidered the file 2a twenty times and used five pieces for each side.
After you are done embroidering, connect the patterns with a zig-zag stitch to get a lace frame.
Wash away the stabilizer and let the lace dry. Press with steam.
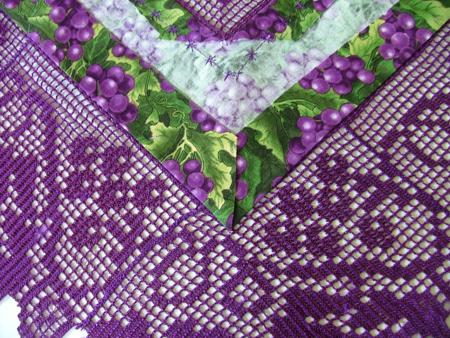
Place the lace frame over the fabric and spread evenly. There should be about 3" of fabric between the inner lace border and the outer lace border. Pin the lace to the fabric every 2".
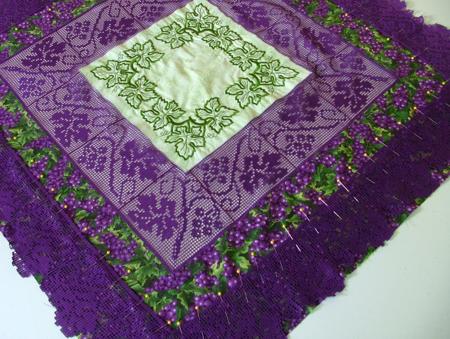
Using short and not very dense zig-zag, attach the lace to the fabric along the inner edges.
Cut away the excess fabric, leaving about 3/4" to 1" of seam allowance. Cut away the fabric at the corners.
Fold the seam allowance back towards the fabric and press. Secure in place with a decorative stitch.
The finished size of this table topper is 33" x 33".
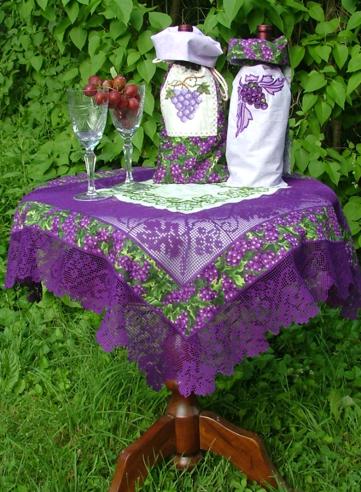
We hope that you liked our idea. There are plenty of other things that can be done with this set, including doilies, table mats, napkins and even whole tablecloths. Grape vine patterns look great on anything!
In the above picture, we placed the wine bottles in embroidered decorative gift bags that are very quick and easy to make. You can read about how to make these gift bags in our Gift Bags for Wine Bottles Guide.


