|
|
|
| The finished size of this quilt is about 23" x 24". You will need a fat quarter of light fabric for the "mat", scraps of fabric for the "frame", about 3/4 to 1 yard of fabric with a small pattern imitating wallpaper for the "wall". You will also need fabric for backing, binding and a piece of low loft batting. To make a trapunto frame, you will need water soluble thread or fabric glue. |
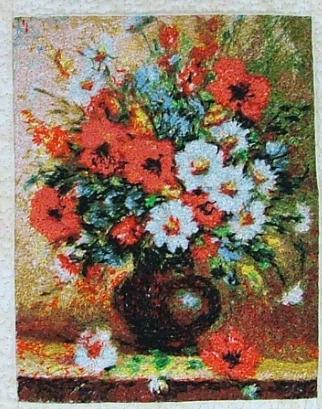
| Step One: Embroider the chosen design. Trim the embroidery, leaving 1/4" seam allowance. |
|
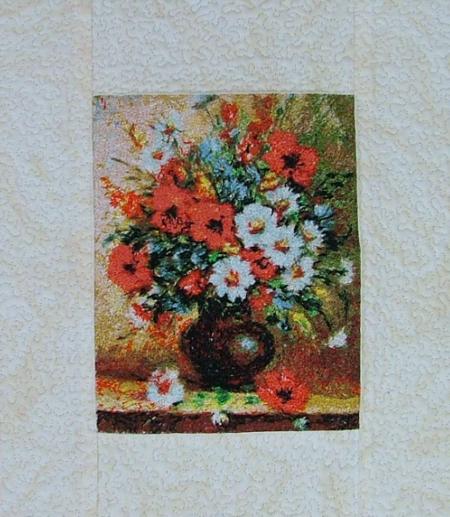
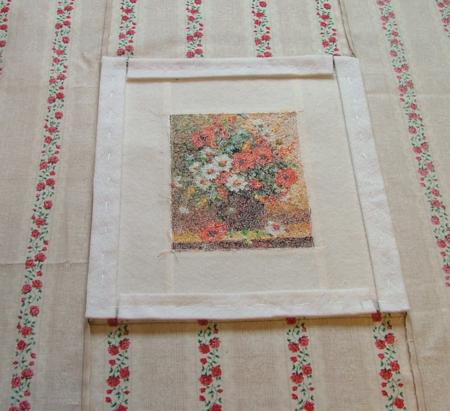
| Step Two: Make the "mat". Out of light fabric, cut two strips measuring 2 1/2" x 5 1/2" and two strips measuring 2 1/2" x 10 1/2". Stitch the shorter strips to the upper and lower sides of the embroidery. Press the seams. Stitch the longer strips to the left and to the right side of the embroidery. Press the seams. |
|
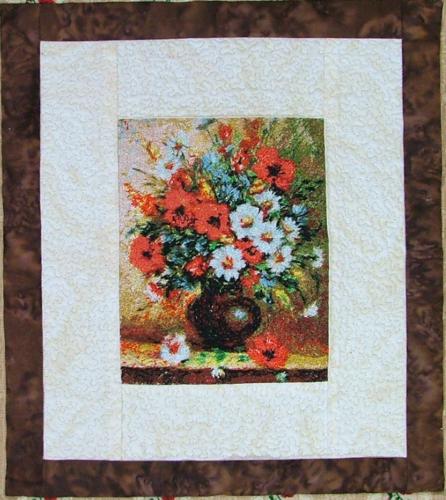
Step Three: For the "frame" cut 2 strips measuring 11/2" x 9 1/2" and 2 strips measuring 1 1/2" x 12 1/2".
Stitch the shorter strips to the upper and lowers sides of the "mat", then stitch the longer strips to the left and right sides of the "mat". |
|
| Step Four: For the "wall", cut 2 pieces measuring 6 1/2" x 11 1/2" and 2 pieces measuring 6 1/2" x 24 1/2" out of the "wallpaper" fabric. Stitch the shorter pieces to the upper and lower sides of the working piece. Press the seams. Stitch the longer pieces to the left and right sides of the working piece. Press the seams. |
| Step Four: Out of craft felt or low-loft batting, cut 2 strips measuring 1" x 9" and 2 strips measuring 1" x 12". Turn the working piece to the wrong side, place the felt pieces over the "frame". Using a water-soluble thread, baste them in place. It's possible to use fabric glue, but we preferred watersoluble thread in this case. |
|
Step Five: Now place the backing on a flat surface (table) face down. Spread the batting over it and spread your working piece over the batting. Pin all layers together with 1" pins and start quilting.
With an invisible thread, quilt through the embroidery - around the vase and the bouquet. This quilting should not be very dense, we need it only to keep the embroidery in place and not allow it to bulge. Then quilt in the ditch around the embroidered picture.
Use stippling to quilt the mat. Quilt in the ditch around the frame. This quilting will press the edges of the frame and it will stand out.
Quilt the "wall" as you like. You can follow the pattern of the fabric. |
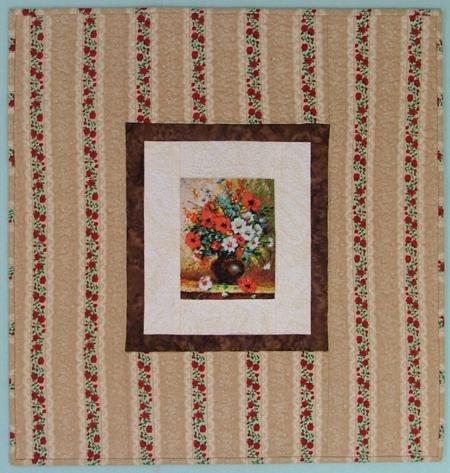
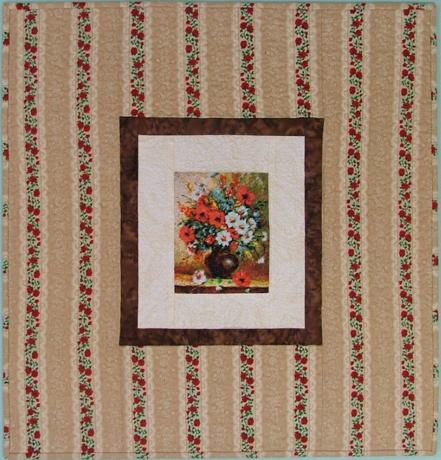
| Step Six: With a damp cloth remove the watersoluble thread. Press the quilt with heavy steam. Square the quilt and finish the edges with binding. We made binding out of the same fabric with which the wall is made. |
|
|
The Picture-on-the-Wall quilt is ready. Enjoy!
|
|
We hope that you like our idea and will come up with many of your own.
|
|
|
|
Back to Projects Page
|


