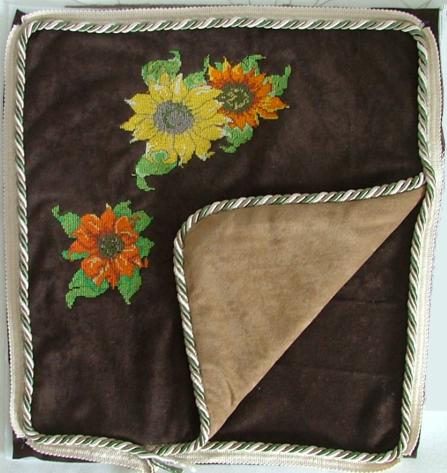
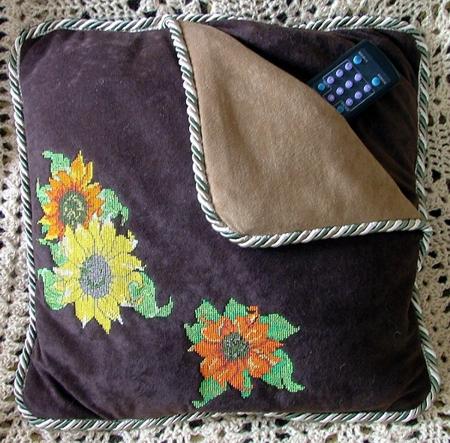
Do you ever lose the remote from your TV? Our Sunflower Cushion with a Pocket is a great place to keep the remote that doubles up as a very comfortable pillow.
For this project we used the designs from the Sunflower Collection.
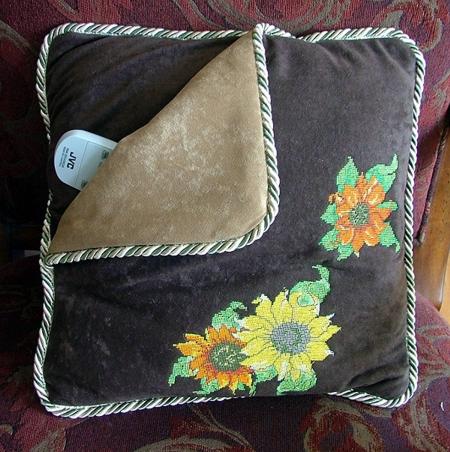
The finished size of the cushion is about 12 1/2" x 12 1/2". You will need about 1/2 yard of fabric, a 10" x 10" square of matching fabric for the pocket (optional), decorative cord, Velcro tape, stabilizer and a pillow form.
For the cushion, we used synthetic suede, because we wated the cushion to be soft and comfortable on one hand, but wanted the fabric to be easy to embroider, on the other. You can use any fabric you like. For the matching fabric, we used dark beige. For the stabilizer we used polyester craft felt, as it makes the cushion even softer.
Cutting:
Out of chocolate brown suede we cut one square measuring 15" x 15" (the front of the cushion), one square measuring 10" x 10" (one side of the pocket) and two rectangles, measuring 15" x 10 1/2" each (the back of the cushion).
Out of the dark beige, we cut one square measuring 10" x 10" for the other side of the pocket.
Out of polyester felt we cut a square measuring 16" x 16".
Embroidering:
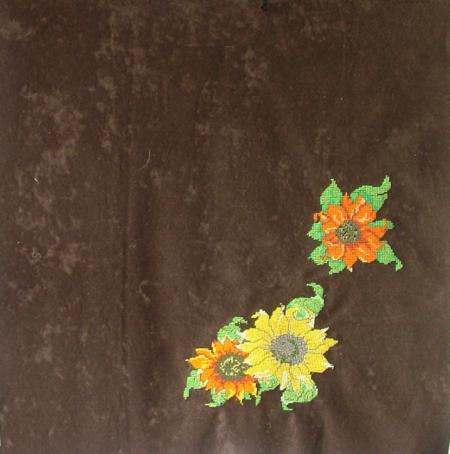
Decide where you want the embroidery to be. Hoop the 15" x 15" square with stabilizer and do the embroidery. When finished, trim the excess stabilizer.
Sewing:
Step One: Take the 10" x 10" square of beige fabric. Place a piece of decorative cord along two sides of the square. Align the edges of the cord with the edges of the fabric. Using a zipper foot, stitch the cord in place.
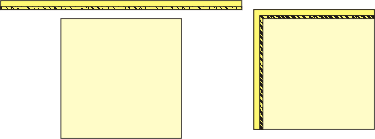
Step Two: Place an embroidered square, face up, on your working table. Take the small square with cord and place it in the corner of the larger square, face down, the corded corner of the small square should be in the corner of the larger square. Align the two sides of the two squares. Pin or baste. Using a zipper foot, stitch the two sides together.
Now turn the working-piece inside-out, so that the cord ends up on the outside.
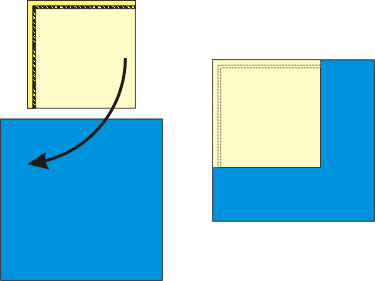
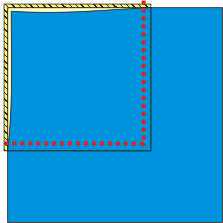
Step Three: Take the 10" x 10" square that you cut out of the chocolate-colored fabric. Place it over the beige square, face down. Align all sides. Pin or baste the two sides that don't have the cord (dotted line on the diagram below). Stitch together.
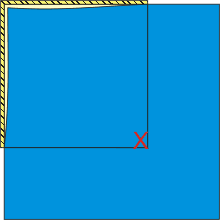
Manually, attach the corner of the small squares (marked with an X on the diagram) to the felt lining of the larger embroidered square.
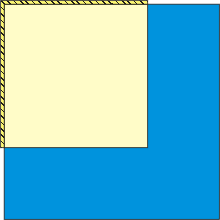
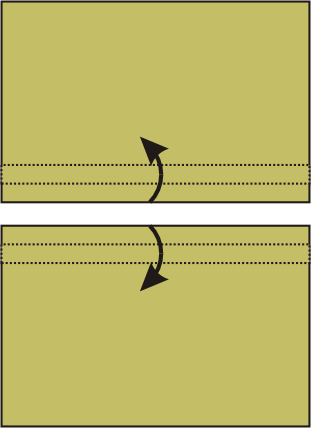
Step Four: Flip the working piece over (face up) and spread it on the table. Fold back the top of the pocket (see diagram below).
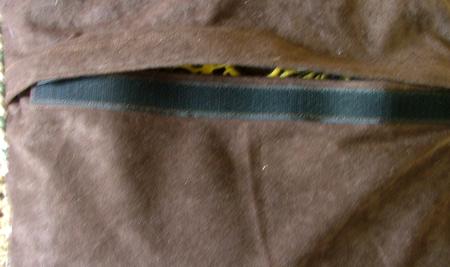
Place the decorative cord around the edges of the cushion. Pin or baste in place. Clip the cord's tape at the corners to make it more flexible. Unravel the ends of the cord and turn them outside the cushion. Using a zipper foot, stitch the cord in place.
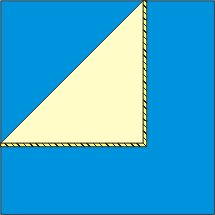
The photo below shows the same process:
Step Five: To make the back of the cushion, take the 15" x 10 1/2" rectangles. Fold back and press 1" twice on the long sides of both rectangles for a double fold. Edge-stitch or blind-stitch the hem in place.
Step Six: Take 10-12" of Velcro tape. Sew one half of it to the top edge of one rectangle and sew the other half to the bottom edge of the second rectangle. "Stick" both back parts together to make one back panel.
Step Seven: Place the front part of the pillow on a table, face up. Unfold the pocket corner. Cover the front part with the back part of the pillow, face down. Align all edges. Pin or baste. Using the zipper foot, machine stitch them together. Turn right side out.
Step Eight: Insert a pillow form into the pillow.
We hope that you liked our idea and will come up with many of your own.


