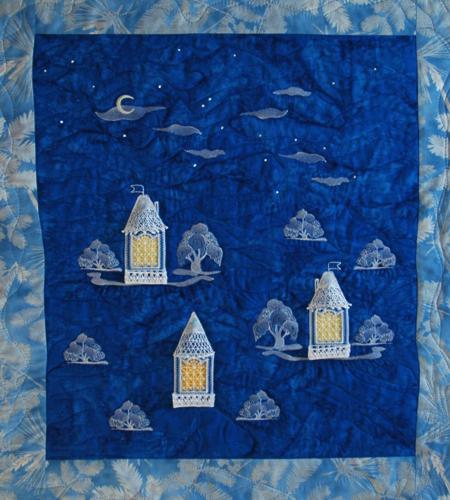
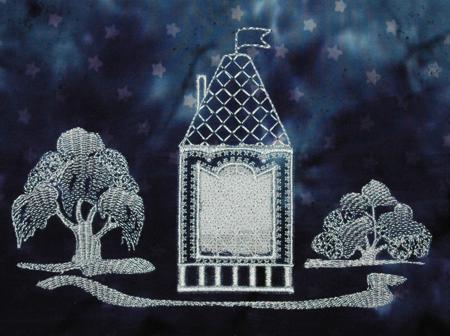
The 3D County Cottage Set contains 8 designs in the satin stitch and freestanding lace techniques. The designs can be combined in a unique way to bring together flat embroidery with 3D elements, giving you some very interesting and unique results. Different combination of these designs allow you to create a variety of landscapes.
These are instructions on how to embroider and assemble a cottage. There are 2 possible cottage designs, with different roofs. They are both embroidered and assembled in the same way.
Step One: Hoop the fabric with a layer of watersoluble mesh. Upload the file "house1" into your machine. Start embroidering. We chose to embroider the whole landscape in one white color. There are stops between all the elements of the design, so that you can change colors if you like. Embroider until the machine makes the outline of the window and stops.
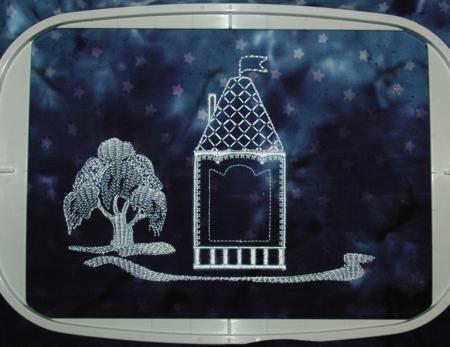
Step Two: Take the hoop out of the machine and with a pair of sharp scissors cut away the fabric inside the outline.
Step Three: Return the hoop to the machine and finish embroidery. It will look like the picture below. Remove the embroidery from the hoop.
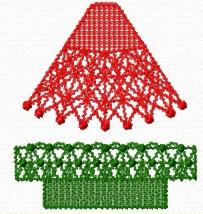
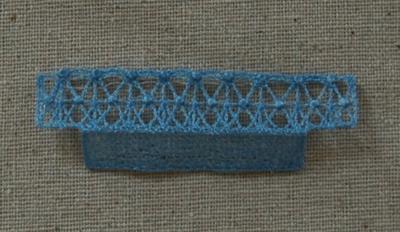
Step Four: Hoop a layer of watersoluble mesh and embroider the file "roof1". There are 2 elements in this file - the roof and a small porch. You can make them the same color or each one different.
Step Five: Neatly trim the excess stabilizer around the lace elements and around the embroidery on the fabric. Rinse the remainder.
To wash away the stabilizer thoroughly, you might need to place the fabric into a bowl of water for half an hour and change the water several times. Use only lukewarm water.
Spread the fabric and the lace to air dry. Press with steam.
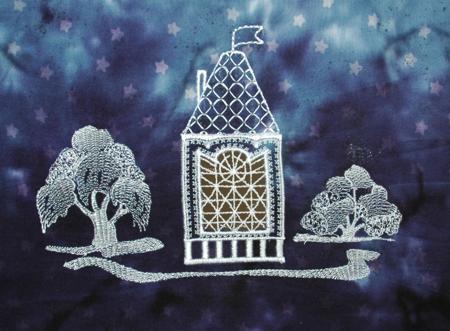
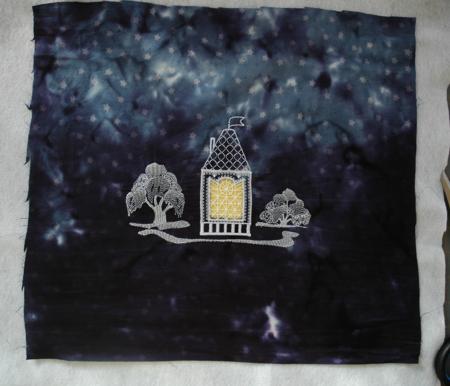
This is what the design will look like after you have washed out the stabilizer. The window is see through. This makes the design suitable for embroidering on transparent fabrics to make curtains, lamp shades, etc.
Do not attach the 3D elements yet. This happens at the end of the project.
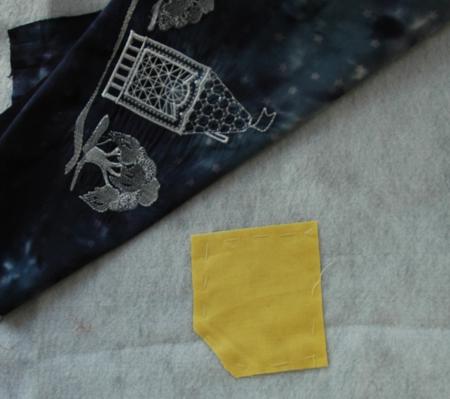
Spread a piece of low-loft batting on your work surface. The piece should be a little bit larger than your embroidered piece. Place a scrap of bright fabric under the window. Fix it in place either with adhesive or fusible tape, or baste in place.
Cover the batting with the embroidered piece so that the scrap is behind the window opening. Underlay the backing. Pin all three layers together and quilt.
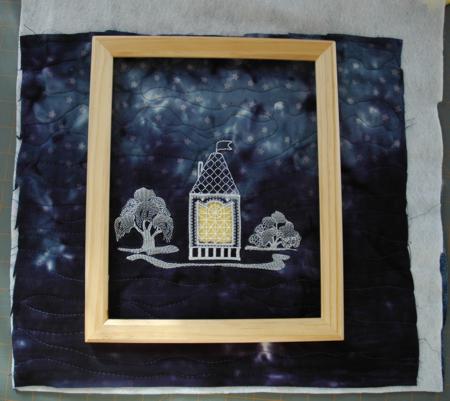
After quilting, press the work with heavy steam and square it. All corners should be 90 degrees and the opposite sides should be equal in length.
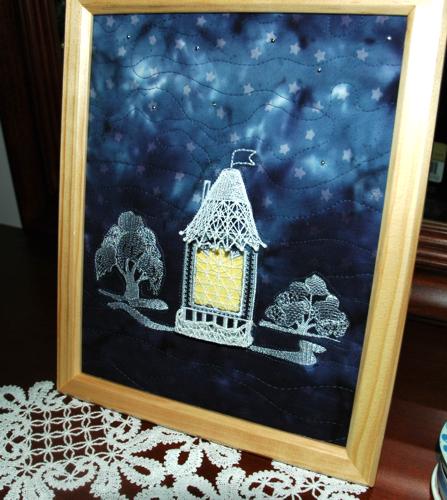
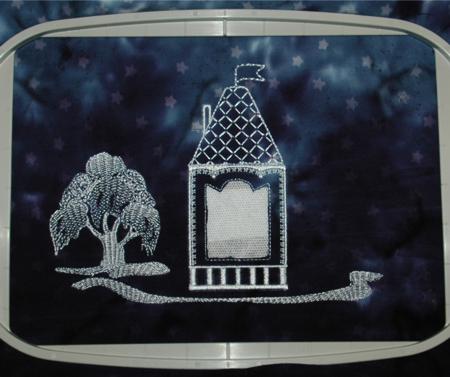
We decided to place the quilt into a small frame - 9" x 11".
We cut the quilt to the size of the frame. Then, we finished the raw edges with zig-zag and embellished the quilt with hot-fix crystals. If you want to embellish the quilt with crystals, beads or paint, do so at this stage.
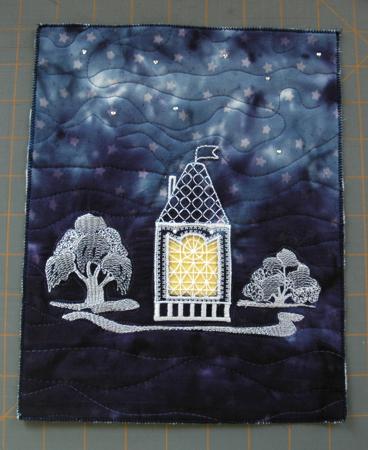
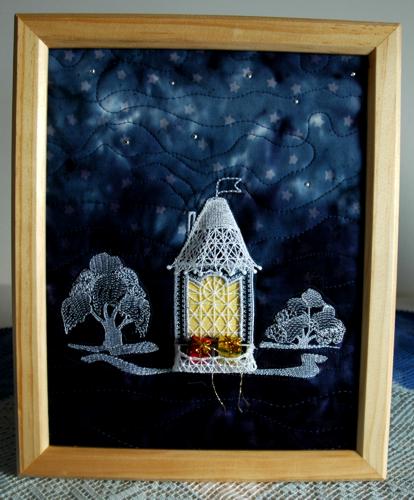
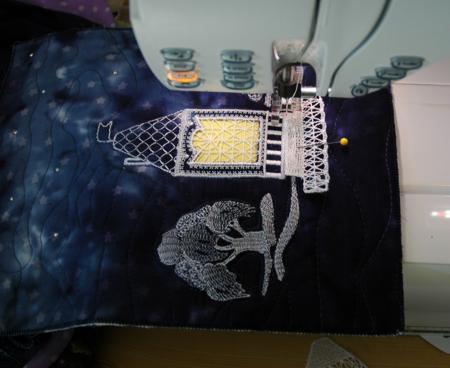
Finally, the quilt is ready for the 3D elements.
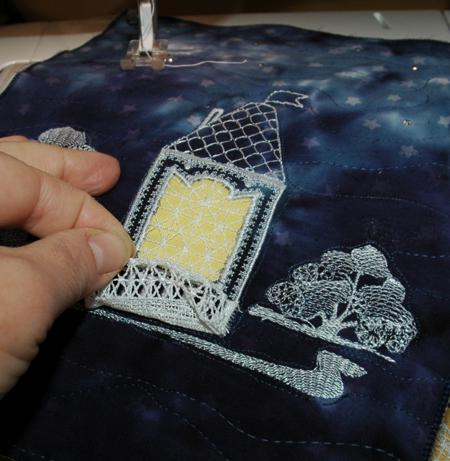
Take the "porch" part, fold it lengthwise and press with steam.
Unfold the "porch", align it with the bottom of the house and topstitch in place.
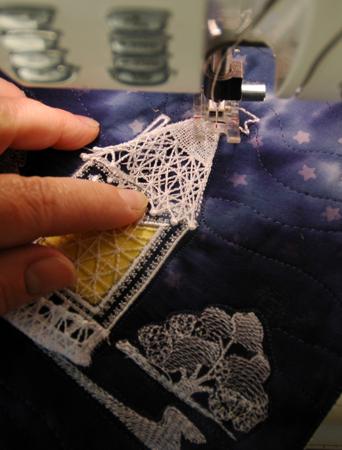
Fold the balcony back and stitch the railings in place.
To attach the lace roof, align one side of the lace and the top with the side and top of the embroidered roof. Topstitch theside and the top.
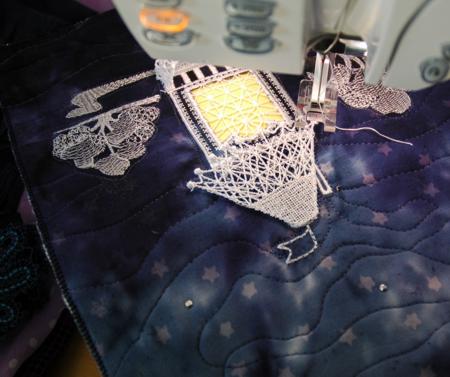
Turn the work, align the second side of the lace roof with the embroidered roof. Topstitch the second side in place.
Now place the quilt into the frame. Your project is finished. Enjoy!