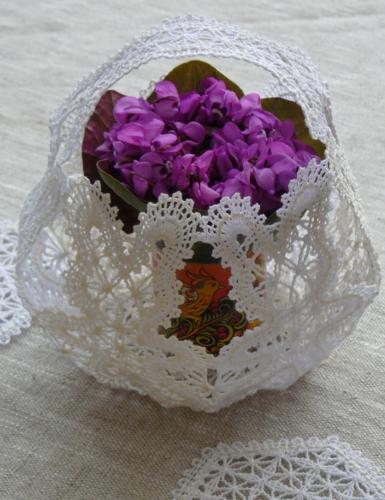
The FSL Battenberg Easter Bunny Lace Set consists of three designs.
The designs can be assembled into two different baskets. The design of the bottom of the basket can be used as a coaster. The bunny panel can also be used to make greeting cards.
Stabilizers: We recommend to use water-soluble mesh, such as Vilene. Vilene D0102 is a non woven dissolvable stabilizer which is imported into the US, is sold in large rolls and is sometimes repackaged under different brand names. Two of these brand names are Wash-Away and Aqua Magic. Film-like water soluble stabilizers, such as Solvy, are not suitable for Free-Standing Lace embroidery.
Threads: Use 40- or 50-weight cotton threads. The thinner the thread, the finer the final product will be. It's also possible to use the following combination: cotton in the bobbin and polyester or rayon in the needle. In this case, the lace will be very fine.
Note: If you embroider with metallic thread use a special needle for metallic thread!
Needles: We use size 75/11 embroidery needles. The needles should be sharp, so it's advisable to change them after every project.
Most Importantly: ALWAYS make a test stitch-out of the design and wash away the stabilizer. This helps you to select the threads, needles, stabilizers and settings of your machine correctly. DO NOT embroider several designs in one hoop.
The files from the set are called "BunnyPanel", "bottom", "handle1" and "handle2".
The "handle1" file is for those who have a 5" x 7" hoop or larger. If you do not have a hoop of this size, use the file "handle2" and embroider the file 2-4 times depending on how long you want the handle to be.
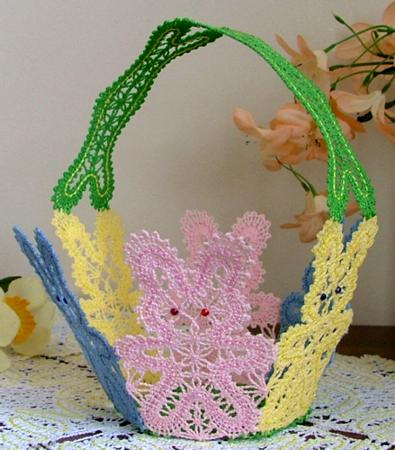
Step One: Make a test stitch-out of one of the designs. If you are satisfied with the results, embroider the bunny panel six times, the bottom once, and the handle as many times as you need.
We used 2 layers of water-soluble mesh stabilizer. Our samples are made using Signature machine quilting cotton threads. We used the same thread in the needle and the bobbin to make two-sided embroidery.
Step Two: Rinse the stabilizer and spread each part neatly on a flat surface to air dry.
Step Three: Press all parts with steam, if needed.
If you want to embellish the parts with hot-fix crystals, do so now.
Step Four: We assembled the designs manually. You will need a needle with a large ear and a thread of a matching color. You can use the thread with which you made the embroidery.
Cut a 10-12" long piece of the thread. Fold it in half and make the ends meet. Thread both ends through the needle. You will have a loop at one end and two thread ends on the other.
When making the first stitch, insert the needle into the working piece and then pull it through the loop. This way, you will secure the thread without making a knot.
Join the parts together with several stitches each.
Use a new length of thread for each panel.
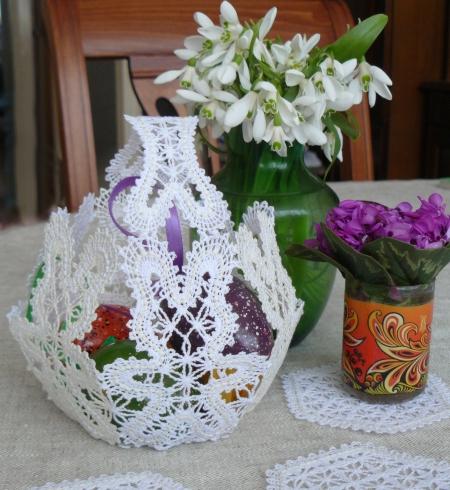
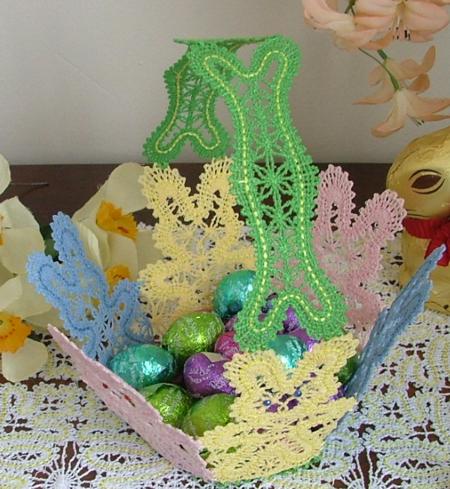
First attach the bunnies to the bottom. Then, attach the bunnies to each other. If you want a basket with a wide mouth, join only the bunnies' legs and hands.
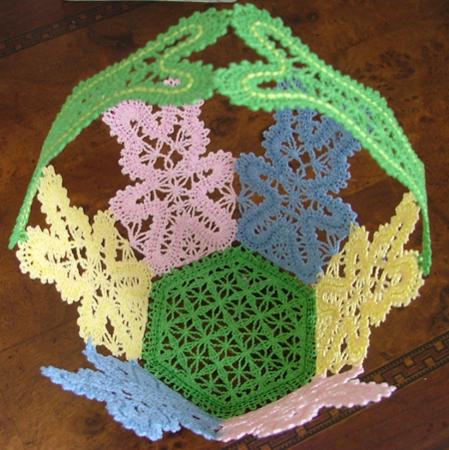
If you want a rounder basket, join the bunnies' ears as well.
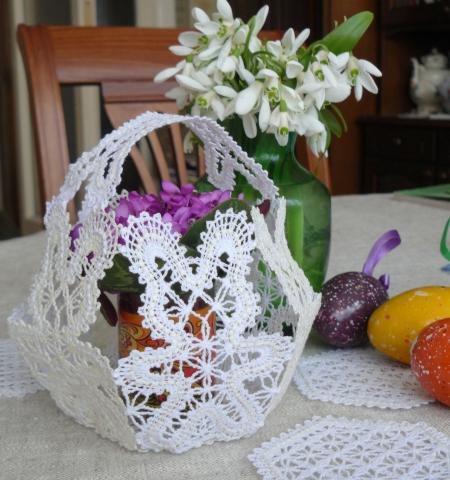
Join the handle parts, then attach the handle to the bunnies' ears.