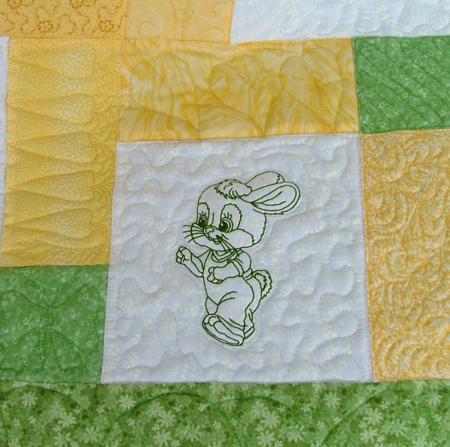
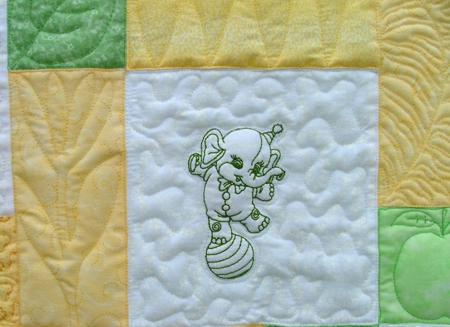
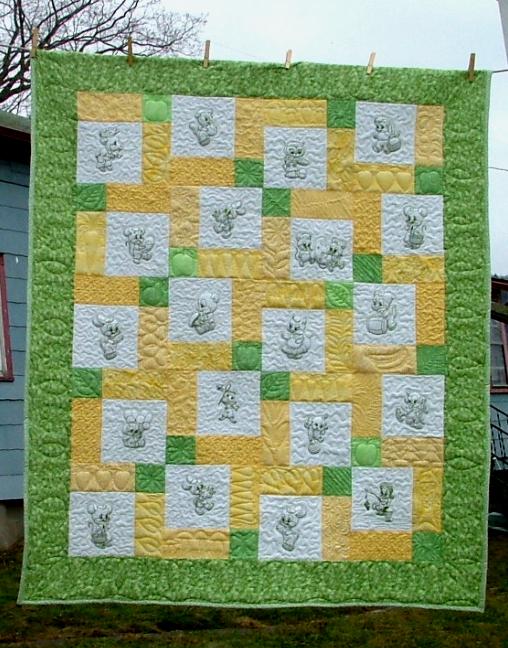
This is a donation quilt for the children's department of our local hospital. The quilt features designs from the Baby Animal Redwork Set, Baby Animal Redwork Set II, and Baby Animal Redwork Set III.

The finished size of the quilt is about 47" x 57". We used the so-called "disappearing 9-patch" block, which is extremely easy to make and accomodates embroidery wonderfully.
We used about 3/4 yard of white fabric for blocks and 1 1/2 yard of green fabric for borders. All other parts are different yellow and green fabrics. You need to have enough yellow fabrics for twenty 7" x 7" squares and green fabrics for five 7" x 7" squares.
You will also need batting, and fabric for the backing and binding.
Out of white fabric, cut twenty 7" x 7" squares.
Out of yellow fabrics, cut twenty 7" x 7" squares.
Out of green fabric, cut five 7" x 7" squares.
For the borders, out of green fabric, cut 4 strips measuring 5" x 47 1/2". Note: the green squares can be of the same fabric as the borders, or you may use all different fabrics.
Seam allowances are 1/4".
Assemble your 7" x 7" squares into five 9-patch blocks following the diagram below.
Working with one 9-patch block at a time, cut it in four as shown:
Arrange the new blocks in rows. The first, the third and the fifth rows should look like this:
The second and the fourth rows should look like this:
Join all the rows:
Attach the borders. First attach the left and the right borders, then attach the upper and lower borders.
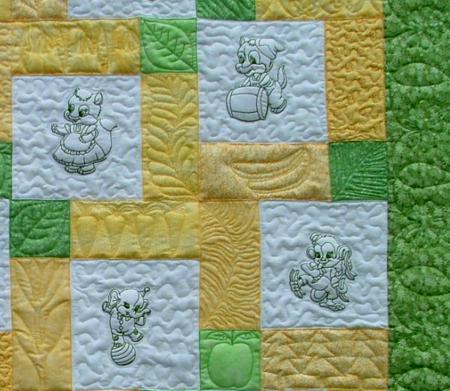
Now the top is ready for embroidery. We chose redwork designs from the Redwork for Children section. For embroidery on quilts, we like to use low-loft DreamPoly batting, instead of stabilizer. After each design is embroidered, we cut away the excess stabilizer as close to the stitches as possible. This technique will make the embroidery puffy and you will get trapunto-like results.
Now place the backing on a flat surface (table) face down. Cover with batting. Spread the top over it.
Pin all three layers together with 1" pins and start quilting. We quilted along the lines of the embroidery to fix it in place, meandered around the embroidery and free-motioned the large open spaces.
After the quilting is finished, press the work with heavy steam and square the work -- all corners should be 90 degrees and opposite sides should be of the same length.
Finish the raw edges with binding, using your favourite method.
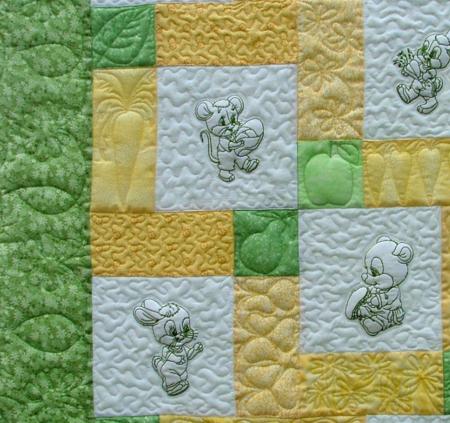
Use this quilt as an exercise in free-motion quilting. Start in the center and move towards the borders. You can try new patterns in each green square and yellow rectangle.

We hope that you liked our idea and will come up with many of your own.


