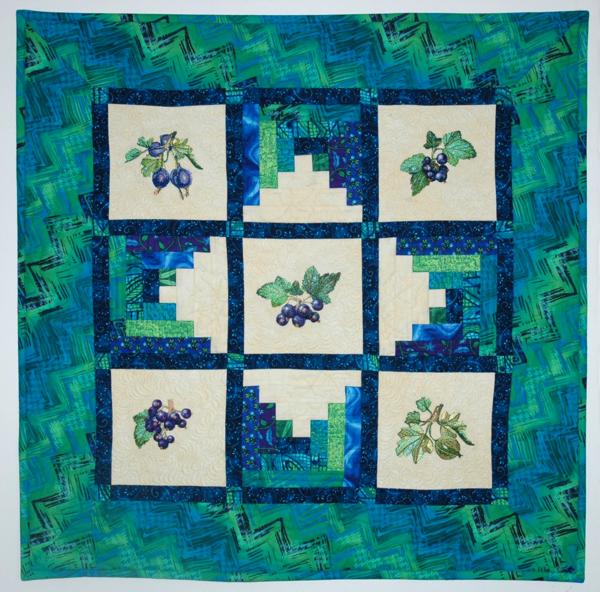
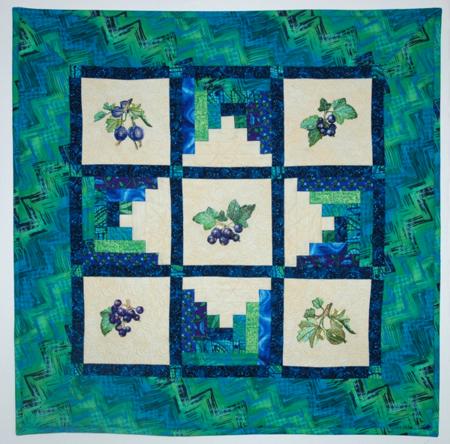
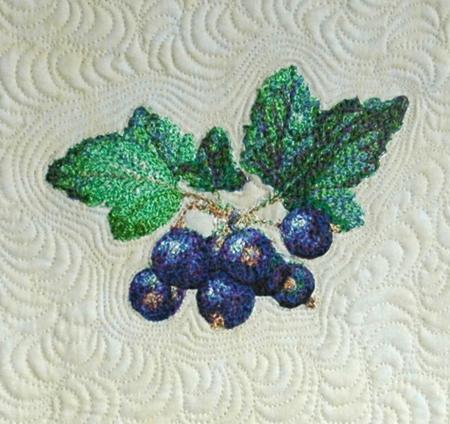
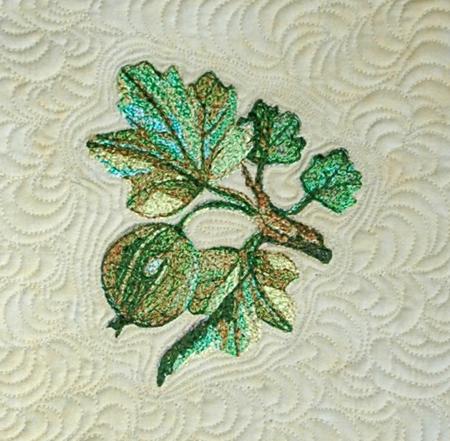
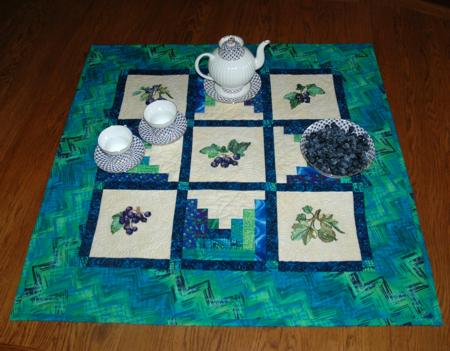
For this late summer table quilt we used traditional Log Cabin block and the embroidery designs of Jostaberry, Gooseberry and Black Currant.
|
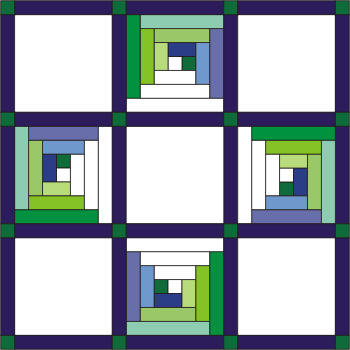
Click to enlarge
|
| The finished size of the quilt is about 33" x 33". The finished size of the log cabin blocks is 7"x 7" (7 1/2" x 7 1/2" unfinished). |
For the quilt top, you will need 100% cotton fabrics:
About 1/2 yard of light cream fabric for embroidered blocks, 1/4 yard of blue fabric for the sashing, 1 yard of fabric for the border and binding, scraps of blue and green fabrics for log cabin blocks, 1 yard of dark blue or green fabric for the backing. You will also need a 40"x 40" piece of batting.
|
| For the borders we used the fabric by Blank Textiles Inc.( www.blanktextiles.com). Pattern #BTR-4367. This fabric remarkably repeats not only the colors of our scraps and embroidery, but the image of the Log Cabin block as well. |
| For embroidery, you will need embroidery threads and iron-on cut-away stabilizer. We prefer to use low-loft DreamPoly batting or white polyester felt as a stabilizer. |
|
Cutting:
|
| All measurements include 1/4" seam allowance. |
1. Out of light cream fabric, cut five squares measuring 7 1/2" x 7 1/2" and several strips 1 1/2" wide and as long as the fabric is wide. Subcut the strips into:
4 squares 1 1/2" x 1 1/2";
4 strips 1 1/2" x 3 1/2";
4 strips 1 1/2" x 5 1/2";
4 strips 1 1/2" x 7 1/2". |
2. Out of scraps of blue and green fabrics cut:
4 squares 1 1/2" x 1 1/2";
8 strips 1 1/2" x 2 1/2";
4 strips 1 1/2" x 3 1/2";
8 strips 1 1/2" x 4 1/2";
4 strips 1 1/2" x 5 1/2";
8 strips 1 1/2" x 6 1/2". |
| 3. Out of blue fabric for sashing, cut 5 strips 1 1/2" wide and as long as the width of the fabric. Subcut the strips into 24 strips measuring 1 1/2"x 7 1/2". |
| 4. Out of green scraps cut 16 squares measuring 1 1/2" x 1 1/2". These squares will be used for the sashing. |
| 5. Out of the fabric for the border, cut 4 strips 4 1/2" wide and as long as the width of the fabric. Also cut 4 strips 2 1/2" wide and as long as the width of the fabric for the binding. |
|
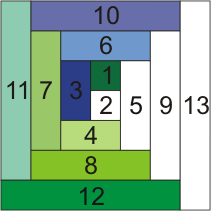
Assembling the Log Cabin block.
|
| You have to assemble 4 blocks like this one. Start assembling with the green1 1/2" x 1 1/2" square in the center and work outwards as shown on the diagram below, according to the numbering. |
|
|
Assembling the quilt top:
|
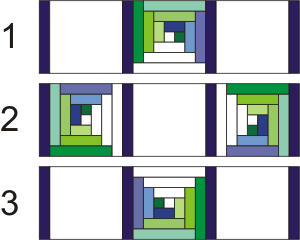
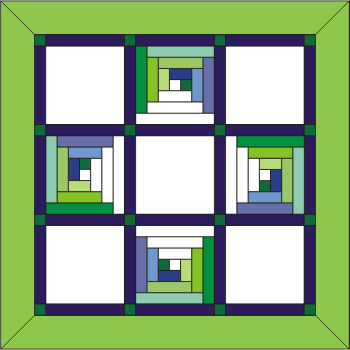
| 1. Assemble the rows according to the diagram below: |
|
| 2. Assemble the sashing according to the diagram below. Make 4 units. |

|
| 3. Connect the rows and the sashing: |
|
| 4. Add the borders. We made mitered corners. If you want boxed corners, you will need 2 strips measuring 4 1/2" x 25 1/2" (for the upper and bottom edges) and 2 strips measuring 4 1/2" x 34" (for the left and right edges). |
|
|
Embroidery:
|
| After the quilt top is assembled, embroider the berry designs. Stabilize each cream block with your favorite cut-away stabilizer and embroider the centers of the blocks with the designs f... Cut away the excess stabilizer. Note: We prefer to embroider on very thin (low loft) felted Dream Poly batting instead of stabilizer. Then, we cut away the batting as close to the embroidery as possible. After quilting the embroidery will stand out better and have a trapunto appearance.
|
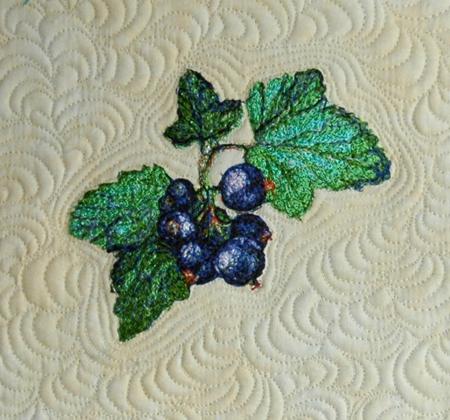
| Black currant design: |
|
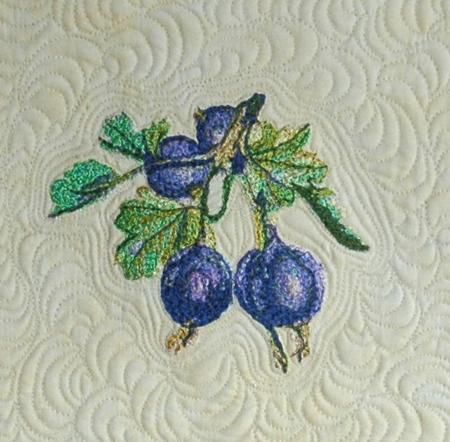
| Gooseberry design: |
|
| Black currant design: |
|
| Black currant design: |
|
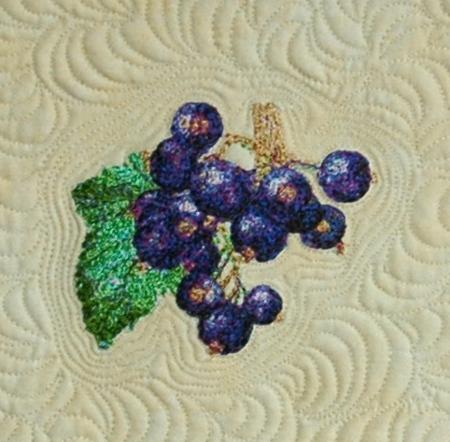
| Jostaberry design: |
|
|
Finishing:
|
Now place the backing on a flat surface (table) face down. Cover with batting. Spread your working piece over it.
Pin all three layers together with 1" pins and start quilting. We quilted along the lines of the embroidery and echo-quilted around each embroidery pattern. Then we quilted everything else in a free-motion style. |
| After the quilting is finished, press the work with heavy steam and square the work -- all corners should be 90 degrees and opposite sides should be of the same length. Finish the raw edges with the binding.
The table topper is ready! Enjoy!
|
|
|
Happy Stitching!
|
|
Back to Black Currant Set
|
|
Back to Jostaberry
|
|
Back to Gooseberry
|
|
Back to the Projects Page
|