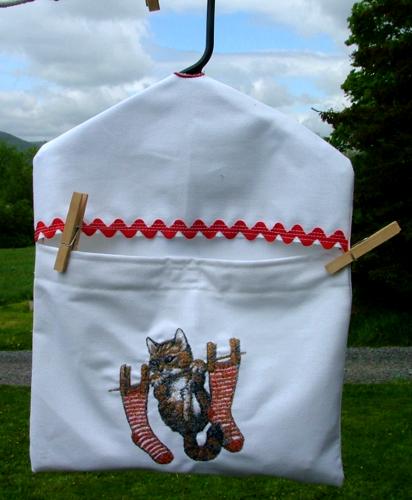
This embroidered clothespin bag combines practicality with simplicity and charm. This project will take you no longer than an hour to make and will serve you for years.
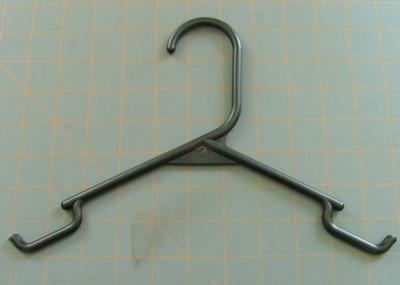
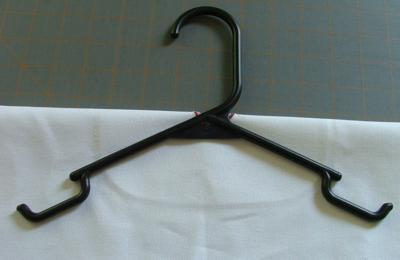
For this project you will need a 13" x 32" piece of dense fabric, such as duckloth, canvas or medium-weight denim. You will also need either a 12" long or larger plastic hanger (if it is longer than 12", it can be shortened). A piece of rick rack and velcro tape are optional. For embellishment we used the design Kitten on a Clothesline.
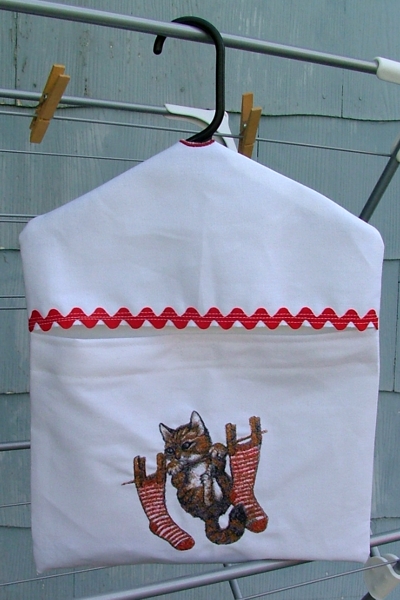
The finished size of the bag is about 12" x 15".
If you cannot find a hanger 11"-12" long, take a regular plastic hanger and cut or break its ends to give it the needed length.
Place a piece of your fabric (13" x 33") on the working table face down. Fold the upper edge forward 6". Press.
Mark the central point on the crease.
Download the design of the cutwork oval from the site and upload it into your machine.
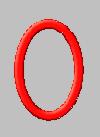
Hoop the fabric with any light-weight stabilizer. Embroider the oval over your mark.
The machine will embroider an outline first. Take the hoop from the machine and cut away the fabric inside the oval as close to the stitches as possible. Try not to cut through the stabilizer.
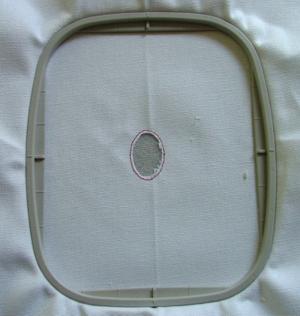
Return the hoop to the machine and finish the embroidery. Remove the stabilizer.
Finish the raw upper edge of the fabric.
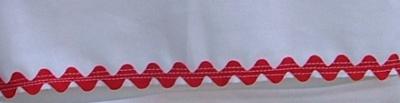
To finish it, we folded the raw edge back 1/2", placed a piece of jumbo rick rack over the fold and topstitched it in place.
Fold the lower edge back 1" and press. Fold it back another 1" and press to make the crease.
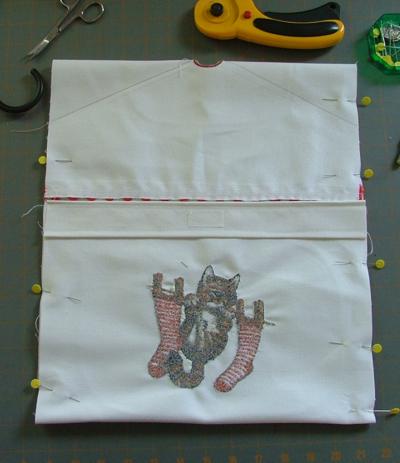
Now fold it so that the lower edge meets the upper folded edge, about 9". Press to make the crease. This will be the pocket. Mark the position of the embroidery in the center of the pocket. Make sure to mark the direction in which the top of the embroidery should point.
Using any tear-away stabilizer (preferably iron-on), embroider the design Kitten on a Clothesline.

After the embroidery is finished, tear away the excess stabilizer. Fold the raw edge twice according to the creases you marked earlier and topstitch in place.
If you wish, you can attach pieces of velcro between the back of the bag and the pocket, and back and upper flap, to secure the pocket and the hanger, respectively.
Turn the working piece face inwards. Pin all the edges.
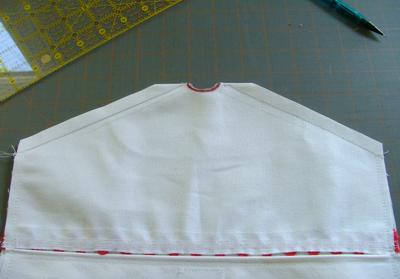
Place the hanger over the upper edge so that the base of its hook is above the oval opening.
With a pencil, trace the outlines of the hanger.
Stitch along the marked lines and along all the raw edges - 1/4"-1/2" from the edges.
With a rotary cutter or scissors, cut away the fabric 1/4"-1/2" from the stitch on the "shoulders".
Turn the bag outside out. Insert the hanger. You're done! Now, just add clothespins and enjoy!
We hope that you liked our idea and will come up with many of your own.


