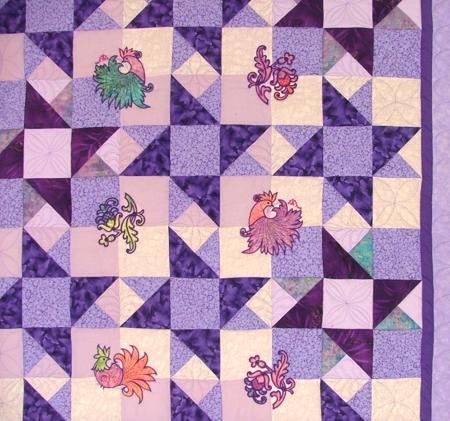
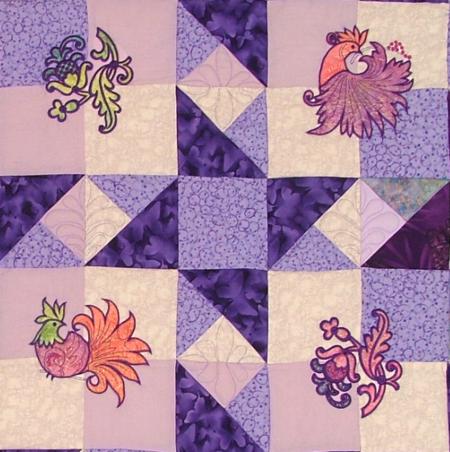
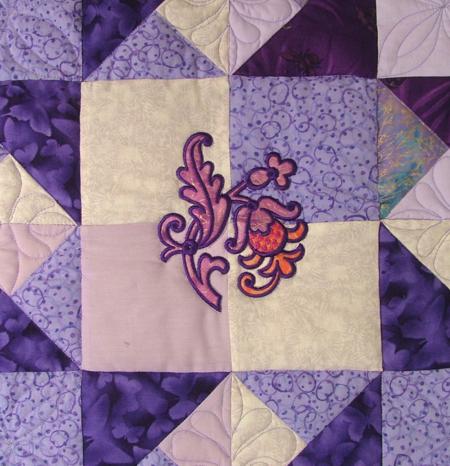
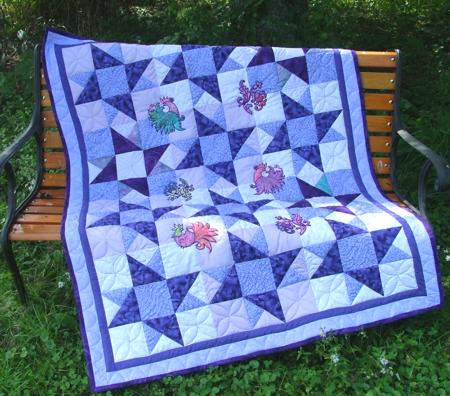
This is one of the donation quilts made by the members of our local quilt guild for the children's department of a local hospital. Each member pieced one block. Then all the blocks were assembled, appliqued, quilted and finished. As you can see different fabrics in lilac hues were used. designs from the Fairy Tale Birds Appliqué Set and Fantasy Flower Appliqué Set add visual interest to the quilt.

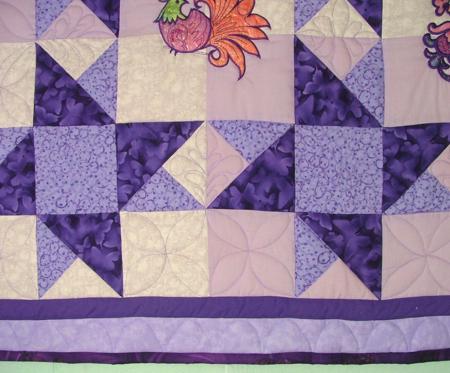
The finished size of the quilt is 42 1/2" x 54". The quilt consists of 12 Double Friendship Star blocks, 12" x 12" each. The first border is 1" wide and the second border is 2" wide.
For this block you will need at least 3 different fabrics - for the background, for the large rays of the star and for the small rays of the star. We used the lightest fabric for the background, the darkest for the large rays and an intermediate shade for the small rays.
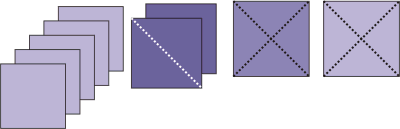
1. For the background and the center of the star, cut 5 squares measuring 4 1/2" x 4 1/2". All five squares can be of the same color, or you might make the 4 squares for the background of one color and 1 square for the center of another color.
2. For the star's large rays, out of your darkest fabric, cut two squares measuring 4 7/8" x 4 7/8". Cut each square down the diagonal to get four triangles.
3. For the star's smaller rays and the background, cut one square of your medium fabric and one square of your background fabric. Each square should measure 5 1/4" x 5 1/4".
Cut each square down one diagonal, then cut down the second diagonal. You will get a total of 8 small triangles in 2 colors.
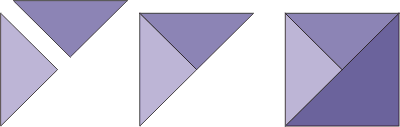
Seam allowances are a scant 1/4".
Sew the small triangles together in pairs. Press the seam allowance towards the darker fabric.
Sew the two-colored triangles to the one-color triangles. Press the seam allowances towards the one color triangle. You should get four units.
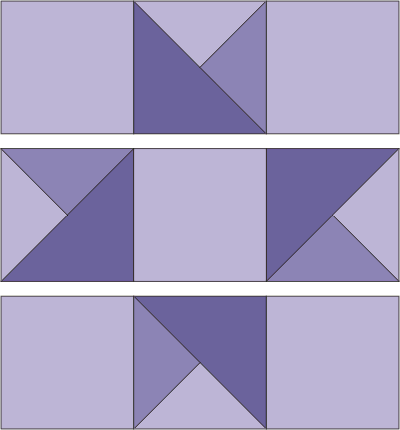
Assemble the block in rows as shown on the diagram.
For the quilt, you will need 12 blocks. Assemble them first in rows, then join the rows.
For the first border, cut 2 strips 1 1/2" wide and 36 1/2" long and 2 strips 1 1/2" wide and 62 1/2" long. Attach the shorter strips to the top and bottom sides of the top. Attach the longer strips to the left and right sides of the top.
For the second border, cut 2 strips 2 1/2" wide and 38 1/2" long and 2 strips 2 1/2" wide and 66 1/2" long.
Attach the shorter strips to the upper and lower edges of the top. Attach the longer strips to the left and right sides of the top.
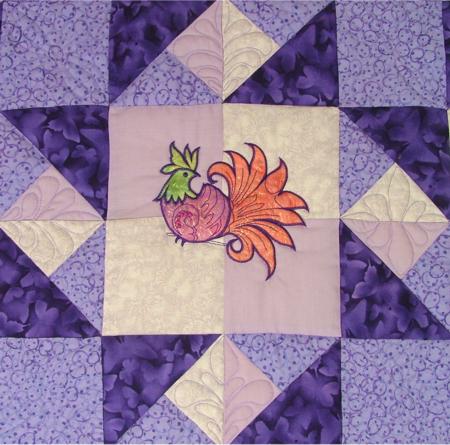
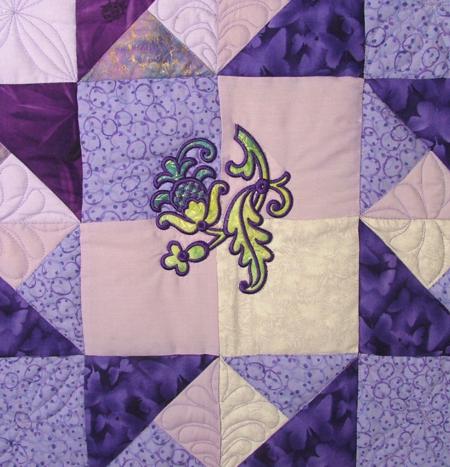
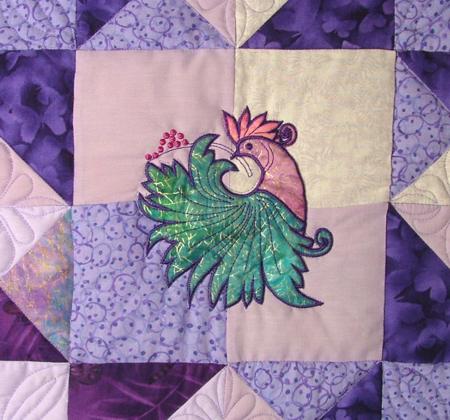
Now the top is ready for embroidery. We placed applique in the gaps formed by the background squares of the adjoining stars.
We used the designs from the Fairy Tale Birds Appliqué Set and Fantasy Flower Appliqué Set.
Instead of the stabilizer we used medium-weight DreamPoly batting. After a design was embroidered, we cut away the batting as close to the stitches as possible. This technique will make the applique puffy and you will get trapunto-like results.
Now place the backing on a flat surface (table) face down. Cover with batting. Spread the top over it.
Pin all three layers together with 1" pins and start quilting. We quilted along the lines of the applique to fix it in place, stitched in the ditch on the blocks and sashing and free-motioned the large free spaces.
After the quilting is finished, press the work with heavy steam and square the work -- all corners should be 90 degrees and opposite sides should be of the same length.
Finish the raw edges with binding using your favourite method.

We hope that you liked our idea and will come up with many of your own.


