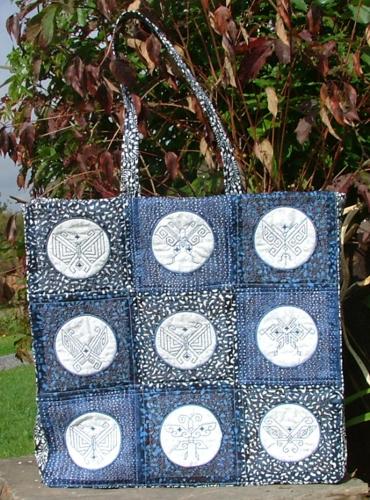
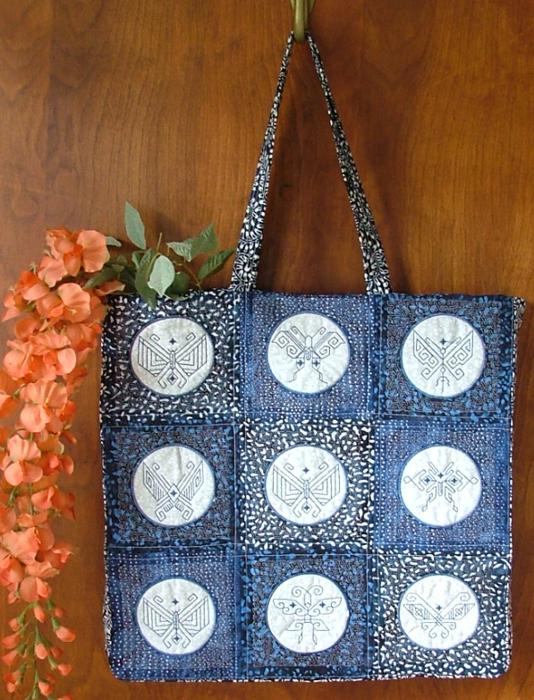
This attractive indigo tote features the Japanese Butterfly Applique Quilt Block Set, combining traditional Japanese patterns with modern styling and colors.

The finished size of the tote is about 18" (high) x 18" (long) x 4" (wide).
We used 4 indigo batiks with white and light blue patterns, about 1/2 yard each; Floriani Stitch N Shape (one-side fusible) stabilizer; 18 white fabric squares measuring 4" x 4" for the applique; 3/4 yard of fabric for the lining.
For the embroidery, we used embroidery polyester thread with a 12/80 embroidery needle. For the sewing, we used topstitch polyester thread and a 14/82 topstitch needle.
With a removable marker and a ruler, draw six 8" x 8" squares each on three different fabrics. You should have a total of 18 squares. Do not cut them out yet! Place the marked fabric onto the fusible side of the stabilizer. Iron to fuse the stabilizer to the fabric.
Mark the center of each square. Hoop so that the center of a square is in the center of the hoop.
Make the applique embroidery. We used white fabric for the applique, blue thread for the butterfly embroidery and white thread for the stippling embroidery.
Cut out the squares and trim them to get eighteen 7" x 7" squares.
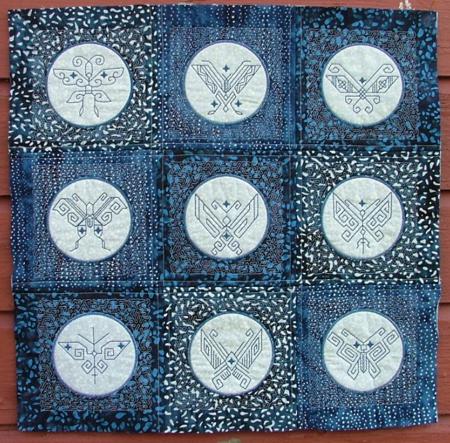
To make the two faces of the tote, arrange the squares in a 3x3 grid, as shown in the diagram below.

Join the blocks in rows. Use a seam allowance of 1/2". After stitching the blocks together, press the seam allowance open. Topstitch the seam allowance from the face side of the working piece 1/4" from the seam. We used white threads to make this topstitch more visible, as its part of our styling. See the diagram below:
Join the rows in the same way. Use a seam allowance of 1/2". After stitching the rows together, press the seam allowance open. Topstitch the seam allowance from the face side of the working piece 1/4" from the seam.

You should get two panels like this one:
For the bottom and sides of the tote, out of the 4th batik, cut six strips measuring 3" x 19". Iron the strips onto the stabilizer to fuse and cut out again.
Place one strip over the lower edge of one of the panels you just made, face down, and align the edges. Stitch with a 1/2" seam allowance. Start and stop stitching 1/2" from each end.
Now, attach the strips to the left and right sides of the panel. The procedure is the same, except the stitch should go all the way to the edge at the top. See the diagram below. In the end, the three strips should overlap at the corners.
Repeat for the second panel.
Place the panels face to face, aligning all the edges. Sew them together along the bottom strip, 1/2" from the edge.
Open the seam allowance. Topstitch from the face side of the working piece, 1/4" from the seam.
Fold the tote in half, wrong side out. Align the edges. Join the sides, 1/2" from the edge.
Now pinch the corners as shown in the diagram below. Pin. Stitch them closed. The seam allowance should be 1/2".
Turn the tote right side out. Topstitch along the side and bottom edges 1/8" to 1/4" from the edge.
For the handles, cut two fabric strips measuring 2 1/2" x 26" and two stabilizer strips measuring 1" x 26".
Fold each fabric strip in half lengthwise, right side inwards. Stitch 1/4" from the long raw edges. Press the seam open. Turn the strips right side out. Press, centering the seam. Insert the stabilizer strips into the handles. Press to fuse. Topstitch each handle 1/8" from each long edge.
Pin each handle to the tote as shown. Position one end of the handle between the first and second blocks and the other between the second and third blocks. Machine-baste the handles 1/4" from the edge.
Measure the circumference of the upper edge of the tote. It should be around 44". Out of fabric, cut 2 strips measuring 4" x 23" (this is 22" or one half of 44", plus 1"; if the top of your tote is of a different length, adjust accordingly). Cut 2 strips of the same size out of stabilizer.
Place the strips face to face, align all the edges and join the short ends with a straight stitch, using 1/2" seam allowance. Open the seams and topstitch them 1/4" from the seam. You'll get a ring with a 44" perimeter.
Place this ring over the upper edge of the tote, face to face. Align the the seams of the ring with the centers of the upper edges of the two embroidered panels. Align the top edge of the ring with the top edge of the tote. Pin. machine stitch in place 1/2" from the edge.
Tuck the ring inside the tote.
Topstitch along the upper edge of the tote 1/4" from the edge.
To make the lining, cut out a rectangle measuring 23" x 36".
Fold it widthwise, face to face, and lightly press the fold line.
In the corners, cut away rectangles measuring 2 1/2" x 2".
If you want an inner pocket, out of lining fabric cut a rectangle measuring 8" x 9". Fold one of the 8"-long sides back 1/2" and press; fold it back another 1/2" and press. Machine-stitch in place. Fold all the other edges back 1/2" and press.
Center the pocket on the right side of one of the lining panels, 2 1/2" below the upper edge. Stitch in place.
Fold the lining, right side inwards and align all edges. Stitch the sides together, 1/2" from the edge. Press the seams open.
Now pinch the corners as shown in the diagram below. Pin. Stitch them closed. The seam allowance should be 1/2".
Fold the upper edge back 1/2" and press.
Insert the lining into the tote. Align the upper edge of the lining so that it slightly overlaps the raw edge of the ring.
Manually slip-stitch the lining to the tote.
We hope that you liked our idea and will come up with many of your own.


