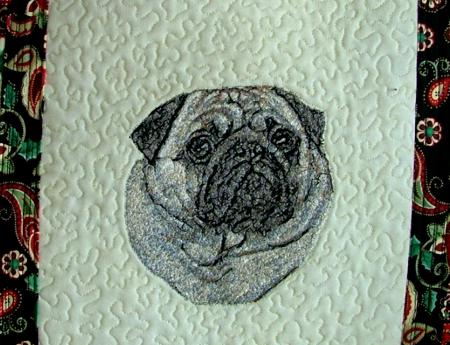
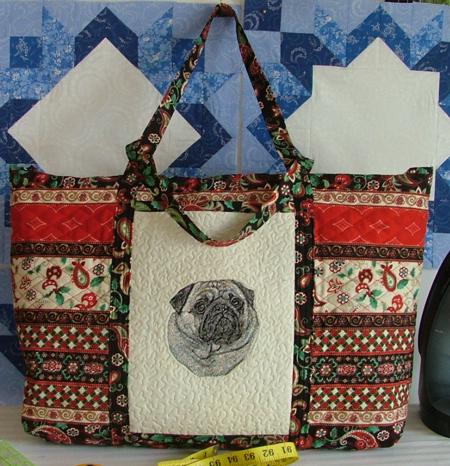
We made this oversized tote bag (the finished size is 21" x 14" x 5") for a friend who needed something this size to carry her quilting supplies. The tote features the embroidery of her dog, a pug named Micki.

We used 1 yard of a pre-quilted fabric (we'll call it the main fabric), a 12" x 14" piece of cream fabric for the outer pocket, a piece of felt of the same size, about 1/2 yard of matching fabric (we'll call it the auxiliary fabric), and a 5" x 21" piece of fusible interfacing, like Pellon Peltex 70 (or 71) or Floriani Stitch N Shape (two-side fusible).
Outer Pocket: First make the embroidered pocket. For this, place a 12" x 14" piece of light colored cotton fabric on a piece of polyester felt. Press with a warm iron. The fabric will cling to the felt and you will not need any additional adhesives.
Hoop these two layers and embroider the designs you would like. Try to make the embroidery closer to the center of the fabric.
After the embroidery is finished, press it. Out of the auxiliary cotton fabric cut a 12" x 14" piece. Spread it on your working table, face down. Cover with the embroidered piece. Pin all three layers together. Quilt in a free motion style. First quilt around the embroidery lines, then all over the field. When finished, press again.
Trim to get a piece measuring 9 1/2" wide and 13" high.
Out of auxiliary fabric, cut two strips measuring 2" x 9 1/2". Finish the upper and the lower raw edges of the pocket. Leave the left and right edges unfinished.
Tote Body: Out of the main, pre-quilted fabric, cut a piece measuring 26" x 38".
Fold it in half widthwise, aligning all the edges. Cut a 2 1/2" x 2 1/2" square out of each corner.
Handles: Out of the main fabric cut the handles. You will need a strip measuring about 3 1/2" - 4" wide and 126" long. To achieve this, cut as many strips as you need to make a length of 126". Do not forget about the 1/2" seam allowances.
Join all the strips for the handles, using 1/2" seam allowance. Unfold each seam allowance and topstitch 1/2" from the seam.
Join the ends of this long strip in the same manner. You should get a ring 3 1/2"- 4" wide.
Fold both edges of the ring strip so that they meet in the center. Press. Fold again. Pin. Topstitch 1/8" from the open edge to close it. Topstitch 1/8" from the other edge.
Inside Pocket: For the inside pocket, out of the main fabric cut a square measuring 9 1/2" x 9 1/2".
Out of the auxiliary fabric cut binding about 2" wide. Finish the raw edges of the inside pocket with binding using your favorite method.
Bottom Plate: Out of auxiliary fabric cut a rectangle measuring 10 1/2" x 21 1/2". Fold it lengthwise, with the face inwards. Sew along one short and one long side 1/4" from the edge. Leave the second short side open. Turn the strip right side out. Insert a 5" x 21" piece of interfacing inside. Tuck the raw edges of the opening inwards. Topstitch close to the edge to close the opening. Press to fuse the fabric to the interfacing. Topstitch 1/4" along all edges.
Assembly:
Spread the tote on your working table, face up. With a removable marker, preferably chalk pencil, mark a line down the center of the tote body. Measure and mark spots 8"
from the left and right sides of the tote and 2 1/2" from the bottom of the tote. Place the embroidered pocket between the markings you just made. Pin in place. Topstitch the pocket to the tote 1/4" from the edges. Make 2 rows of stitches along the bottom of the pocket - one close to the edge, the second one 1/4" from the edge.

Turn the tote wrong side up. Measure and mark spots 8" from the left and right sides of the tote and 5" from the upper edge of the tote. Place the inside pocket between the markings you just made. Pin. Topstitch 1/8" from the edges.
Spread the tote on your working table, face up. Place and pin the handles ring as shown on the diagram below. On the front, the handles should overlap the embroidered pocket by 1/2". Topstitch the handles to the top along the edges, about 1/4" from the edges. Topstitch again, 1/8" from the edges.

Fold the tote in half, face inwards. Align the edges. Stitch the sides together 1/2" from the edge. Open the seams and press.
Out of the auxiliary fabric, cut 2 strips 2" wide and 14" long. Fold the long edges to the center, wrong side inwards. Press.
Place the strips over the open seam. Pin. Stitch the strips in place close to the edge to hide the raw edges of the seams.
Now pinch the corners as shown in the diagram below. Pin. Stitch them closed. The seam allowance should be 1/2".
Place the bottom plate at the bottom of the tote. Topstitch the short sides of the plate to the bottom seams.
Turn the tote right side out.
Out of auxiliary fabric, cut binding 2 1/2" wide. Finish the upper raw edges of the tote with binding. Use your favourite method.
The tote bag is ready! You can use the same idea to make totes of any size.
We hope that you liked our idea and will come up with many of your own.


