These are last minute projects. It will take you only a couple of hours to sew, embroider and embellish the tote bags. To make the process even faster, you can use ready bags, but you'll have to rip one of the side seams for embroidery and sew it closed later.
The totes are great for gifts as they are, or you can use them to hold other gifts.
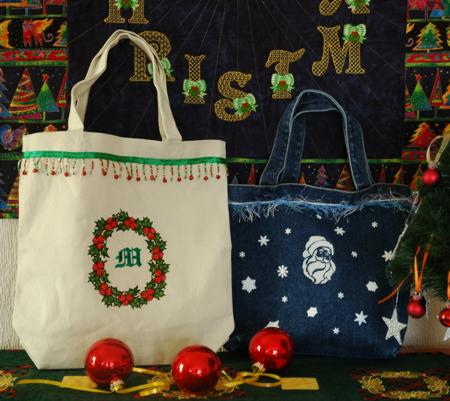
To make a tote, you'll need canvas or denim fabric. You'll also can use any small embelishments you have - buttons, beads, trims, crystals, etc.
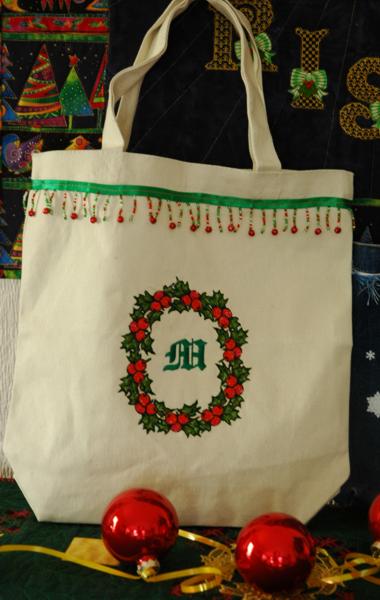
The finished size of the white Christmas tote is 10" x 13". You willl need about 1/2 yard of canvas.
Out of canvas, cut a strip measuring 11" x 30" and 2 strips measuring 3" x 20" (for the handles.
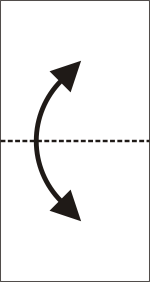
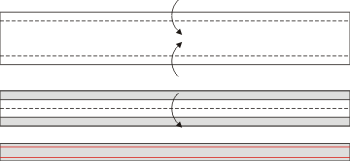
Fold the 11" x 30" widthwise in half and slightly press to mark the bottom line.
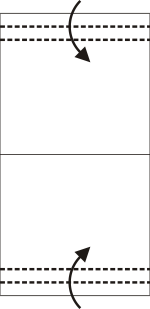
Fold the short edges of the tote 1" back and press. Fold back another 1" and press again.
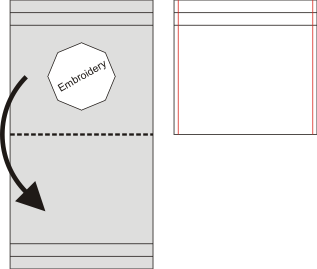
Unfold. Stabilize with a tear-away stabilizer and make the embroidery on the upper half of the tote.
We embroidered the Holy Wreath and the initial of our giftee inside the wreath.
After the embroidery is finished, set the tote aside for.
To make the handles, take the 3" x 20" strips. Fold back 1/2" of the long edge and press. Repeat with the other long edge.
Now fold the strip in half lengthwise and press. Topstitch about 1/8" from the edges (marked in red).
Fold the tote in half, face inwards and stitch the side seams (marked in red). Finish them with zig-zag.
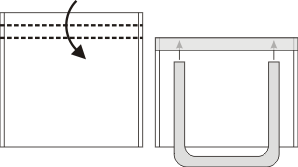
Fold the upper edges back along the pressed lines that you made several steps ago. Press again.
Tuck the handles under the folded edges. Topstitch to secure the edge and the handles.
Turn the handles out and topstitch along the upper edge of the tote to secure the handles on this edge.
Stitch box corners at the bottom of the bag. For this, separate the front and back sides at the corners. Center the side seam with the central (creased) line of the bottom. Measure 2 1/2" along the seam from the corner and machine-stitch perpendicular to the seam across the corner. Do not trim the seam. Fold it onto the bottom and attach with several manual stitches. Repeat for the second corner.
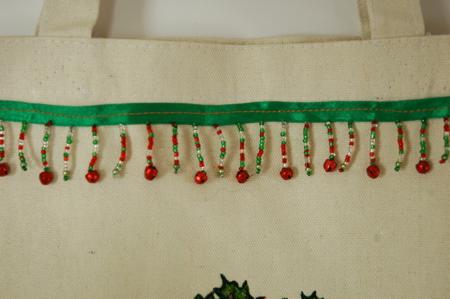
Turn the tote right side out. We further embellished the tote with a beaded trim, which we topstitched 1" from the upper edge.
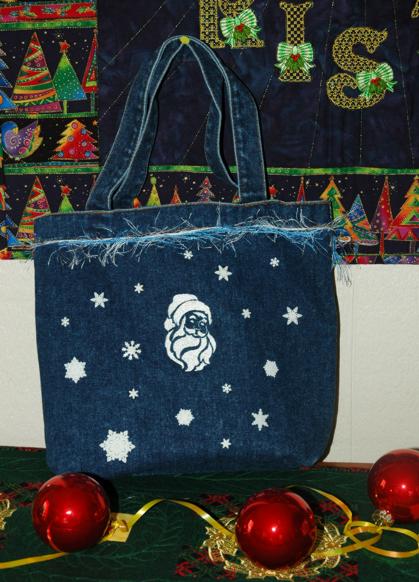
The denim tote is smaller, it's 10" x 10". It's sewn in the same way as the canvas tote.
It features a design from the Santa Silhouette Set.
We further embellished the tote with snowflake buttons and fur yarn which we attached 1" from the upper edge of the tote.
We hope that you liked our idea and will come up with many of your own!


