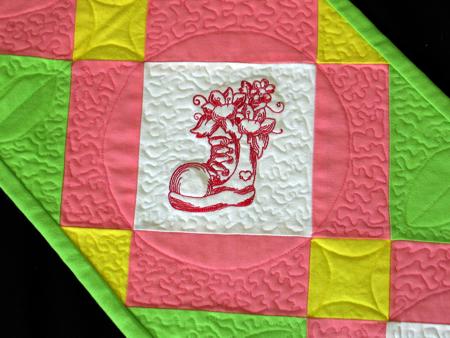
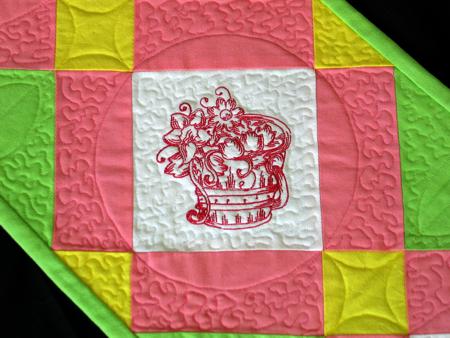
This spring-themed table runner features the designs from the Garden Redwork Set for the small (4"x 4") hoop.
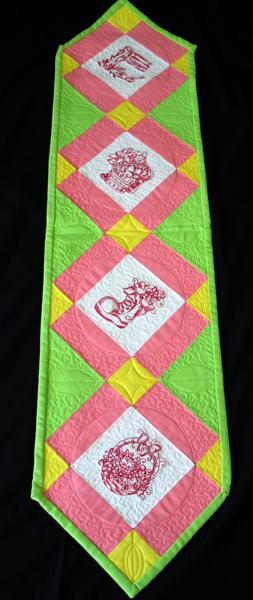
The finished size of the tablerunner is about 9" x 42".
We used 4 solid fabrics in bright spring hues: pink, yellow, green and white. Assuming a fabric width of 40", you will need: 1/4 yard of pink fabric, one strip 2 1/2" wide of yellow fabric, 1/2 yard of green fabric (this includes the binding) and 1/4 yard of white fabric. You will also need backing and batting, each piece measuring about 15" x 15".
Out of white fabric, cut 4 squares measuring 5 1/2" x 5 1/2".
Out of yellow fabric, cut 13 squares measuring 2 1/2" x 2 1/2".
Out of pink fabric, cut 16 rectangles measuring 2 1/2" x 5 1/5".
Out of green fabric, cut 7 squares measuring 5 1/2" x 5 1/2", and 3 strips 2 1/2" wide and the length of the width of the fabric for the binding.
Sew 4 yellow squares and 2 pink rectangles into two strips as shown below:
Sew the remaining 9 yellow squares and 6 pink rectangles into three strips as shown below:
Sew 2 white squares, 4 pink rectangles and 2 green squares into two rows as shown below:
Sew 2 white squares, 4 pink rectangles and 4 green squares into two rows shown below:

Assemble the parts as shown on the diagram:
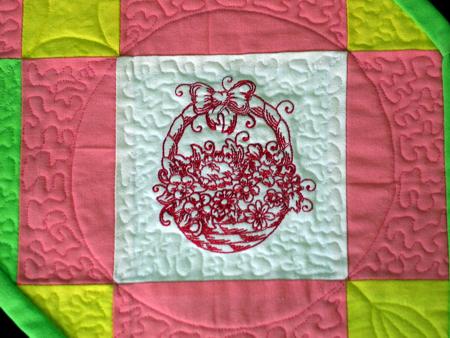
Stabilize the white squares with iron-on cut-away stabilizer. Make the embroidery. Cut away the excess stabilizer.
You can also use polyester craft felt instead of the stabilizer. In this case we recommend to baste the quilt top to the felt in the ditch along the colored borders. After the embroidery is finished, rip the baste and cut away the excess felt around the embroidery.
Now place the backing on a flat surface (table) face down. Cover with batting. Spread your working piece over it.
Pin all three layers together with 1" pins and start quilting. We quilted along the lines of the embroidery and made stippling all over the quilt.
After the quilting is finished, press the work with heavy steam and cut away the excess fabric along the diagonal of the edge squares.
Finish the raw edges with the binding.
We hope that you liked our idea and will come up with many of your own.


