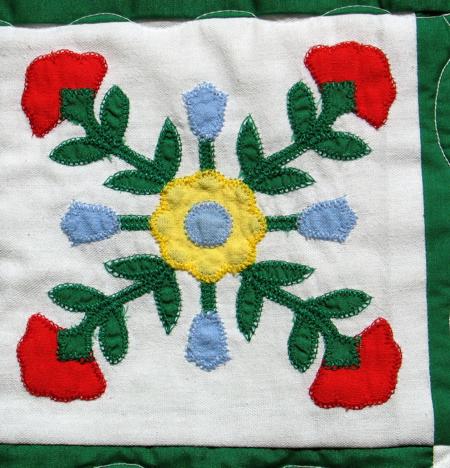
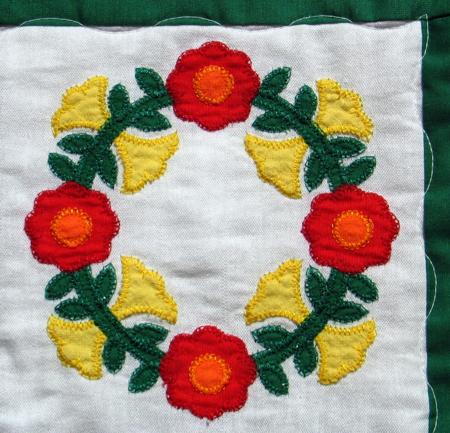
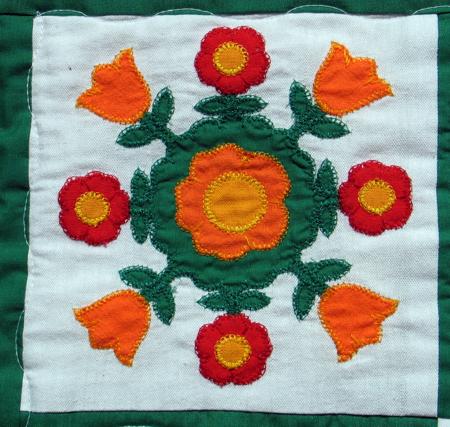
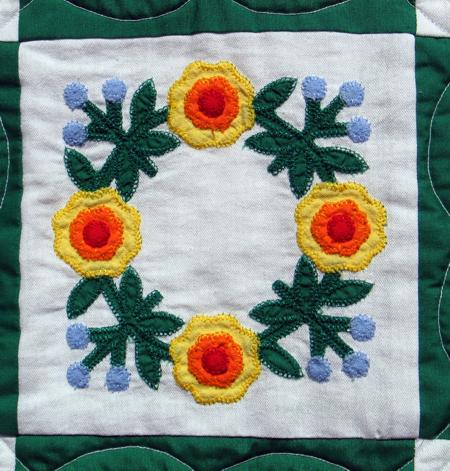
We converted these traditional applique designs for use with a modern embroidery machine. The tried-and-true simplicity of these patterns makes them great for quilting projects.
The embroidery designs are from the Antique Quilt Applique Set
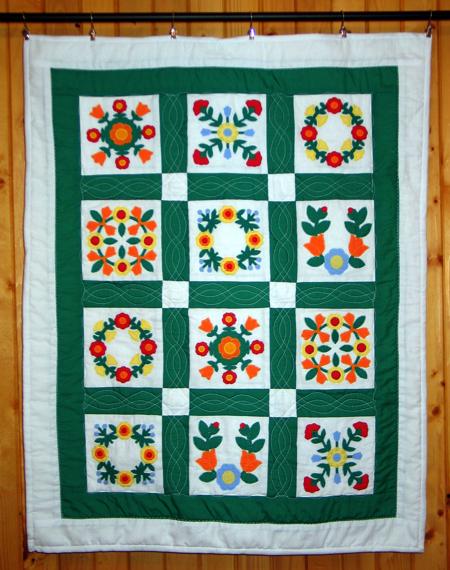
The finished size of the wallhanging is about 34" x 37 1/2".
We used 2 solid fabrics: white for the blocks, outer border and binding (1 1/2 yard), and green for the first border and sashing (about 1/2 yard). You will also need backing and batting.
For the applique, we used scraps of green, red, yellow, blue, and orange fabrics.
All measurements are based on width of 40". 1/4" seam allowance is included.
Out of white fabric, cut 12 squares measuring 6 1/2" x 6 1/2";
6 squares measuring 3" x 3";
2 strips measuring 3" x 34";
2 strips measuring 3" x 37 1/2".
Also cut 4 strips 2 1/2" wide and the length of the width of the fabric for the binding.
Out of solid green fabric, cut 3 strips measuring 3" wide and the length of the width of the fabric. Subcut the strips into17 strips measuring 3" x 6 1/2" ;
2 strips measuring 3" x 32" and
2 strips measuring 3" x 28 1/2".
Stitch 3 white blocks and 2 green strips together in 4 rows as shown.

Stitch 2 small white squares and 3 green strips together in 3 rows of sashing as shown.
Stitch the rows and the sashing together:
Add the green borders. First attach the 32" long strips to the left and right edges, then attach the 28 1/2" long strips to the upper and lower edges.
Add the white borders. First attach the 37 1/2" long strips to the left and right edges, then attach the 34" long strips to the upper and lower edges.
Stabilize the central part of each block with iron-on cut-away stabilizer. Make the embroidery. Cut away the excess stabilizer. The instructions on how to make machine applique are enclosed with the designs.
Now place the backing on a flat surface (table) face down. Cover with batting. Spread your working piece over it.
Pin all three layers together with 1" pins and start quilting. Quilt along the lines of the embroidery, then quilt the blocks, sashing and borders as you like.
After the quilting is finished, press the work with heavy steam and square the work -- all corners should be 90 degrees and opposite sides should be of the same length.
Finish the raw edges with the binding.
Here are more close-ups: