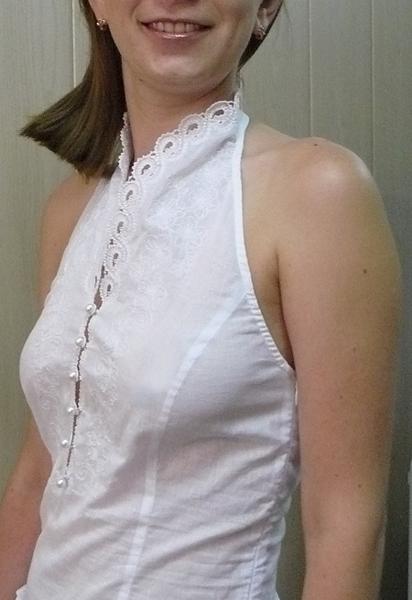
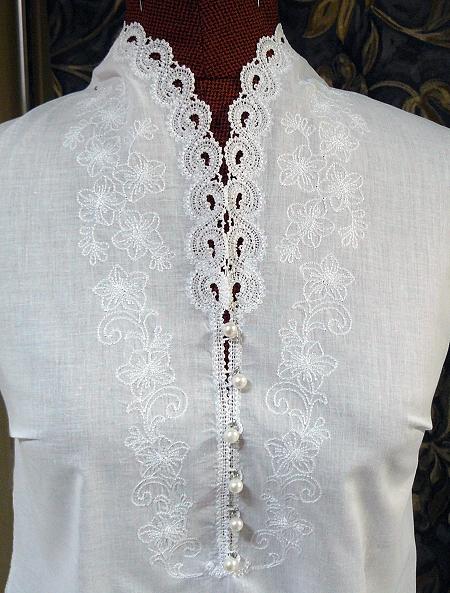
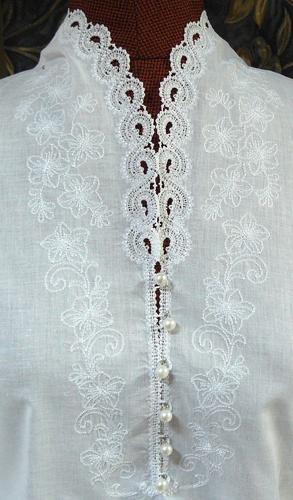
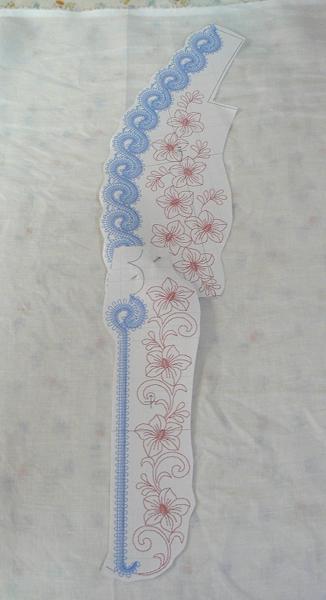
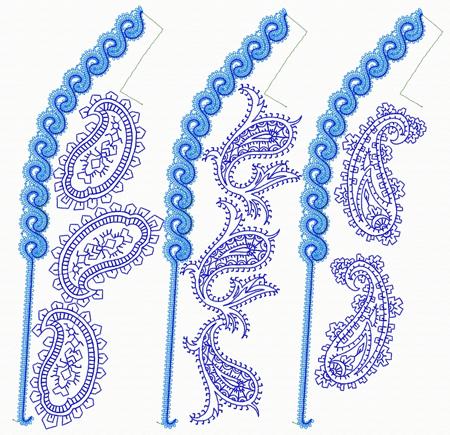
The FSL Battenberg Applique Lace Collar is sold as a set of 4 designs for the mega hoop. These designs are embroidered directly on the fabric of the blouse. This is great if you sew your own blouses, or it can be embroidered on ready-made blouses, but alterations are needed.
Stabilizers: We recommend to use water-soluble mesh, such as Vilene. Vilene D0102 is a non woven dissolvable stabilizer which is imported into the US, is sold in large rolls and is sometimes repackaged under different brand names. Two of these brand names are Wash-Away and Aqua Magic.
Film-like water soluble stabilizers, such as Solvy, are not suitable for Free-Standing Lace embroidery.
Threads: For this project we recommend to use cotton thread both in the bobbin and in the needle. Cotton gives bulk to the lace and makes it look hand-made.
Embroidery polyester and rayon threads will make very fine weblike lace, which will not fall apart, but is too light for our taste. However, you can try these threads, maybe you'll like the look. Just don't forget that colors of rayon threads can run under the influence of the chemicals in the watersoluble mesh.
You can use 40-, 50- or even 60-weight cotton. If you use 40-weight cotton thread for the needle, you can use 50- or 60-weight cotton in the bobbin.
We used Signature machine quilting cotton thread both in the needle and in the bobbin, but similar threads from other companies should work just as well.
Clean your machine from lint after embroidering each part.
Needles: We used size 80/12 metallic needles. Our experience shows that cotton thread used with metallic needles gives less lint. The needles should be sharp, so it's advisable to change them after every project.
Most Importantly: ALWAYS make a test stitch-out of the design and wash away the stabilizer. This helps you to select the threads, needles, stabilizers and settings of your machine correctly. DO NOT embroider several designs in one hoop.
Check the tension! The embroidered lace parts should be of the same size as given in the description on the design page.
We recommend to use light-weight fabrics for this project . You will need a basic shell pattern or you can use McCall's patterns M5556, M5112.
Step One: Cut a piece of fabric for the front of the blouse. Fold it in half and lightly press to mark the central line. Trace the blouse's front.
Step Two: Print the screenshot of all 4 files. Cut them out.
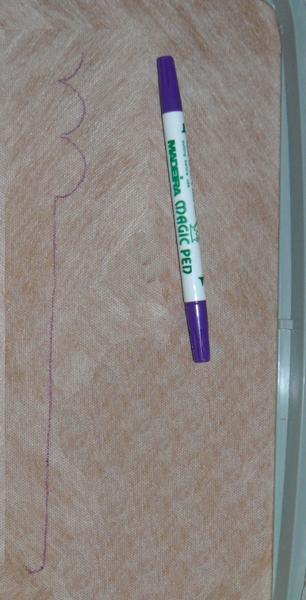
Place the the prints-outs of the left part of the collar along the central line and mark their position.
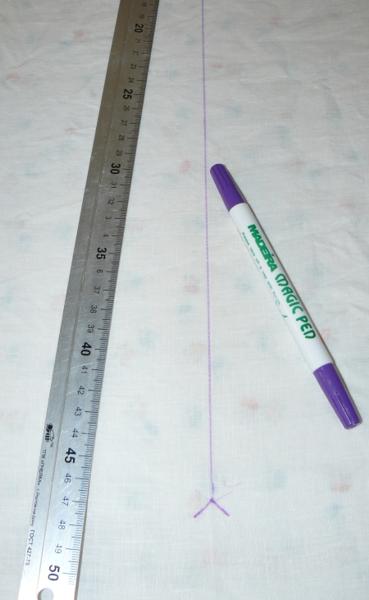
If you have no opportunity to print out the sceenshots, mark the central line of the future blouse with a disappearing or watersoluble marker. Draw a straight line of about 23"-24" (55-60 cm) long.
Cut the fabric to the marked point.
Step Three: Upload the file "ALeft" to your machine. Hoop 2 layers of watersoluble mesh and embroider the first color without thread. With the disappearing or watersoluble marker, trace the perforated mesh.
Note: If your machine does not work without thread, embroider the first color with a polyester thread of the the same color as the cotton thread you'll use for the lace.
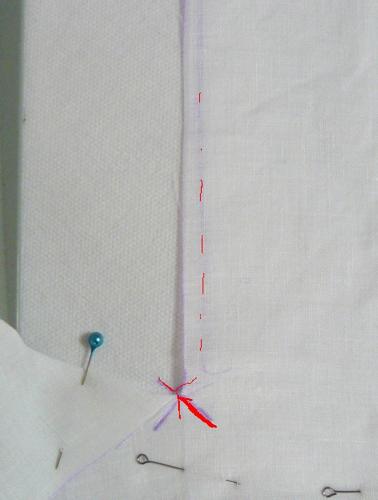
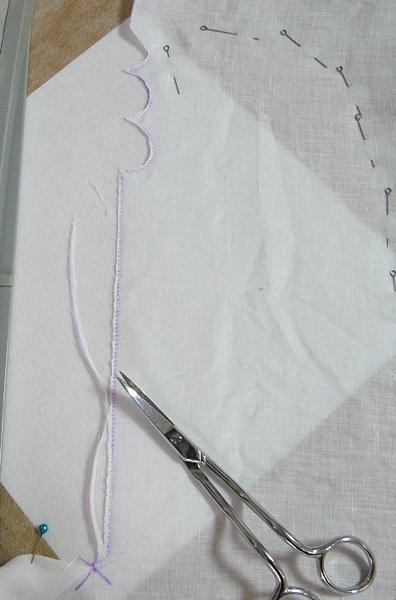
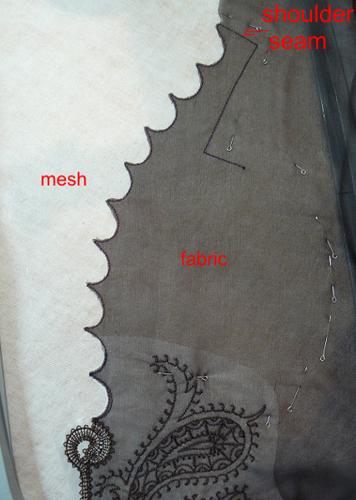
Step Four: Position the right edge of the cut fabric (this will be the left side of the blouse) face up, slightly overlapping the marked line. Align the tip of the cut with the beginning point of the embroidery (see photo below) and either pin or baste the fabric to the mesh.
Return the design to the beginning and start embroidering the first color.
Step Five: Embroider the first color. Take the hoop from the machine and cut the fabric close to the stitches.
Step Six: Return the hoop to the machine and finish the embroidery.
Open the hoop and cut away the mesh.
Step Seven: Hoop two more layers of the mesh. Upload the file "BLeft". Start the machine and embroider the first color without thread. With the disappearing marker or watersoluble marker, trace the perforated mesh.
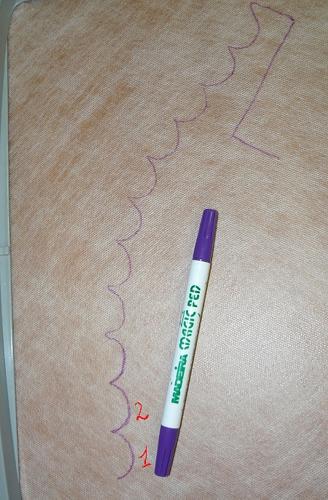
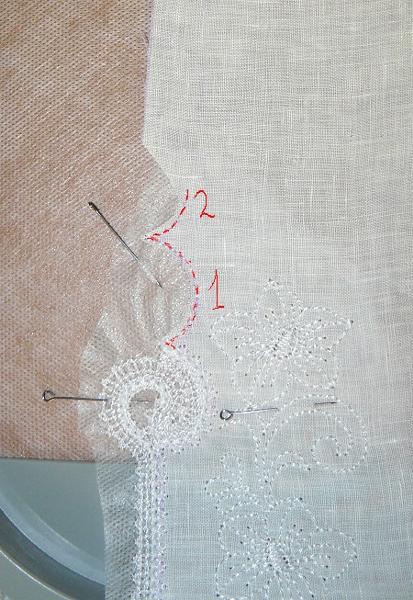
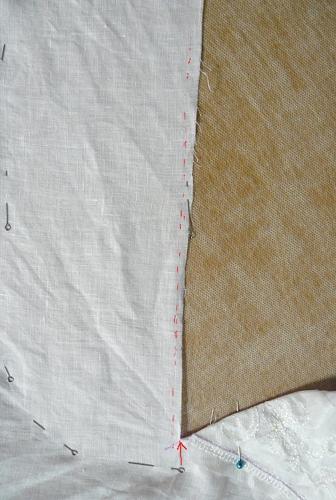
Step Eight: Position the working piece over the mesh so that the indentations marked 1 and 2 on the fabric coincide with indentations 1 and 2 on the mesh. Pin or baste the fabric in place.
Return the design to the beginning and start embroidering from the very first color. After the first color take the hoop from the machine and cut the fabric close to the stitches.
Please note that you need to leave fabric for the seam allowance beyond the shoulder line.
Step Nine: Repeat Steps 3-8 for the right side of the blouse. Start with the file "ARight". After you have created a perforated outline by embroidering the first color without thread, place the left edge of the fabric over the marked line, aligning the end of the cut with the beginning of the perforated outline (as shown below).
Return the design to the beginning and start embroidering from the very first color.
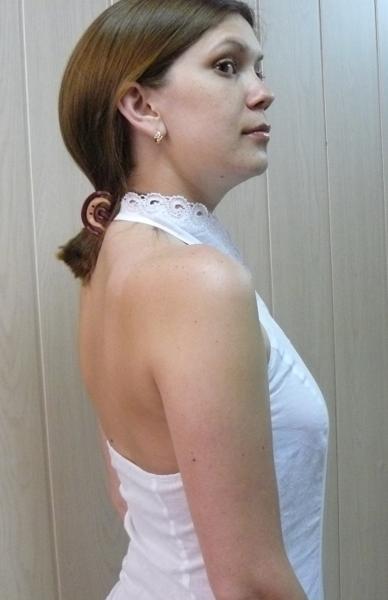
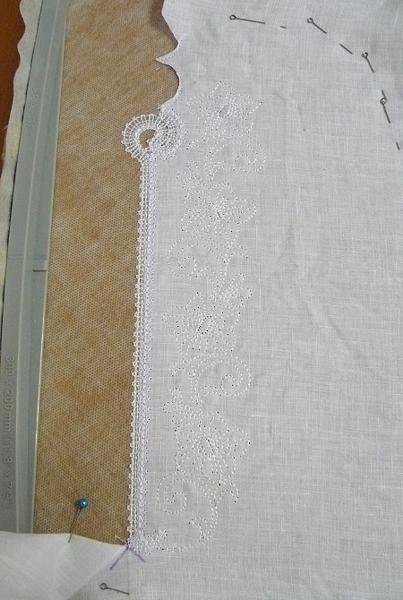
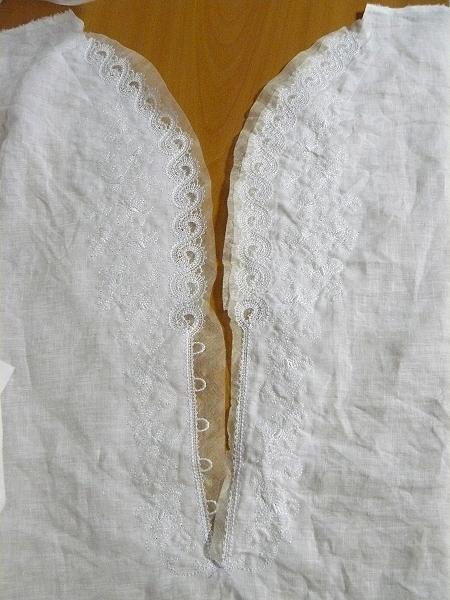
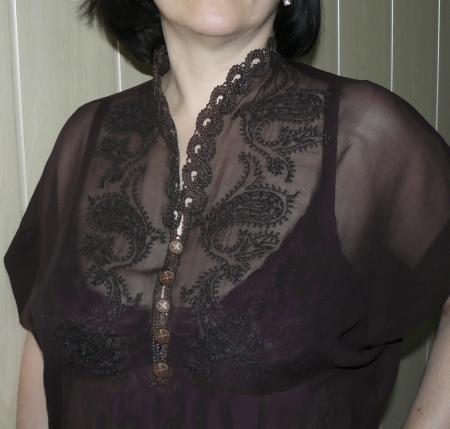
Go through the rest of the steps. After you finish, your work will look like this:
Step Ten: Cut away the stabilizer and thoroughly wash away the remainder. To do this, place the working piece in a bowl with lukewarm water for an hour or two, changing the water several times.
Spread the fabric on a towel and let it air dry. Do not let it dry completely, press while it's slightly damp.
Now you can finish the rest of the blouse.
Instead of the flowers that come with this design, you can embroider any other light embroidery, such as redwork, e.g. Redwork Paisley. You'll need to edit the collar in your machine to position the embroidery correctly.
The blouse below features the Redwork Paisley designs.
Yet another idea for this pattern - it was used to make a sundress.