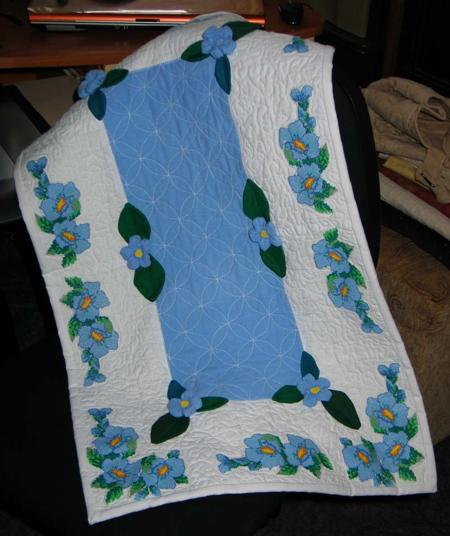
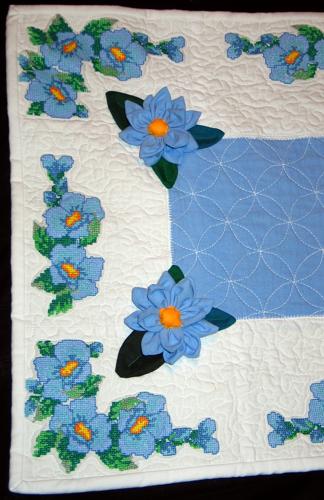
This blue and white quilted tablerunner sets a fresh, joyful Spring mood. It's a great centerpiece for your living room or dining room table. It features the designs from the Periwinkle Linen Set in the cross stitch technique.
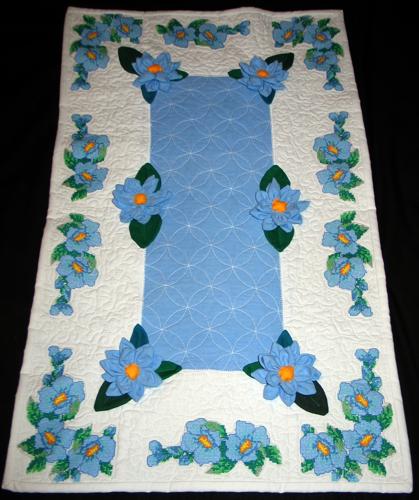
The finished size of the quilt is about 19" x 32".
For the central part, you will need a strip of light blue fabric measuring 8 1/2" x 21 1/2". For the borders with embroidery and binding, you will need about 1 yard of white fabric. You will also need backing and batting, each measuring about 21" x 34".
Out of white fabric cut 10 squares measuring 12" x 12".
Unlike most of our other quilts, we made the embroidery first, then cut out and assembled the pieces.
Stabilize each white square with iron-on cut-away stabilizer.
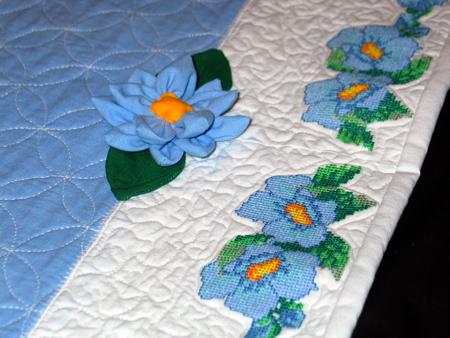
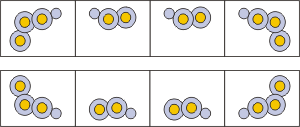
Embroider 6 squares with the long, narrow motif, and embroider 4 squares with the corner motif from the Periwinkle Linen Set . Embroider the corner motif 2 times as it is and 2 times as its mirror image.
Trim the embroidered squares to get pieces 8 1/2" long and 6" wide. The embroidery should not be centered, as you can see from the picture. Leave about a 1" margin on one side of the embroidery and about 2 1/2" on the other.
After you cut out all the pieces, cut away the excess stabilizer.
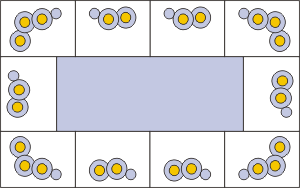
Sew 2 strips embroidered with the long motif to the short sides of the central blue rectangle.
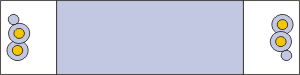
Assemble the long borders out of the strips with the corner motifs and the long motifs.
Sew the new strips to the long edges of the working piece.
Now place the backing on a flat surface (table) face down. Cover with batting. Spread your working piece over it.
Pin all three layers together with 1" pins and start quilting. Quilt the blue center first, then quilt the embroidered borders. We quilted along the lines of the embroidery and made stippling all over the borders.
After the quilting is finished, press the work with heavy steam and square the work -- all corners should be 90 degrees and opposite sides should be of the same length.
Finish the raw edges with the binding.
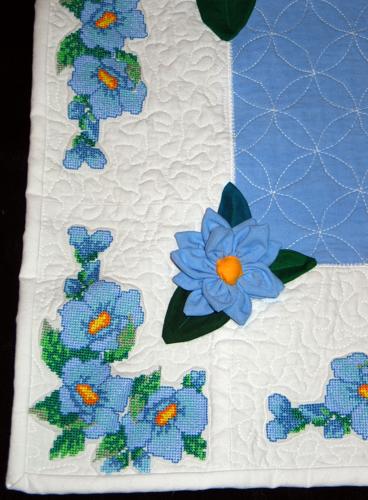
We further decorated the quilts with 3D flowers. We found the instructions for these in the web log of Laura Ingalls Wilder (https://sewritzytitzy.blogspot.com/2008/11/from-annas-gardenfabric-flower-tutorial.html)
They are very helpful.