Step One: Cut out two strips of plain fabric, measuring 20" (500 mm) long. It has to be wide enough for hooping. Then cut a third strip of the same plain fabric, 23" x 5 1/2" (575 x 140 mm).
Step Two: Cut out two more strips, this time of patterned fabric, measuring 20" x 5 1/2" (500mm x 140mm), and a third measuring 23" x 5 1/2" (575 x 140 mm).
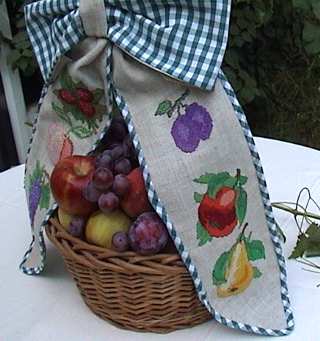
Step Three: Now decided how you want to lay out the designs on your bow. We made the grapes and the plum to be the endmost designs on the bow, because they are oblong in form. The other fruits can be distributed according to your taste.
Step Four: Using a chalk or soft pencil, mark out the position of the designs on the two 20-inch strips of plain fabric from Step One, leaving a distance of 1" (25mm) between them and 3" - 5" (75 -125 mm). Go ahead and embroider the designs! When both strips have been embroidered, cut away the extra fabric. In the end, both strips should measure 5 1/2" (140 mm) wide.


Step Five: Take the two embroidered strips and the 23-inch strip of embroidered fabric and machine-stitch them together where indicated in red. This will be Part A.
Now take the remaining two strips of patterned fabric and the strip of plain fabric and repeat the procedure. This will be Part A.
Iron all the seams.
Step Six: Now lay Part B on your workspace, seam-side up, and place Part A on top of it, with the embroideries facing up. Align the two parts and pin or baste them together.
Now cut the shape you want for the ends of your bow. You might want them rounded, or slanted or even wavy.
When you are satisfied, with the result, you can stitch the two parts together. For this you will need a strip of bias trimming. You can buy a pre-made one, or simply cut one from the patterned fabric. Baste or pin one half of the trimming to the edge of the embroidered strip, then machine-stitch it where indicated in red on the diagram. Fold the other half over the edge and turn the whole thing over. Machine-stitch the trimming in place.
Step Seven: Nearly done now! Just fold the long strip in half, so that the embroidery is facing outwards and machine stitch where indicated in red.
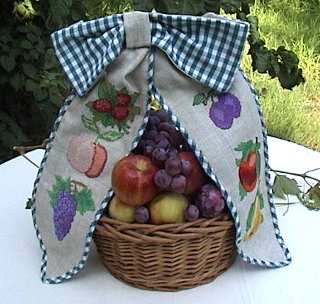
Step Eight: As for the bow itself, unfold the strip you just created and flatten it. Take a piece of ribbon, 1" (25 mm) wide, and tie it around the center of the strip to form the bow. The tails of the ribbon can be used to tie the bow to a basket.