 |
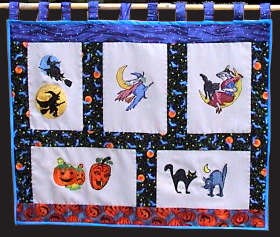
Step One: Chose the designs you want to see on your banner, you will need three embroidery blocks with vertical designs and two blocks with horizontal designs. We have a variety of Halloween designs in our Catalog of Designs. |
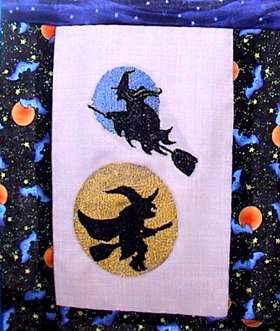 |
We used the following: 1. Two flying witches from Halloween Set I (which you can see on the left). |
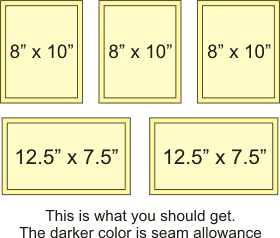 |
Step Two: Stitch out your designs so that you have 3 embroidered rectangles with vertical designs measuring 8" x 10", which includes a seam allowance of 1", and 2 rectangles with horizontal designs measuring 12 1/2" x 7 1/2", which also includes a seam allowance of 1". |
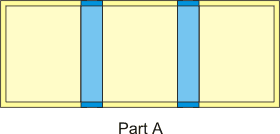 |
Step Three: Out of patterned fabric cut out 2 strips measuring 10" x 3" including a seam allowance of 1". Stitch the strips to the rectangles with the vertical designs. This is Part A. |
 |
Step Four: Out of the same patterned fabric cut a strip 7 1/2" x 3" (1" seam allowance included) and stitch it to the rectangles with horizontal design. This is Part B. |
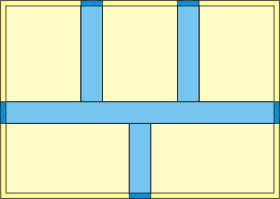 |
Step Five: Again using the same patterned fabric cut a strip measuring 3" x 26" and use it to stitch Parts A and B together. |
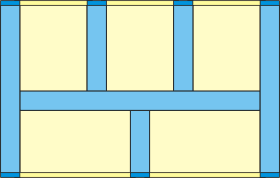 |
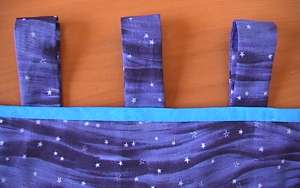
Step Six: Still working with the patterned fabric cut 2 strips measuring 18 1/2" x 3" and stitch one onto either side. |
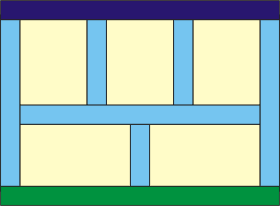 |
Step Seven: Now using two different kinds of patterned fabric cut 2 strips 29" x 3" for the upper and lower edges. For the upper strip we used fabric showing a cloudy night sky. For the lower strip we used a fabric with Jack-O-Lanterns. Stitch the strips to lower and upper edges of your banner. |
 |
Step Nine: Cut out a piece of felt for the backing, measuring 29" x 21 1/2". Place the backing on an even surface and cover it with your embroidered piece. Stitch (or machine stitch) both layers together along the seams. |
 |
Step Ten: Prepare a matching bias strip (you will need about 105") and finish the raw edges with it. |
 |
Step Eleven: Cut out 10 strips measuring 2" x 4". Make them into loops and stitch them to the upper edge. |
 |
Step Twelve: If you wish, make the inscription HAPPY HALLOWEEN on the reverse side of your banner. You can paint it or cut the letters out of orange felt and glue them on using craft adhesive for fabric. |
|
|
Step Thirteen: Put your banner on a rod. |


