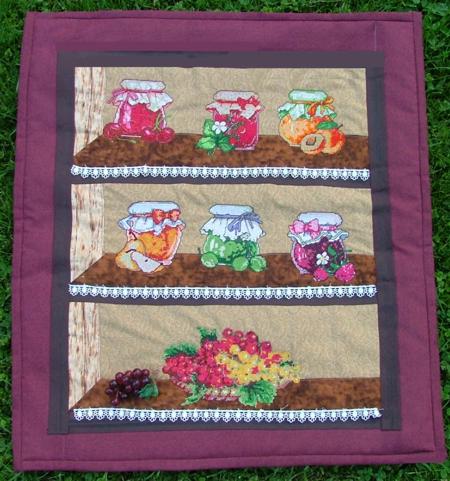
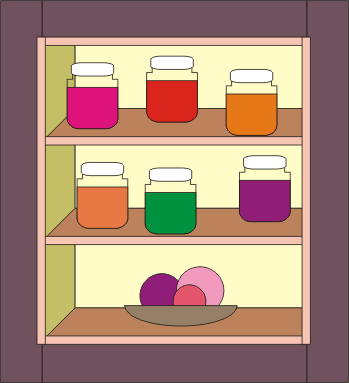
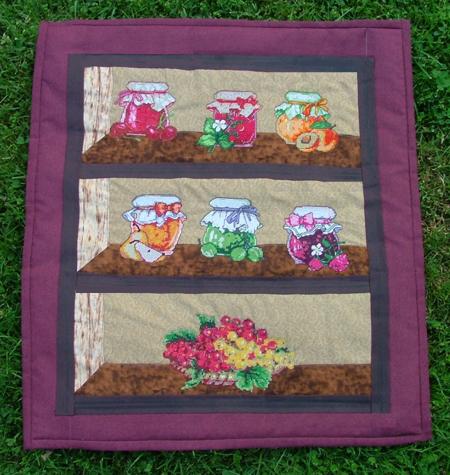
Using our popular Jam Jars Set I and Set II, and the design Plate with Currant, we made this mini quilt, meant to resemble a kitchen cupboard. We hope that you like it and send us your own mini-quilts.
The finished size of the quilt is 21" x 23".
You can purchase this wall quilt from our Etsy store!
|
|
For this mini quilt we used four different 100% cotton fabrics:
1. about 9" x 17" of fabric with a dark wood texture;
2. about 9" x 7" of fabric with a light wood texture;
3. about 15" x 15" of solid or lightly-patterned dark cream fabric;
4. about 24" x 14" of maroon fabric. Of course, the choice of fabric is up to you.
You will also need one pack of dark brown bias tape, 22" x 24" piece of Pellon Peltex 71 stabilizer, fusible tape, one pack of dark brown bias tape and maroon quilt binding.
|
|
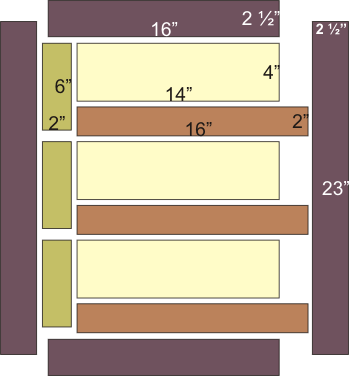
| Step One: Pre-wash all the fabrics you are working with and iron them. Cut out the needed parts as instructed below. The measurements do not include seam allowance. Please do not forget to add around 1/2" seam allowance to every side. Out of the dark wood-textured fabric, cut 3 strips measuring 2" x 16".
Out of the light wood-textured fabric, cut 3 strips measuring 2" x 6".
Out of the cream fabric, cut 3 rectangles measuring 4" x 14".
Out of the maroon fabric cut 2 strips measuring 2 1/2" x 16" and 2 strips measuring 2 1/2" x 23".
|
|
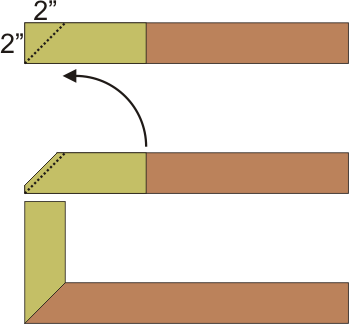
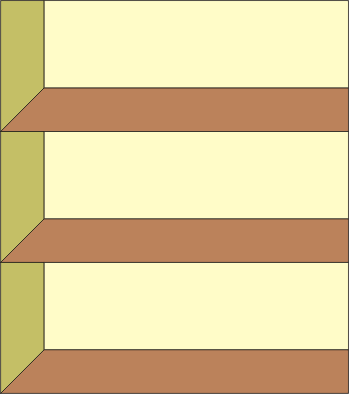
| Step Two: Start assembling the mini quilt. Place one of the 2" x 6" strips over one of the 2" x 16" strips. Measure 2" from the corner, draw a diagonal, as shown in the diagram, and machine-stitch along it. Trim the excess fabric about 1/8" from the seam. Unfold the seam and press. Repeat with the other 4 strips. You should get a total of three such angles. |
|
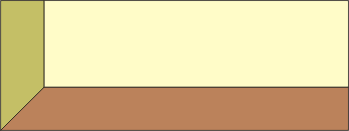
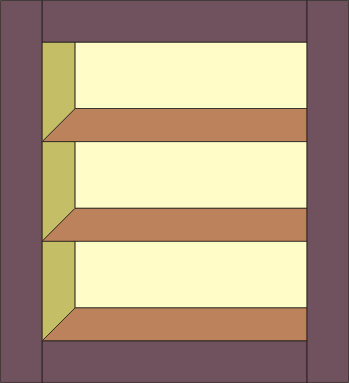
Step Three: Stitch one of the dark cream rectangles to one of the angles, as shown on the diagram. Press the seams open.
Repeat with the other 2. Assemble the three "shelves" into one piece. Press all seams open. |
|
Step Four: Stitch the maroon strips to the "cupboard". First stitch the shorter strips to the top and bottom, then stitch the longer strips to the side edges.
Press all seams open. |
|
| Step Five: Take your 22" x 24" piece of Pellon Peltex 71 stabilizer. Attach the stabilizer (it is self-adhesive) to back of the working piece. Using a hot dry iron at wool setting, press the stabilizer to the fabric. |
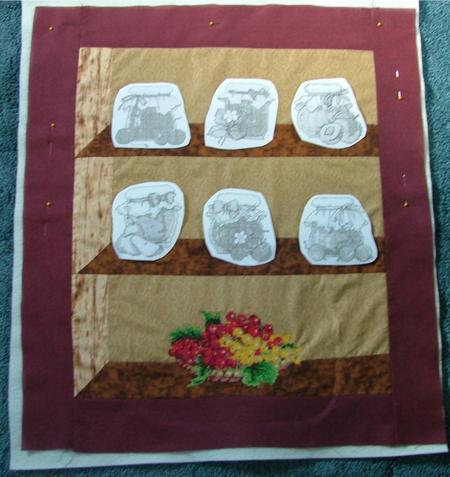
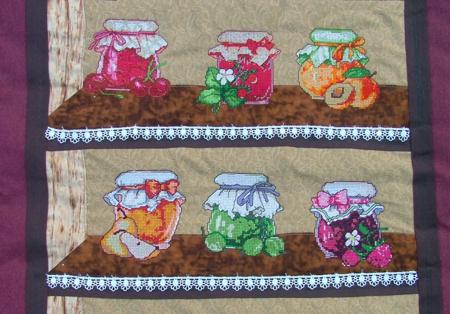
| Step Six: Embroidering. Using print-outs of the designs, mark the spots where you would like to have the embroidery. Hoop the working piece and start embroidering. Embroider the Plate with Currant first. You will need a large hoop for it. |
|
| When finished, press the working piece and embroider the jars on the second shelf, then on the third shelf. Press. |
|
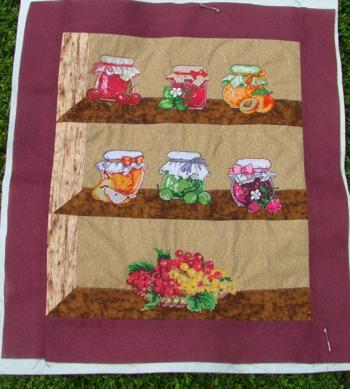
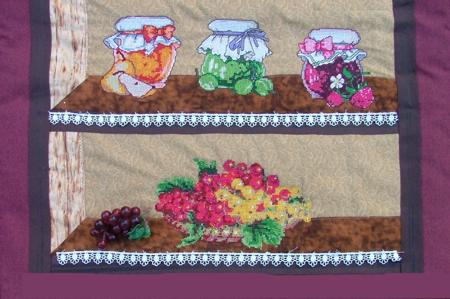
| Step Seven: Take the dark brown bias tape and fusible tape. Cut the bias tape into 4 16" long pieces and 2 19 1/2" long pieces. Place the bias tape on an ironing board right side down. Cover with the fusible tape, net side down and paper side up and fuse with a hot iron. Leave to cool. Peel off paper backing. Place the bonded bias tape in desired positions, as shown on the diagram. The bias tape is meant to give the "shelves" a more 3-dimensional appearance. Iron to adhere the tape into place.
|
|
| Step Nine: Finish the raw edges with matching quilt binding. You are basically finished. |
|
| Step Eight: You can also decorate the quilt with 3D elements - small plastic fruits and lace to trim the shelves. Here are some more close-ups: |
|
|
|
We hope that you like our project.
|
|
|


