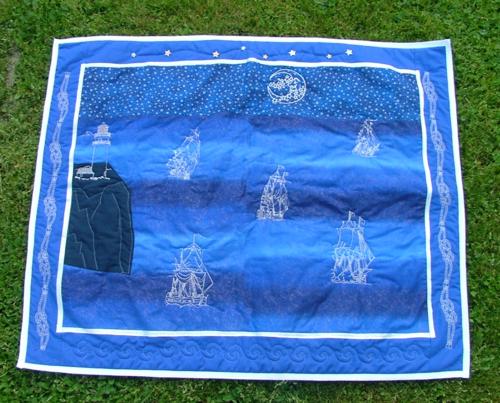
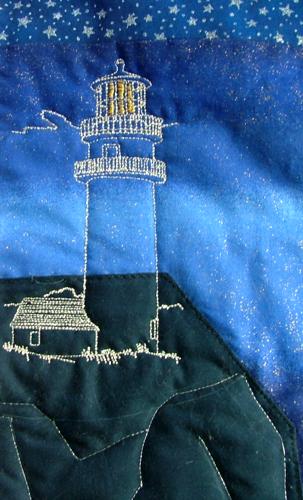
Using Redwork designs from the sets Sailing Ships, Lighthouses, Marine Knots, and Sun and Moon, we put together this lovely wall quilt, which we are planning to use as a Father's Day gift.
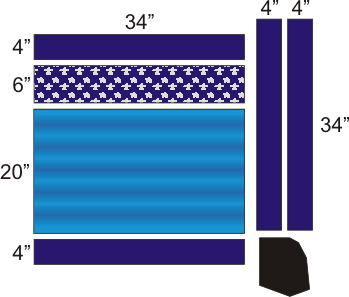
We used 100% cotton fabric. You will need a piece of about 21" x 35" of unevenly shaded blue fabric; a 7" x 35" strip of silver and blue star-patterned fabric; a piece of about 20" x 35" of matching plain blue fabric; about 7" x 11" of navy blue fabric; about 42" x 36" of fusible polyester batting; about 42" x 36" of cotton backing; quilt binding; 1/4" wide metallic silver ribbon or bias tape; 8-12 star-shaped decorative buttons; and silver metallic thread for the embroidery.
Step One: Out of the unevenly-shaded blue fabric, cut a piece measuring 26" x 34". Out of the star-patterned fabric cut a strip measuring 6" x 34". Out of plain blue fabric, cut 4 strips measuring 4" x 34". Out of plain navy blue fabric, cut a shape that looks like a rocky shore. Measurements DO NOT include seam allowance. Please add 1/4" or 1/2" for seams on each side.
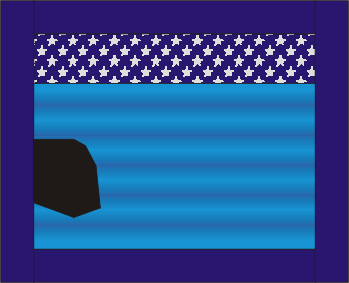
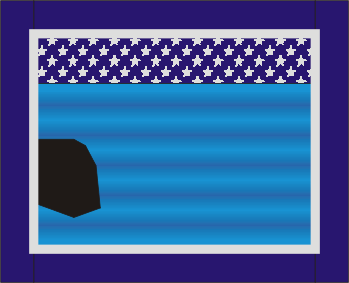
Step Two: Assembling the top of the quilt. Place the "rock" on the left side of the large piece and zig zag it in place. Machine-stitch all the other parts together as shown on the diagram. Press all seams open.
Step Three: Spread the backing on a large even surface (table or floor), cover with batting, and cover with the quilt top. Baste all three layers together, starting from the middle of the quilt. Iron both from the back and the front, to attach the fusible batting. Remove the basting threads.
Step Four: Using print-outs of the designs, mark the places where you want them to be. Hoop and embroider the designs of the lighthouse, the ships and the moon, one by one, starting from the middle of the quilt. You do not need any additional stabilizer.
Step Five: With a removable marker or white chalk, draw the lines of the rocks. Quilt along these lines by hand or with a machine.
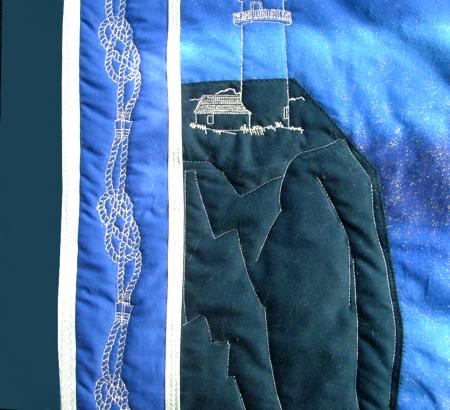
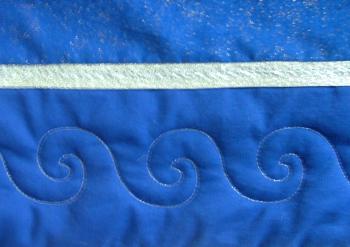
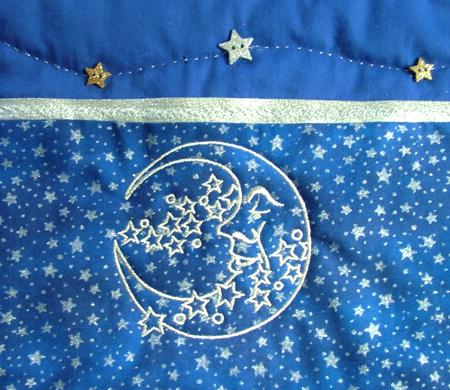
Step Six: Pin the silver metallic ribbon over the seams that separate the main field from the borders. Using a zig zag or any decorative stitch availablle on your machine, stitch the ribbon in place.
Step Seven: Quilt the borders. We used the designs of the marine knots to decorate and quilt the left and the right border. If you have trouble hooping the edges, baste a piece of scrap fabric to the edges and take them off again after you finish the embroidery.
The lower border was quilted with a decorative "wave" stitch, which is included in our Brother machine. The upper border was hand-quilted and we stitched some decorative star buttons onto it.
Step Eight: Now cut away all excess batting and backing, make all edges even and finish them with the quilt binding. The wall quilt is finished and we hope you like it.
You can find all the designs that were used in the Redwork/Nautical section of our catalog.


