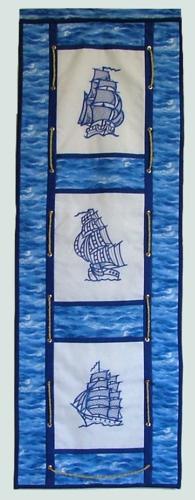
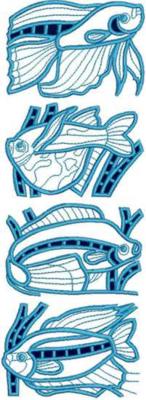
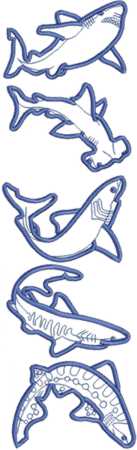
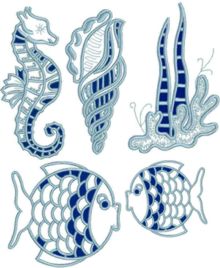
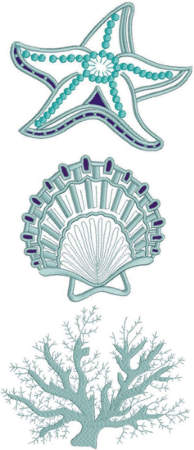
Step One: Make the embroidery on white fabric. You do not need to stabilize the fabric, but tighten it well in the hoop. When the embroidery is ready, press it. Draw 8" x 10" rectangles around the embroidery and cut them out, leaving 1/2" on each side for seams.
Step Two: On the patterned fabric, draw 4 rectangles measuring 3" x 8". Cut them out, leaving 1/2" on each side for seams. Stitch them to the embroidered pieces, linking them. Press to the side of the patterned fabric.

Step Three: Cut six 9" long pieces of bias tape and slip-stitch them over the seams. Press.

Step Four: Out of patterned fabric cut out two rectangles measuring 42" x 3", leaving 1/2" seam allowance on one of the long sides. Stitch them to the sides of your working piece. Press the seams to the patterned fabric.
Step Five: Out of bias tape cut two pieces 42" long and slip-stitch them over the new seams. Press.
Step Five: Place a piece of felt (43" x 15") on the table. Cover it with your embroidered piece. Pin both layers together. Quilt along the bias tape. Cut the away excess felt at the edges.
Step Six: Finish the raw edges with the bias tape.
Step Seven: Out of patterned fabric cut out a rectangle measuring 4" x 15". Finish the short edges. Fold in half lengthwise, face side inwards. Machine stitch along the long side to form a tube. Turn it inside out. Press.
Step Eight: Stitch lengthwise, 1" away from the seam.
Step Nine: Slip-stitch the tube to the upper edge of the hanging. Slip-stitch a loop in the center of the top edge on the back of the hanging.
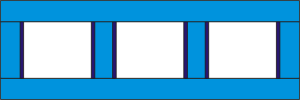
Step Ten: Mark the placement of the grommets, 3 3/4" apart -- the grommets are marked in yellow on the diagram. Insert the grommets, following the manufacturer's directions.
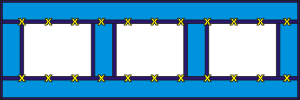
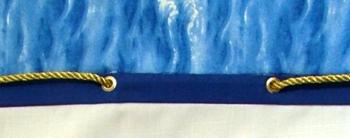
Step Eleven: Thread the golden metallic cord through the grommets.
Step Twelve: Insert a rod into the tube on the upper edge.
The wall hanging is ready. Enjoy!
 |
 |
 |
 |
 |
 |


