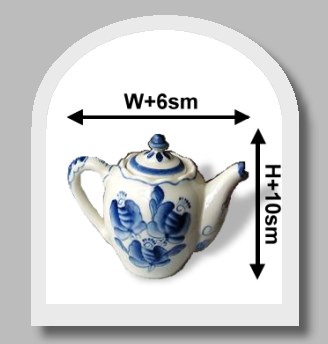
Step One: First you will need to make a paper pattern, based on your teapot. You will need the following measurements:
1) the height of your teapot. Add 4" (10cm) to the result.
2) the length from handle to spout. Add 2 1/2" (6 cm) to the result.
Now draw a rectangle on paper, making the upper angles rounded using a set of curves, a compass or simply by hand. Cut out the pattern.
Step Two: Trace the paper pattern onto white fabric, making two copies: one for the cozy's front and and one for the back.
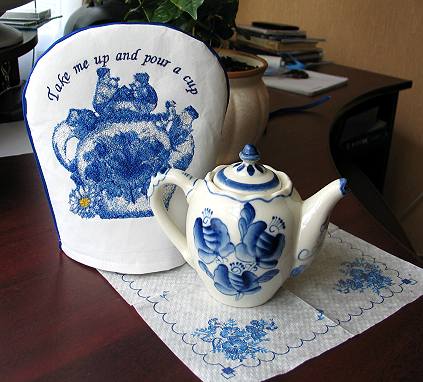
Embroider both with designs of your choice. If you wish, you can embroider an inscription similar to ours. If your embroidery software does not support writing, you can download it here free of charge.
|
|
|
|
|
|
|
|
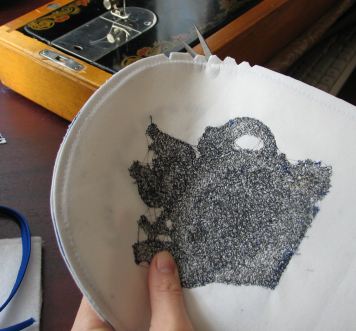
Step Three: Press the embroidery. Cut out the front and the back of the cozy, leaving 1" of seam allowance.
Place the back of the cozy on a table face up and baste or pin the welting or corded piping along the edges. Now cover the back of the cozy by the front, face down. Baste or pin the two parts together. Machine-stitch, making sure to leave the bottom open. Use a zipper foot.
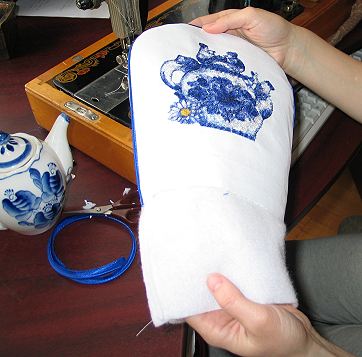
Step Five: Make small cuts on the rounded parts, as shown on the photo. Turn the cozy inside-out.
Step Six: Using the paper pattern from Step One, cut out lining and batting for the front and the back; they shoud be 1/2" shorter than the outer part of the cozy. Stitch the front and the back of the lining together, leaving the bottom open. Repeat the same procedure with the batting. (Do not turn them inside-out!) Place the lining inside the batting, then place both lining and batting into the cozy, as shown on the photo.
Step Seven: Turn the lower raw edges of the cozy inside and slip-stitch them to the lining.


