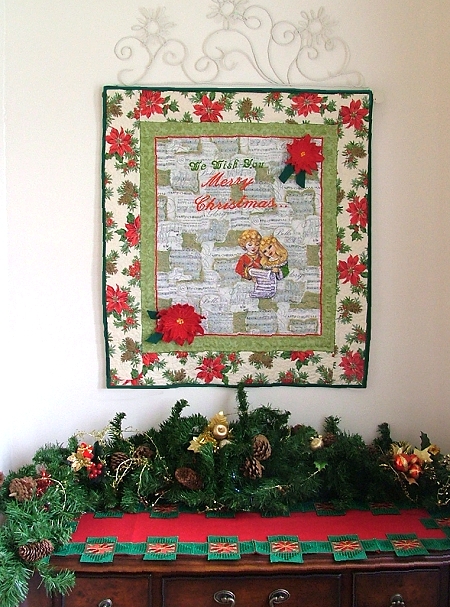
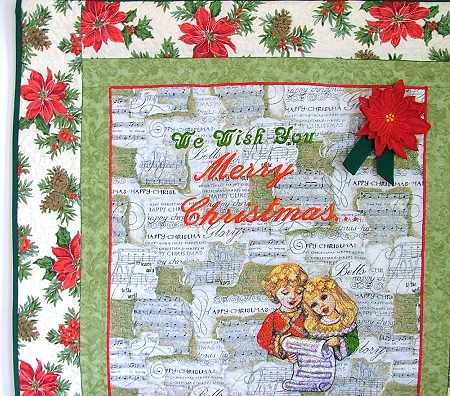
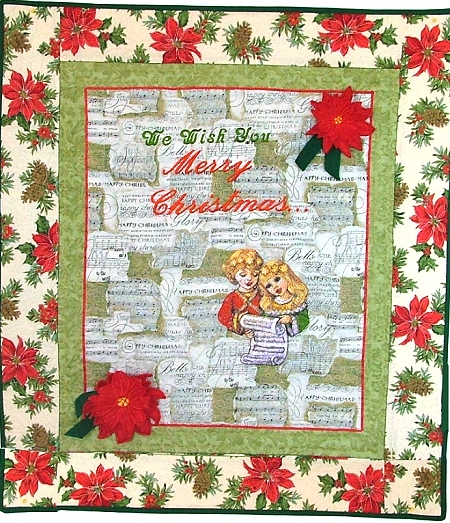
For this wall hanging, which we displayed in our entrance hall, we used the designs Caroling Children and 3D Poinsettia Applique Set.
You can purchase this wall quilt from our Etsy store!
|
|
| We used a line from the popular Christmas carol "We wish you Merry Christmas'. The finished size of our wall hanging is 17" x 26". |
All measurements are based on 42" wide fabric and 1/4" of seam allowance.
You will need:
- a fat quarter of cotton fabric for the center part with embroidery (we used a fabric with notes and lines from famous carols on it in black, silver and olive green);
- 8" of a second cotton fabric for the inner border;
- 14" of a third cotton fabric for the outer border.
- 7" of red fabric for the poinsettias;
- 1 pack of ready quilt binding, or 6" of fabric for binding;
- about 20" x 28" of batting;
- about 20" x 28" of cotton for backing;
- tear-away stabilizer for embroidery.
|
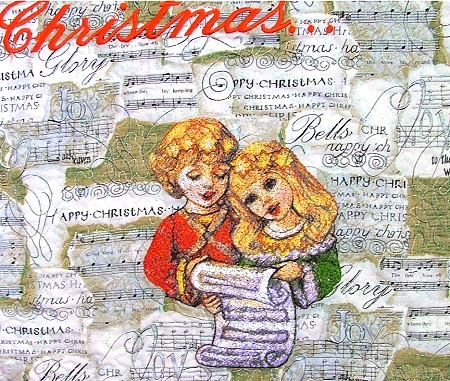
| Step One: On the wrong side of the fat quater, with a removable marker, mark a rectangle measuring 15" x 18". Turn the fabric to the face side, hoop with stabilizer and make the embroidery within the marked lines. Embroider the children first. |
|
| Unhoop. Press the working piece, re-hoop the fabric and embroider the words. Unhoop and press. |

|
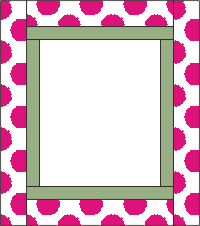
| Step Two: Trim the piece with embroidery to a size of 14 1/2" x 17 1/2". For the first border, cut 2 strips measuring 2" x 17 1/2" and 2 strips measuring 2" x 17". For the outer border cut 2 strips measuring 3 1/4" x 17" and 2 strips measuring 3 1/4 x 26". |
| Step Three: Assemble the top according to the diagram below: |
|
| Step Four: Spread the backing on the table, cover it with the batting, and cover the two layers with the top. Pin all three layers together and quilt. We used stippling for the embroidered center, then quilted all borders in the ditch and quilted along the poinsettia flowers on the outer border. |
| Step Five: Measure and trim the raw edges. Then finish them with binding. |
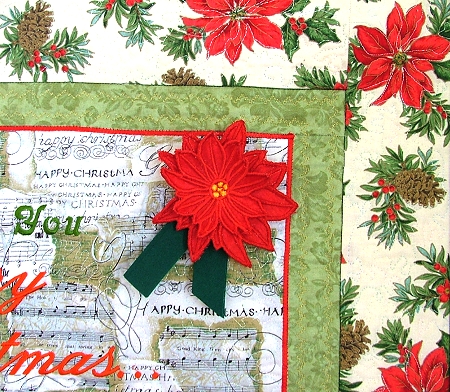
| Step Six: Make two 3D Poinsettia flowers in accordance with the instructions given on the page of the design and stitch them onto the wall hanging. |
|
| Step Seven: Make a sleeve for the pole and stitch it to the back of the quilt. |
|
|
We hope that you liked our idea!
|
|
|
Back to Projects Page
|


