Please read the General Guidelines and Step-by-Step Guide to Embroidering Crochet-Style Free-Standing Lace first
It's possible to assemble crochet lace in two ways - either to dissolve the stabilizer first and stitch the parts together next, or to stitch the parts together first and dissolve the stabilizer next. Both ways have their pros and cons.
Please try them both and choose which works better for you.
Note: Never use hot water - cotton threads shrink substantially and colors may run in hot water. Vilene dissolves well in slightly warm water. If you need very soft lace, leave it in the bowl of warm water for an hour, or even longer, and change the water several times. If you need stiffer lace, rinse the stabilizer by dipping your embroidery in the warm water for several moments.
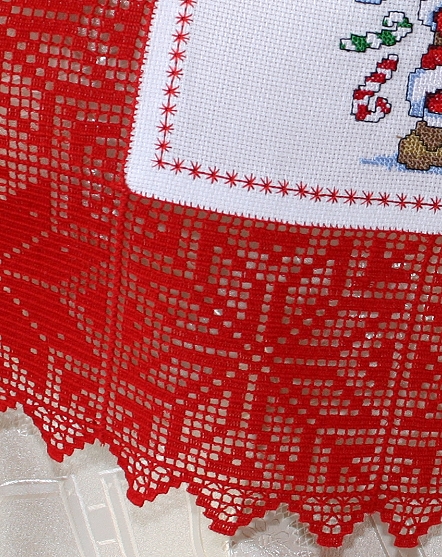
After dissolving the stabilizer, spread the embroidery flat on an even surface and leave to air dry. Press with steam.
If you prefer to stitch first, and to dissolve later, follow the steps below.
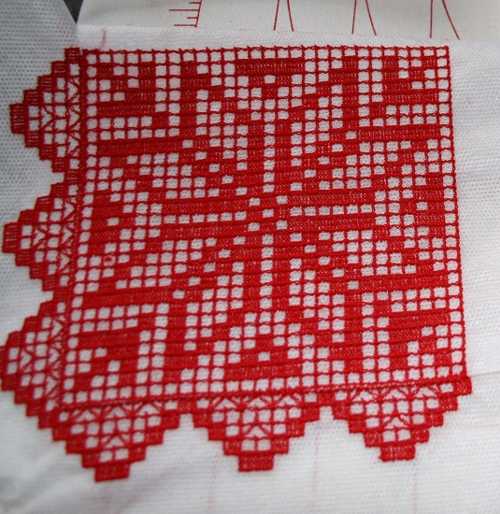
Step One: Trim the Vilene to about 3/4" from the edge of the design.
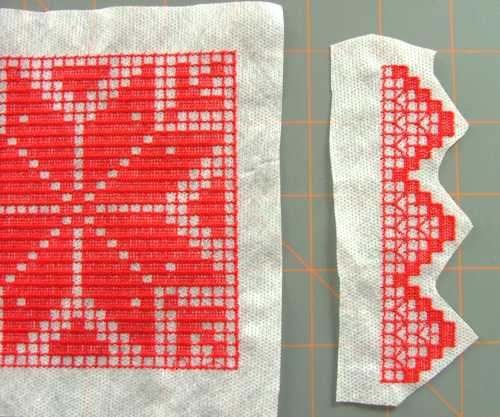
Step Two: Take the first design and lay it flat. Take the second design and fold the Vilene back along the edge of the design.
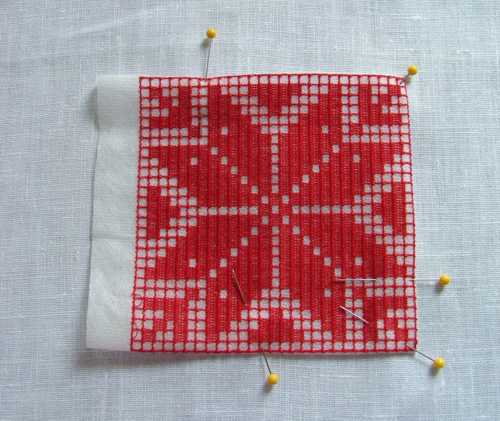
Now align the edges of the designs. Use pins to fix them in place, if you like.
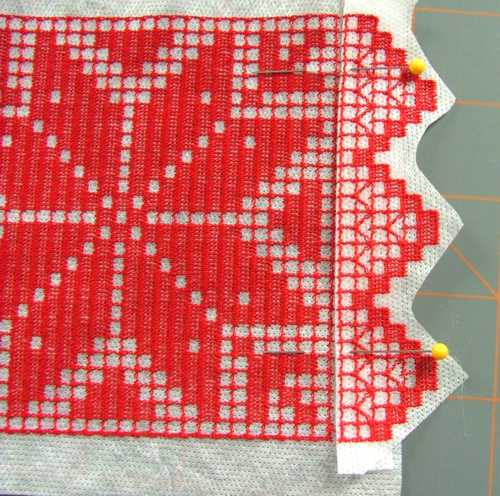
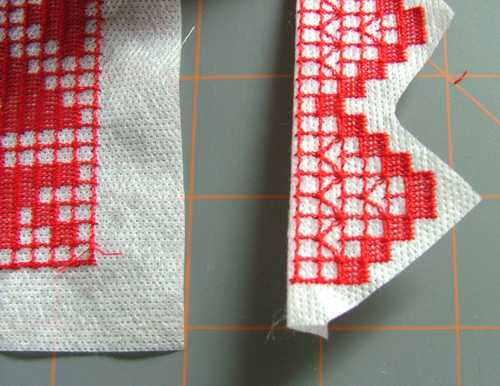
Step Three: Choose the zig-zag stitch on your machine. Place the designs under the presser foot. Using the same thread as in the embroidered designs both for the needle and for the bobbin, stitch, making sure that the stitches catch both patterns.

Stitch other patterns together in the same way.
If you dissolved the stabilizer, press the lace with steam and place it where you would like to have your insert. Pin. Then using a dense zigzag, and the same thread with which you embroidered the lace, stitch the design to the fabric
If you did not dissolve the stabilizer, fold back the Vilene on the design and pin in place. Then, using a dense zig-zag, stitch the design to the fabric. Choose the same thread as the one you used for the design.
After you attach all the FSL to your working piece, place it into a bowl of warm water to dissolve the stabilizer, if you have not already done so. Change the water several times. Lay the project flat, spread it evenly, take up the excess water with a cloth (towel) and leave to air dry. Press with steam.
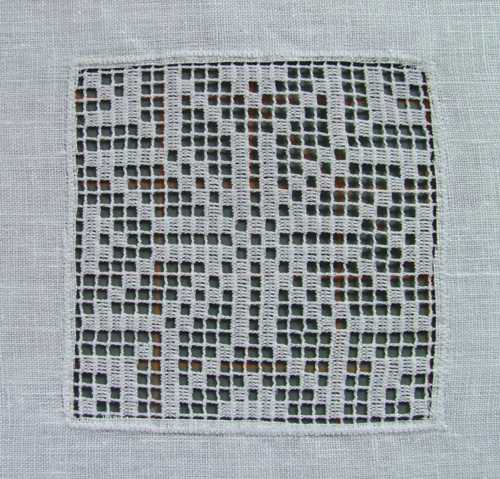
Turn the working piece to the wrong side and, using very sharp small scissors, cut away the fabric under the insert. The wrong side shoud look like the picture below:
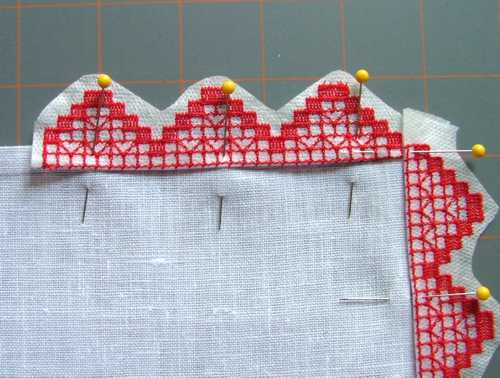
If you're attaching crochet-style FSL to the edge of the fabric, draw lines about 3/4" from the edges with removable fabric marker.
Folding back the Vilene, place the designs along the marked line, attaching with pins, if necessary. Then, using a dense zig-zag, stitch the design to the fabric. Choose the same thread which you used for the design.
If the stabilizer is already dissolved, just attach the lace along the marked lines using zig-zag.
Place the assembled project into a bowl of warm water to dissolve the stabilizer. Change the water several times. Lay the project flat, spread it evenly, take up the excess water with a cloth (towel) and leave to air dry.
Turn the working piece to the wrong side and, using very sharp small scissors, cut away the excess fabric under the lace. Press with steam.