Mobile Menu IconMenu
Advanced Embroidery Designs -- Online Center for Machine Embroidery Designs
Enter code ArborDay24 to get Crescent Moon Tree FREE with Any Order! Shop Now!

Keepsake Bags for Small Gifts

( In-the-Hoop Project )

These small gift bags are fun to make and fun to receive. You can pack them with sweets or any other small items. We used the Gift Bag in the Hoop designs and the Kitty Got his Christmas Gifts, Christmas Bells and Santa with Letter from the Christmas section of our catalog

( In-the-Hoop Project ) image 1

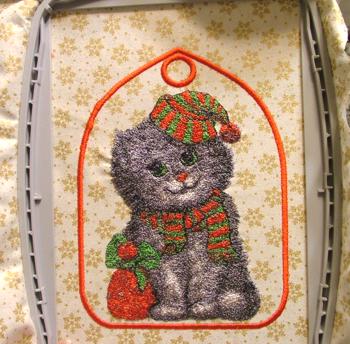
Step One: On your computer or in your machine, combine a design with the bag frame. Embroider the design first.

If you want the bag to have a lining, place the lining fabric under the hoop after you finish the design. Then, embroider the frame.

Step Two: Take the embroidery out of the hoop and cut away the excess fabric.

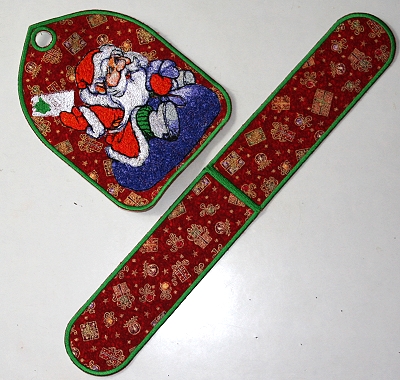
Step Three: Embroider the back and sides of the bag. If you like, you can embroider another design or the name of the giftee on the back. Take the embroidered parts from the hoop and cut away the excess fabric.

( In-the-Hoop Project ) image 2

Assembling

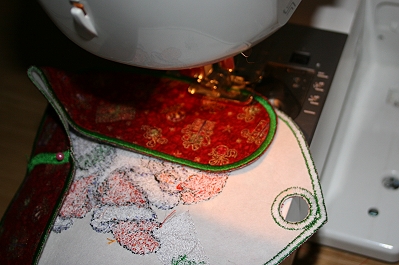
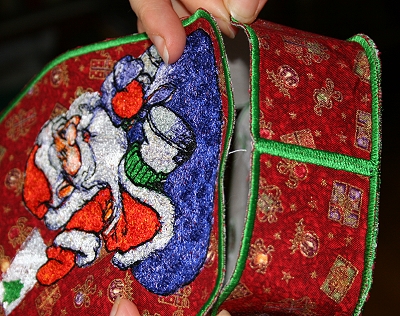
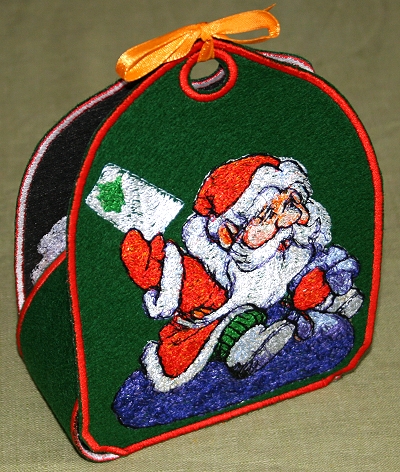
To assemble a bag with rounded sides, first stitch the two sides together. Find the middle point on the bottom edge of the face panel. Pin the sides and the face panel at that point.

( In-the-Hoop Project ) image 3

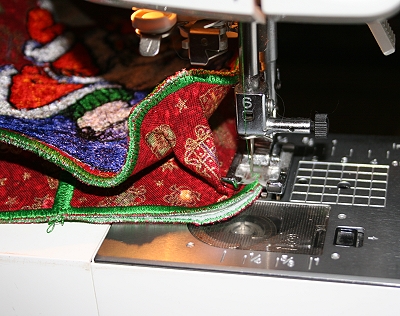
Place the parts wrong side to wrong side. Using a zig-zag stitch, attach the parts to each other over the edge.

( In-the-Hoop Project ) image 4

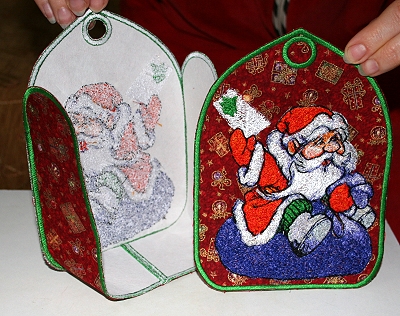
Align the second panel with the bag's sides and stitch together as shown on the photos.

( In-the-Hoop Project ) image 5

( In-the-Hoop Project ) image 6

( In-the-Hoop Project ) image 7

( In-the-Hoop Project ) image 8

This bag is ready!

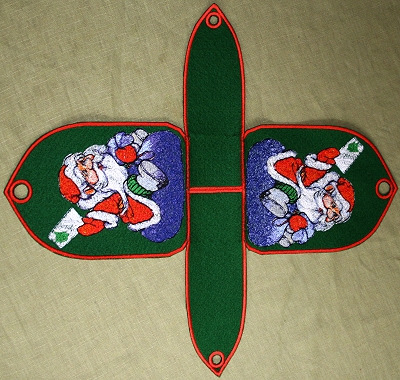
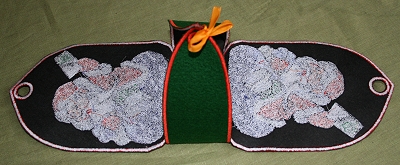
The second type of bag, with side panels that have holes at the top, is much easier to assemble. Just stitch the sides together and then stitch them to the front and the back panels. You can use a dense zig-zag or any other bridging stitch.

( In-the-Hoop Project ) image 9

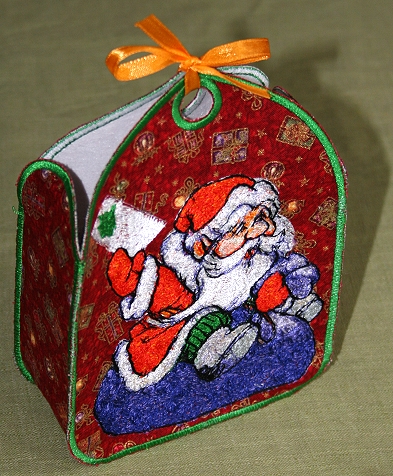
Tie the side panels with a small ribbon.

( In-the-Hoop Project ) image 10

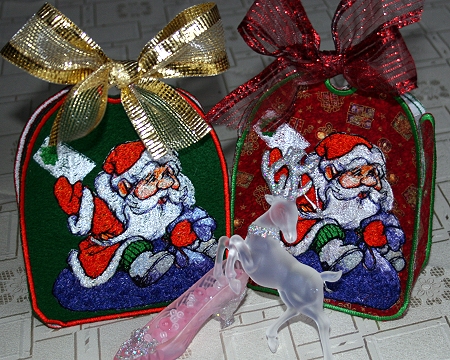
Tie the front and back panels with another ribbon.

( In-the-Hoop Project ) image 11

The second bag is ready! We hope that you liked our project. Enjoy!

( In-the-Hoop Project ) image 12

These are some of the designs which can be used in this project:
Santa with Letter
Santa
Bear Santa
Kitty Got His Christmas Gifts
Christmas Bells
Bullfinches on a Tree

Back to Projects Page

Mailing List
Enter your e-mail for news, discounts and exclusive special offers.


Find us on Twitter

Special Offers
Bonus design on all orders over $25
Coffee Coasters In-the-Hoop

Shop Now!

Announcement
Best Project Contest
The results are in!
Featured Project
Check out our latest project Birds and Blooms Quilted Tablerunner
Tutorials
Never heard of photo stitch? - Check out our What is Photo Stitch? page
Most Popular Designs
|| Home || Shop || Free Designs || New Designs ||
|| Projects || Tutorials || Links || About Us || Contact Us ||
|| Store Policy || Licensing || Accessibility ||

Social Media:

Copyright © Advanced Embroidery Designs. All Rights Reserved.