Mobile Menu IconMenu
Advanced Embroidery Designs -- Online Center for Machine Embroidery Designs
Earth Day Sale! 40% off Floral, Landscapes, Redwork Flowers and Seasons!

Christmas Poinsettia Table Runner

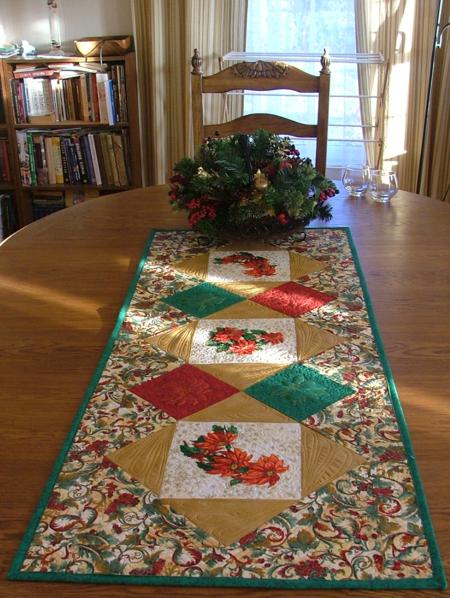
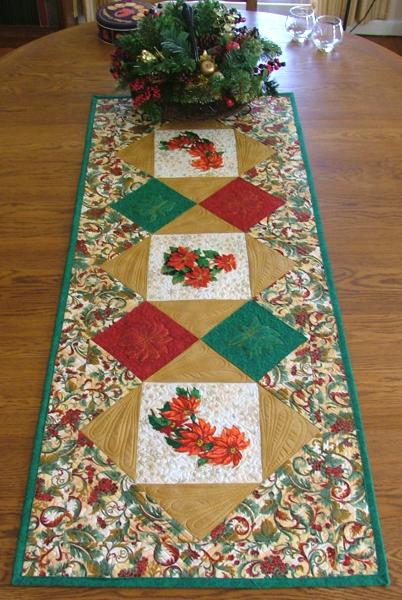
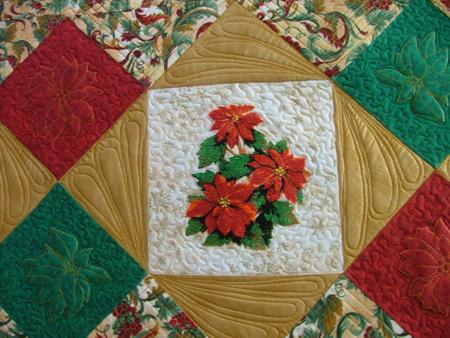
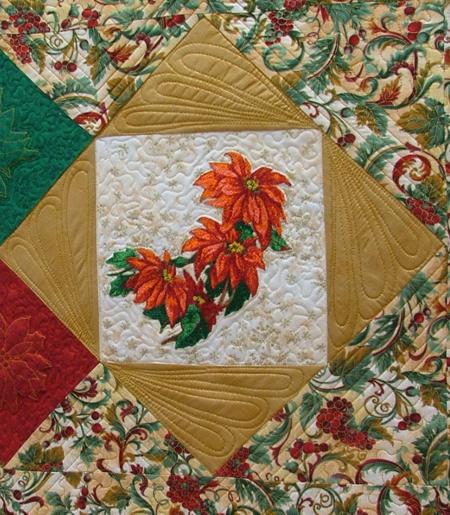
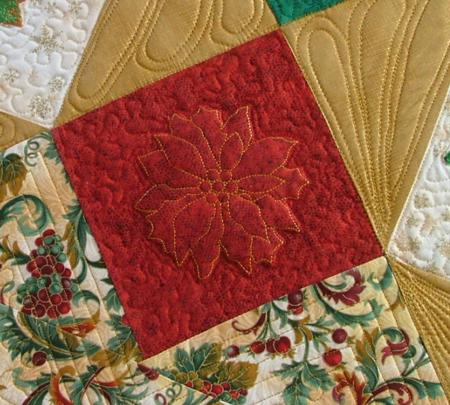
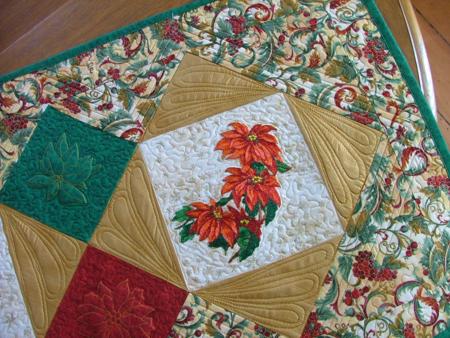
This quilted tablerunner features 2 photo-stitch designs of Poinsettia, Poinsettias and 2 redwork poinsettias from the Christmas Quilting Set. All designs used are for a large hoop (5" x 7").

This project is pretty quick and easy, and the results are very rewarding. It's great as a centerpiece for your Christmas table.

The finished size of the tablerunner is about 21 1/2" x 51 1/2".

Christmas Poinsettia Table Runner image 1

For the project you will need:

  • 1/2 yard of light-colored fabric for the background,
  • about 1/2 yard of golden-colored fabric for the blocks,
  • about 1 yard of brigthly-colored patterned fabric for the triangles and borders,
  • about 1/4 yard of green fabric for the squares and binding,
  • a 6" x 12" piece of red fabric,
  • cut-away iron-on stabilizer or polyester felt to be used instead of stabilizer,
  • rayon or polyester embroidery threads for embroidery, cotton threads for sewing and quilting.
You will also need fabric for the backing and low-loft batting.

Use size 12/80 embroidery needle for embroidery and 12/80 general purpose needle for sewing.

Cutting

Out of light-colored fabric for the embroidery background, cut

  • 3 squares measuring 11 1/2" x 11 1/2".
Out of golden-colored fabric, cut
  • 12 squares measuring 6" x 6"
Out of red fabric, cut
  • 2 squares measuring 6" x 6"
Out of green fabric, cut
  • 2 squares measuring 6" x 6"
  • 3 strips 2 1/2" wide and the length of the width of the fabric for the binding
Out of bright patterned fabric, cut
  • 8 squares measuring 6" x 6",
  • 2 squares measuring 8 1/2" x 8 1/2", subcut them by diagonal into 4 triangles
  • 2 strips measuring 3" x 16" and
  • 2 strips measuring 3" x 52"

Blocks:

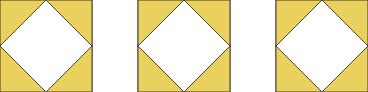
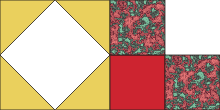
Take a light-colored 11 1/2" x 11 1/2" square and one of the 6" x 6" golden squares.
Position the golden square in the corner of the light-colored square. Align the edges. With a pencil, draw a diagonal, as shown on the diagram below. Sew along the diagonal. Cut, leaving 1/4" seam allowance. Unfold the corner and press.

Christmas Poinsettia Table Runner image 2

Repeat with all the corners. Make one corner at a time.
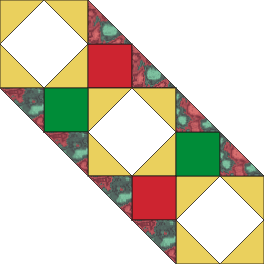
Christmas Poinsettia Table Runner image 3

Make 3 such blocks.

Christmas Poinsettia Table Runner image 4

Assembly:

Sew two patterned 6" x 6" squares to two sides of each red and each green 6" x 6" square, as shown on the diagram below. You'll have 4 such units.

Christmas Poinsettia Table Runner image 5

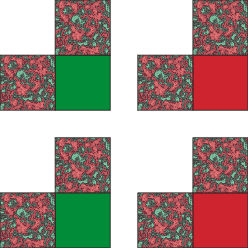
Row 1: Sew one unit with the red square to the right side of the first block as shown:

Christmas Poinsettia Table Runner image 6

Row 2: Sew the units with green squares to the right and left sides of the next block as shown:

Christmas Poinsettia Table Runner image 7

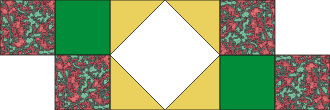
Row 3: Sew the remaining unit with the red square to the left side of the last block as shown:

Christmas Poinsettia Table Runner image 8

Sew the rows together as shown:

Christmas Poinsettia Table Runner image 9

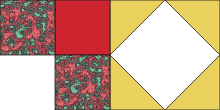
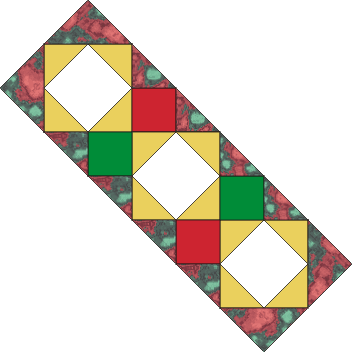
Now place the ruler along the diagonal of all patterned squares and cut through.

Christmas Poinsettia Table Runner image 10

Sew the patterned triangles to the raw sides of the end blocks:

Christmas Poinsettia Table Runner image 11

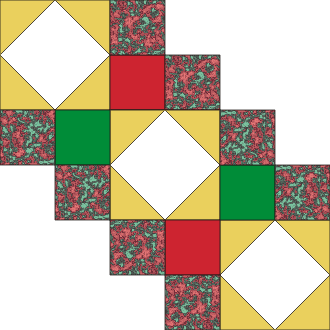
Sew the short patterned strips to the short ends of the working piece.

Christmas Poinsettia Table Runner image 12

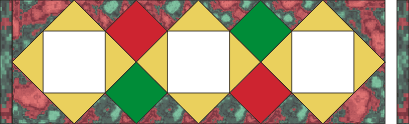
Sew the long patterned strips to the long ends of the working piece.

Christmas Poinsettia Table Runner image 13

Embroidery

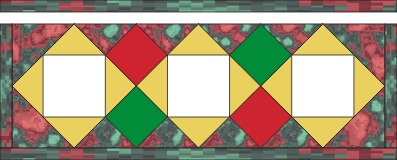
Stabilize each block with light-weight cut-away stabilizer. Embroider one block at a time. Make an embroidery of Christmas Candles on the light squares.

We prefer to use polyester craft felt instead of stabilizer. After embroidery is finished cut away the excess felt around the embroidery.

Christmas Poinsettia Table Runner image 14

Poinsettia

Christmas Poinsettia Table Runner image 15

Christmas Quilting Set

Christmas Poinsettia Table Runner image 16

Quilting and Finishing:

Now place the backing on a flat surface (table) face down. Cover with batting. Spread your working piece over it.

Pin all three layers together with 1" pins and start quilting. We quilted along the lines of the embroidery and made stippling all over the background fabric. The patterned triangles were quilted in parallel lines.

Christmas Poinsettia Table Runner image 17

After the quilting is finished, press the work with heavy steam and square the work -- all corners should be 90 degrees and opposite sides should be of the same length.

Finish the raw edges with the binding.

Christmas Poinsettia Table Runner image 18

The table runner is ready. Enjoy!

Happy Stitching!

Back to Poinsettia, Poinsettias and Christmas Quilting Set

Back to the Projects Page

Mailing List
Enter your e-mail for news, discounts and exclusive special offers.


Find us on Twitter

Special Offers
Bonus design on all orders over $30
Ivy Vine Border Set

Shop Now!

Announcement
Best Project Contest
The results are in!
Featured Project
Check out our latest project Birds and Blooms Quilted Tablerunner
Tutorials
Never heard of photo stitch? - Check out our What is Photo Stitch? page
Most Popular Designs
|| Home || Shop || Free Designs || New Designs ||
|| Projects || Tutorials || Links || About Us || Contact Us ||
|| Store Policy || Licensing || Accessibility ||

Social Media:

Copyright © Advanced Embroidery Designs. All Rights Reserved.