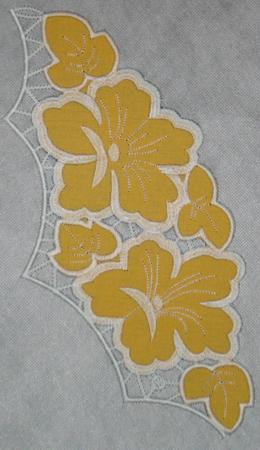
These are instructions on how to embroider the Hibiscus Cutwork Lace Border design. The design is available in 2 sizes for the large (5" x 7") and mega (6" x 10") hoops. You will get 2 embroidery files - the main file and its mirror image.
One of the advantages of the design is that you embroider each pattern separately and then incorporate them into a larger project - this means you don't risk ruining your project if something goes wrong during embroidery.
You will need fabric for the cutwork and fabric for the body of the doily, water soluble mesh and embroidery rayon or polyester threads.
Step One: Hoop 2 layers of water soluble mesh. Upload the first file into your machine. Start embroidering. The machine will embroider the outline of the design and stop.
Step Two: Cover the outline with fabric and start the machine. You can secure the fabric by pinning it to the stabilizer outside the embroidery field, or using quilter's tape. The machine will embroider the outline of the lace and stop.
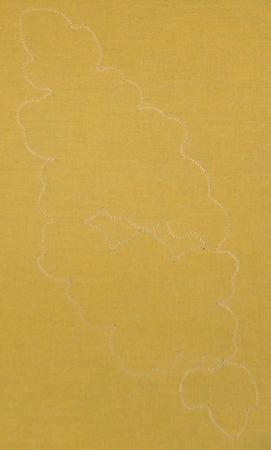
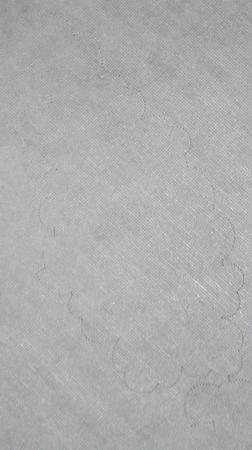
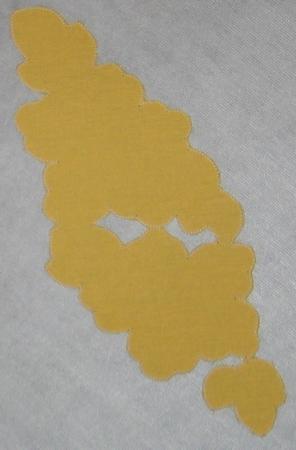
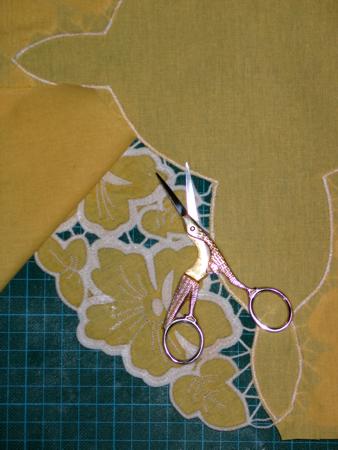
Step Three: Take the hoop from the machine. With a pair of sharp scissors cut away the fabric in the areas shown on the picture.
Step Four: Return the hoop to the machine and finish embroidering.
Step Five: Neatly cut away the excess stabilizer around the motif.
You can wash away the remaining stabilizer at this point, or do it later, after assembling the doily. If you prefer to wash away the stabilizer now, do so, then neatly spread the motif on a flat surface and leave to air dry. Press if needed.
To make a doily, you'll need a piece of fabric measuring 8" x 8".
Embroider the first design 2 times and the mirror design 2 times.
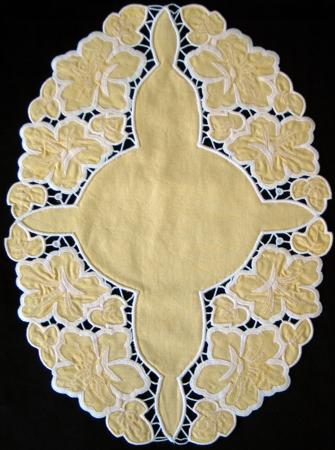
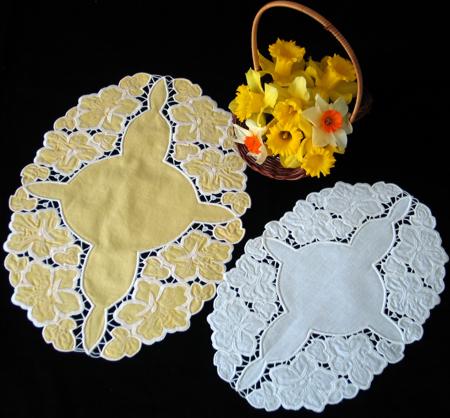
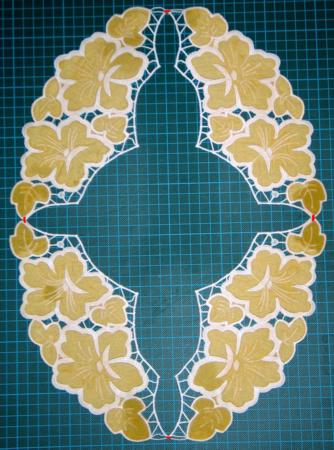
Position them as shown on the picture.
Sew the motifs together to get a frame.
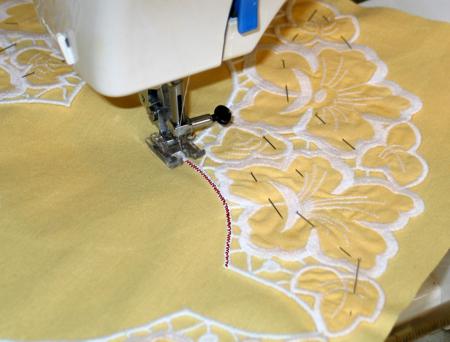
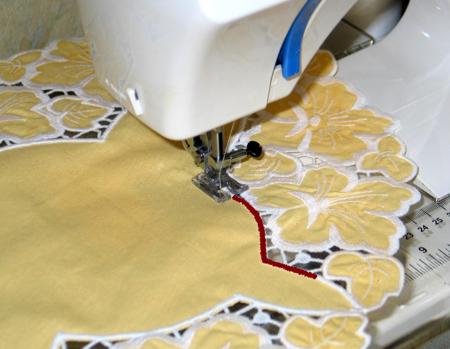
Place the frame over a piece of fabric and pin in place.

Stitch the pattern to the fabric. Use short, but not very dense zig-zag. Both in the needle and in the bobbin, use thread of the same color as the embroidery.
Cut away the excess fabric close to the stitches.
Stitch again, using very dense zig-zag. Both in the needle and in the bobbin, use thread of the same color as the embroidery.
The finished size of the doily with the motifs for the large hoops is about 9 1/4" x 13 1/2", for the mega hoops is about 12 1/4" x 17".