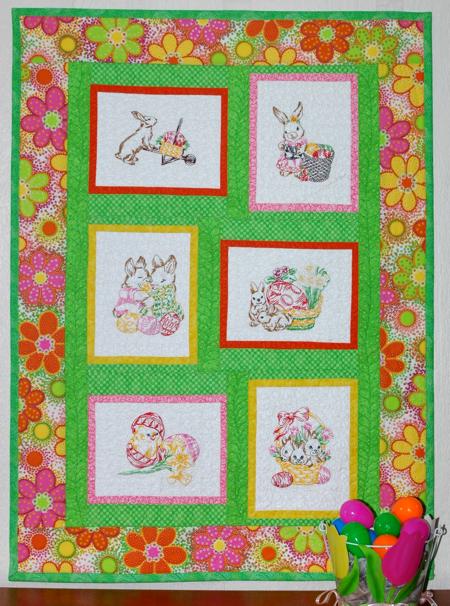
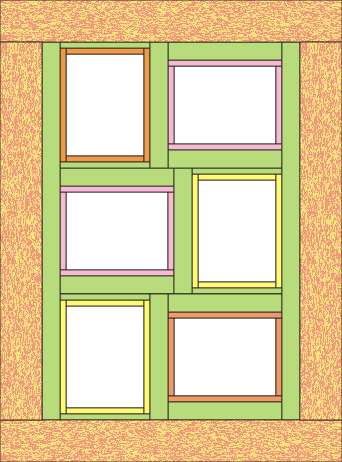
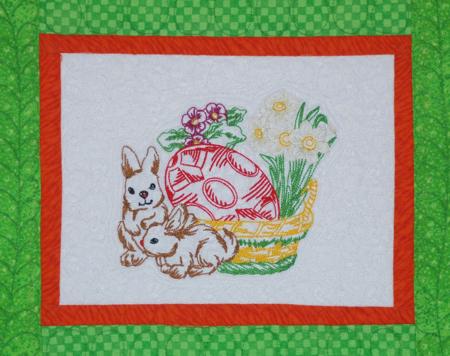
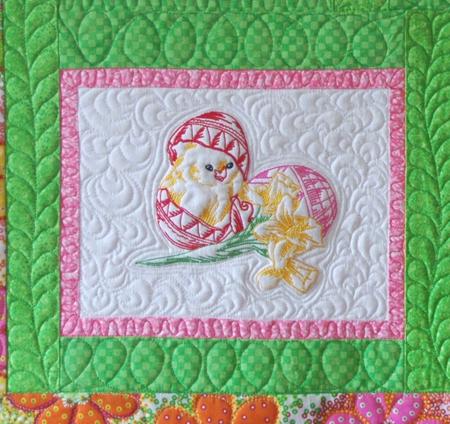
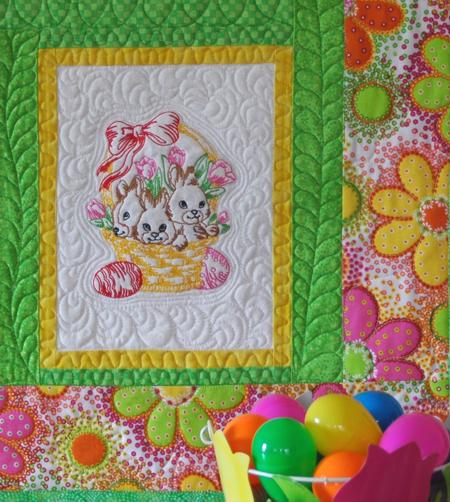
This cheerful wall hanging features an Easter Bunny theme in bright spring colors. It'll instantly let the warmth of spring into your house. Particularly great for a children's room.
The finished size is about 29 " x 40".
The embroidery designs used are from the Easter Bunny Set.
|
|
| For the project we used 1/2 yard of white fabric, 1/2 yard of bright patterned fabric for the border, 3/4 yard of bright green fabric for sashing and binding, and scraps of yellow, pink and orange fabric for the blocks. Note: The fabric for the border was the starting point of the quilt. We selected all the other fabrics of the quilt to match the colors in the border.
You will also need fabric for the backing and a piece of batting.
|
|
Cutting:
|
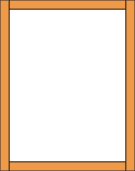
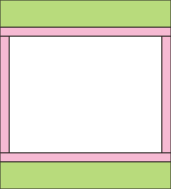
| Out of white fabric, cut 6 rectangles measuring 7" x 9". Out of each of the pink, orange and yellow fabrics cut 2 strips measuring 1" x 7" and 2 strips measuring 1" x 10".
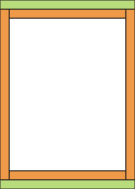
Out of bright green fabric, cut 6 strips measuring 1" x 8",
6 strips measuring 2" x 10",
3 strips measuring 2" x 11",
2 strips measuring 2" x 32";
4 strips measuring 2 1/2" and the length of the width of the fabric for binding.
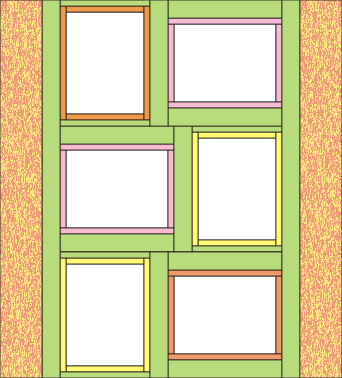
Out of the fabric for the borders, cut 2 strips measuring 4" x 32" and 2 strips measuring 4" x 29".
|
|
The Blocks.
|
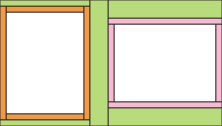
| Sew the colored 1" x 7" strips to the short sides of the white rectangle. |

|
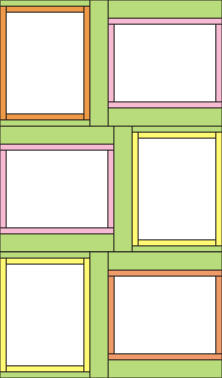
| Sew the 1" x 10" strips to the long sides of the white rectangles. You will get 6 blocks with orange, pink and yellow frames. |
|
| 3 of the blocks will be positioned horizontally and 3 vertically. The way you arrange them is up to you. |
| Sew the 1" x 8" green strips to the upper and lower sides of the blocks that are going to be vertical. |
|
| Sew the 2" x 10" green strips to the upper and lower sides of the blocks that are going to be horizontal. |
|
|
Assembly of the Top
|
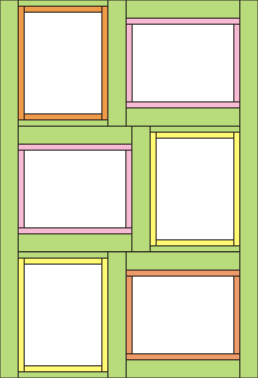
| Sew the horizontal and vertical blocks in rows placing green 2" x 11" strips between them. |
|
| Sew the rows together. |
|
| Sew the 2" x 32" green strips to the left and right sides of the quilt. |
|
| Sew the 4" x 32" borders to the left and right sides of the quilt. |
|
| Sew the 4" x 29" borders to the upper and lower sides of the quilt. |
|
|
Embroidery:
|
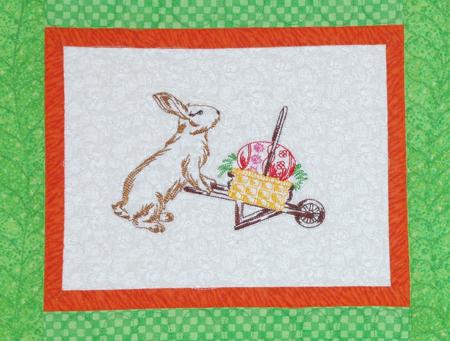
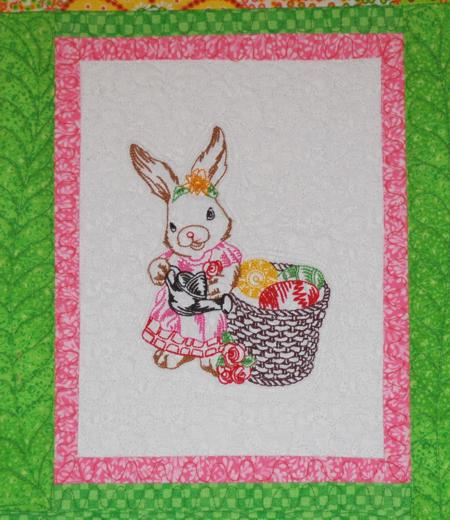
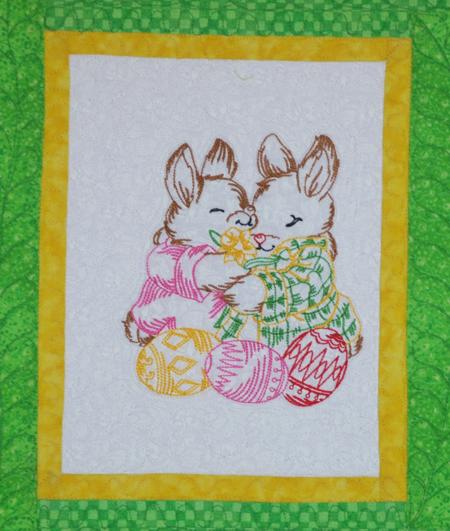
| Stabilize the central part of the white blocks with polyester craft felt. Make the embroidery. Cut away the excess felt around the embroidery. Note: We selected the threads for the embroidery to match the quilt fabrics.
|
|
|
Quilting and Finishing:
|
| Now place the backing on a flat surface (table) face down. Cover with batting. Spread your working piece over it. Pin all three layers together with 1" pins and start quilting. We quilted along the lines of the embroidery and made free-motion quilting all over the wall hanging.
After the quilting is finished, press the work with heavy steam and square the work -- all corners should be 90 degrees and opposite sides should be of the same length.
Finish the raw edges with the binding.
|
|
|
|
|
|
|
The wall hanging is ready. Enjoy!
|
|
Happy Stitching!
|
|
Back to Easter Bunny Set
|
|
Back to the Projects Page
|


