These are instructions on how to embroider and assemble the In-the-Hoop Fashion Belt.
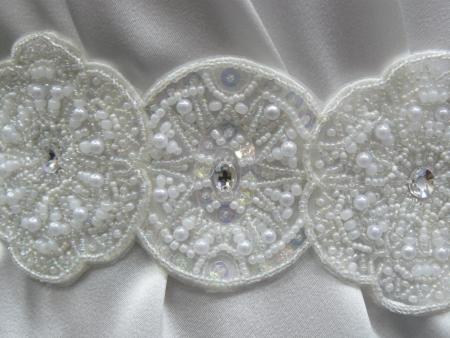
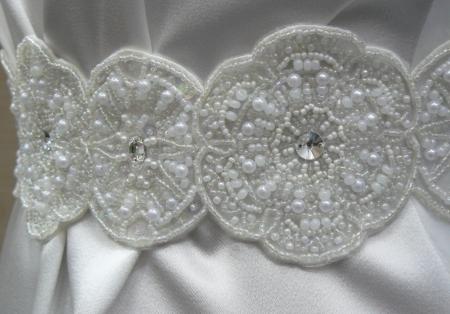
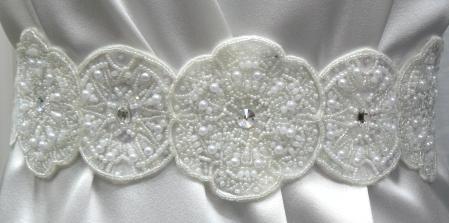
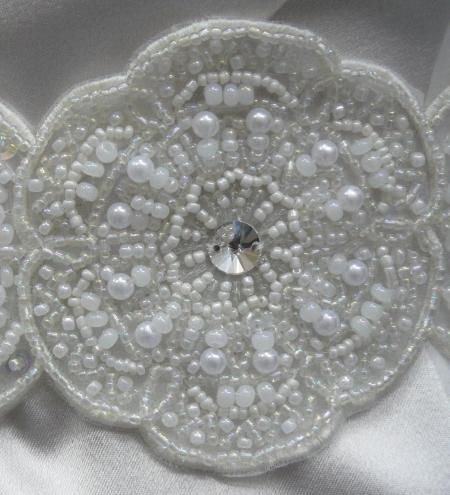
The In-the-Hoop Fashion belt consists of a freestanding base which you can embellish to your own taste. The ends of the belt are sewn into the back seam under the zipper. Our version of the belt was made for a wedding dress, and we embellished it with seed pearls.
For the project you will need tulle or organza, water soluble mesh and small embellishments suchs beads, sequins, crystal, ribbons, seed pearls, etc.
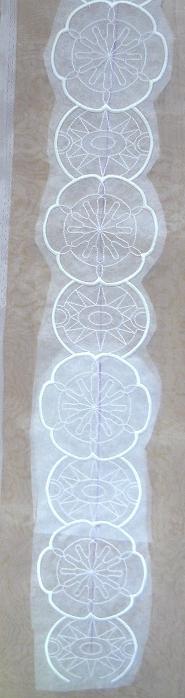
There are 3 files in the set. The central part of the belt is the file "BeltS", its length is 7 1/2". There are 2 files to extend the belt: "Belt2" (length 10 1/2"), and "Belt3" (length 8").
Step One: Measure the waist length to decide which files you need to embroider. Cut 2 strips of tulle or organza 10" wide (for better hooping) and the length of your waist plus 4-5" for better hooping.
Put the strips one over another and hoop the central part of the strips with a layer of water-soluble mesh.
Step Two: Embroider the file "BeltS" in the center of the tulle/organza strips.

Step Three: Re-hoop the fabric and go on embroidering the files "Belt2" or "Belt3" on both sides of the center to get the needed length. For example, for a 24" waist, you would embroider the file BeltS (7 1/2") and the file Belt3, twice, (8" x 2); total length: 23 1/2".
Step Four: Dissolve the stabilizer, neatly spread the belt on a towel and leave to air dry.
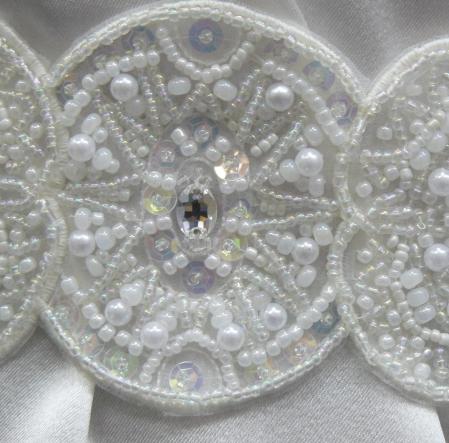
Step Five: Hand-stitch beads, sequins, crystals, seed pearls or other embellishments to fill in the belt base.

Step Six: With a pair of sharp scissors, neatly cut away the excess tulle/organza.
Put the belt over the dress and secure to the dress with several stitches. Sew the ends of the belt in the back seams under the zipper.