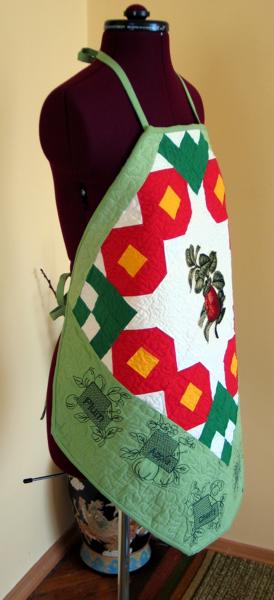
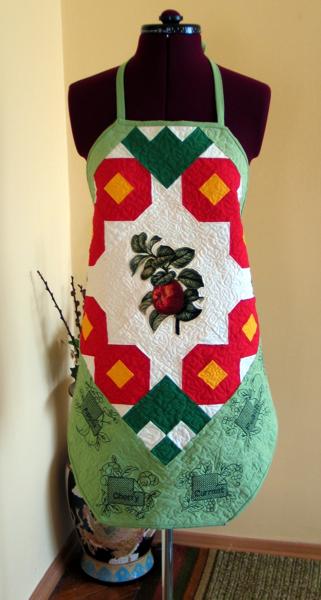
This quilted apron has a simple, rustic look that makes it very appealing, but also practical. It makes a great gift, and best of all it's quick to make. It took us longer to put this project together than to actually make it! We embellished the apron with embroidery designs Apple and Redwork Fruit Labels.

We used about 2 yards of light green fabric, including the backing (lining), binding and ties;
1/2 yard of white fabric,
scraps of pale yellow, dark green and red fabrics.
You will also need low-loft batting.
For embroidery we used embroidery polyester threads.
Out of pale green fabric, cut:
Out of white fabric, cut:
- 1 strip measuring 7" x 26 1/2",
- 1 strip measuring 7" x 20"
- 1 strip measuring 2" x 18 1/2"
- 1 strip measuring 2" x 20"
- 5 strips measuring 2 1/2" and the length of the width of the fabric (for binding and ties.)
Out of dark green fabric cut 28 squares measuring 2" x 2".
Out of red fabric cut 16 squares measuring 2 1/2" x 2 1/2" and 32 squares measuring 2" x 2".
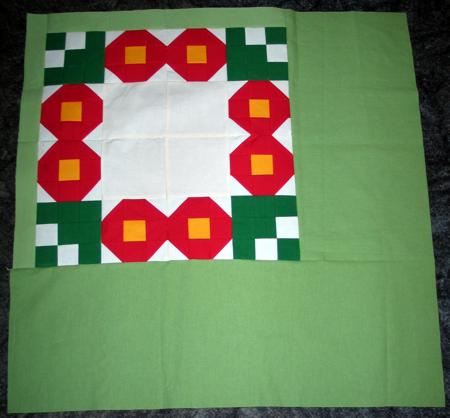
Out of green and white 2" x 2" squares sew 4 blocks as shown below:

To make the next block, you need to make 32 half triangles first. For this, place 16 white and 16 red 2 1/2" x 2 1/2" squares in pairs, face inwards.
With a lead mechanical pencil, draw a diagonal on the lighter square. Stitch a scant 1/4" from the pencil line on both sides.
Cut along the line. Open the new squares. Press the seam towards the brown. Trim the ears. Repeat for all the pairs. You should get 32 two-color squares, measuring 2" x 2".
Now assemble 8 blocks as shown:
Step One: Sew the red-and-white blocks into four pairs.

Step Two: Sew the first pair to the upper, and the second pair to the lower edges of the white square.
Step Three: Sew the green-and-white blocks to the left and right edges of the remaining pairs of red blocks.

Step Four: Sew the strips to the left and right sides of the white square.
Step Five: Sew the pale green 2" x 18 1/2" strip to the upper edge of the unit.
Step Six: Sew the pale green 2" x 20" strip to the left edge of the unit.
Step Seven: Sew the pale green 7" x 20" to the right side of the unit.
Step Eight: Sew the pale green 7" x 26 1/2" to the bottom edge of the working piece.
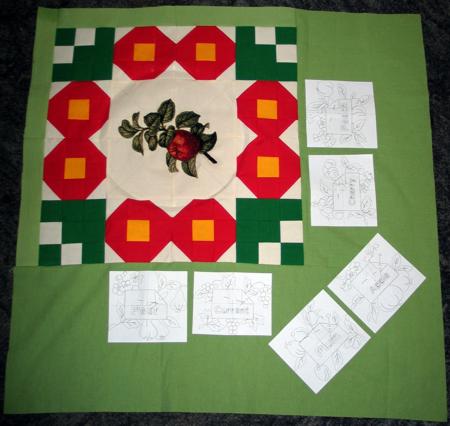
On your working table, place low-loft batting, or better, polyester felt. Spread the pieced top over it, face up. Mark the placement of the embroidery.
Hooping different parts of the apron, make the embroidery.
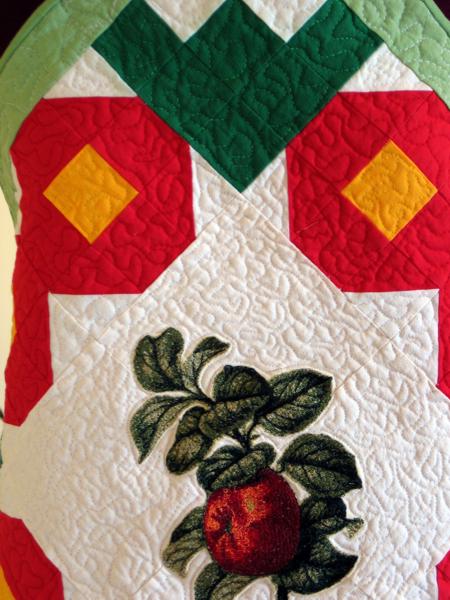
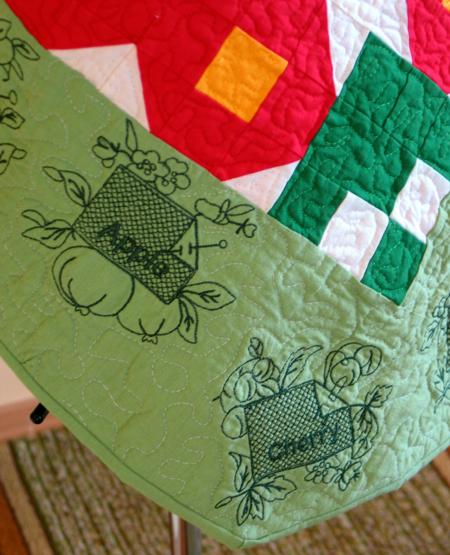
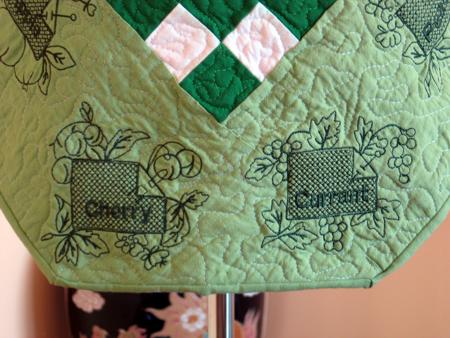
We embroidered Apple on the white square and Redwork Fruit Labels on the wide green strips.
Place the workingpiece on the batting. Pin three layers together.
We quilted along the lines of the embroidery and made meandering all over the apron
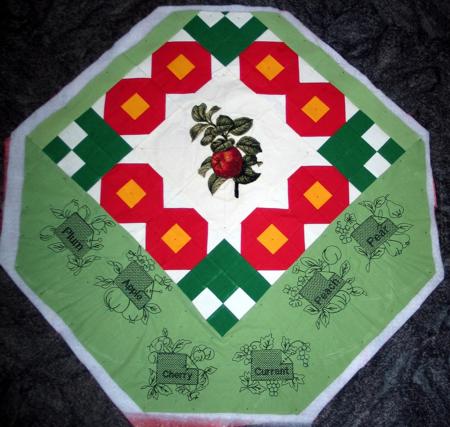
After the quilting is finished, press the work with heavy steam and trim all sides - cut away the excess batting and backing.
Cut away the corners of the apron.
Sew all strips for the binding together. Fold the long strip in half legthwise and press.
Finish the raw edges with the binding. Cut away the remaining binding strip.
Take the remaining binding strip. Fold the raw edges inside and press. Topstich the edge to get a long strap. Cut it into 4 straps.
Topstitch 2 straps to the upper part of the apron and 2 straps to the sides of the apron. Topstitch 2 straps to the sides of the apron.