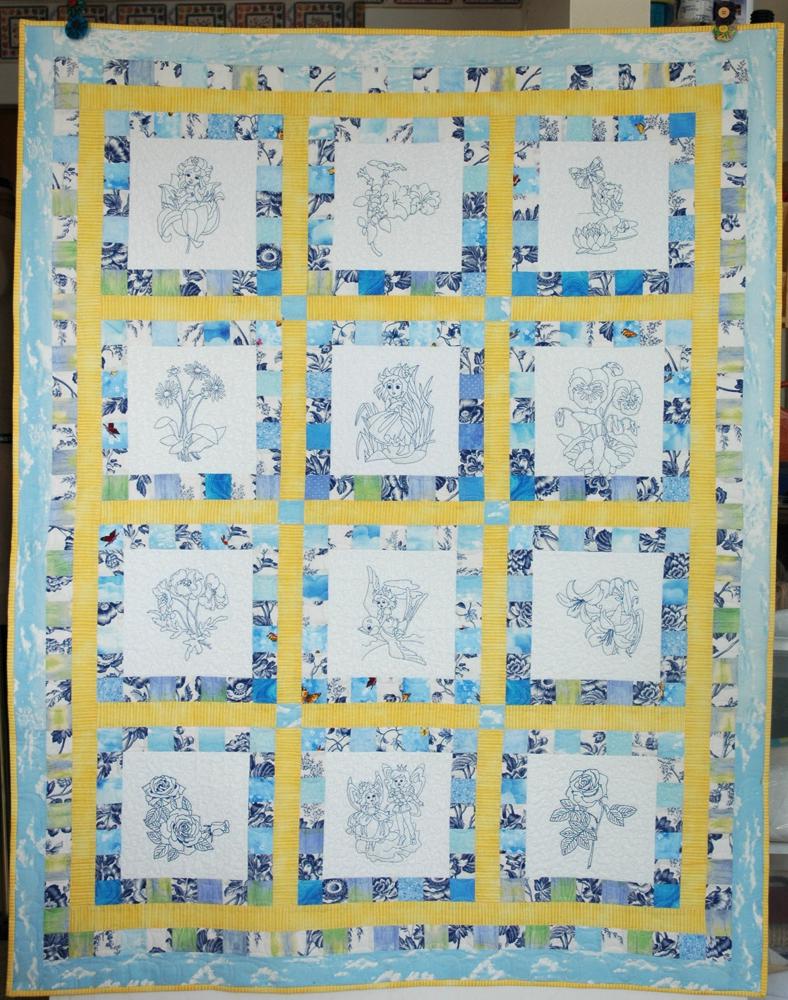
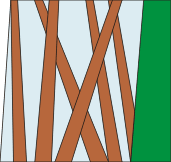
| This quilt is pretty simple and easy to make, but it looks great. It's perfect to use as a summer wallhanging to decorate your room or give away as a gift. |
|
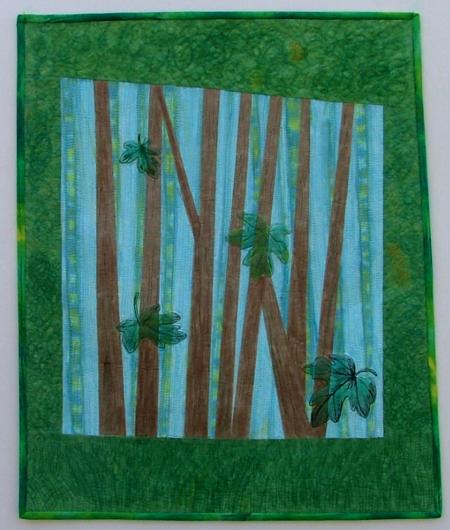
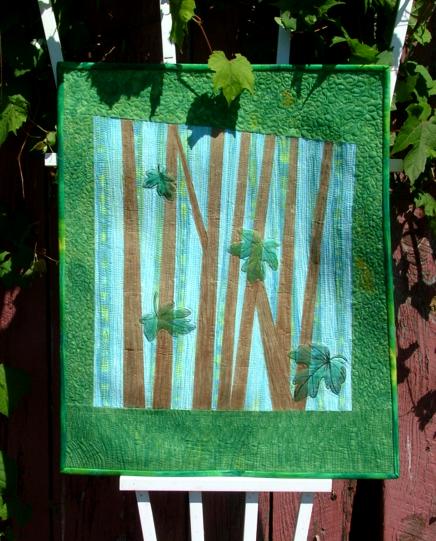
| The finished size is about 19 1/2" x 24 1/2". The embroidery designs used are from the Autumn Leaves Set. |
| We used a fat quarter of blue batik for the central part, a fat quarter of light brown batik for the tree trunks, green fabrics for the borders and binding. We used different pieces of different green fabrics from the stash. You will also need a piece of batting and fabric for backing.
For embroidery, we used embroidery polyester threads. For appliqued tree trunks we used Steam-a-Seam adhesive film.
For coloring, we used water-resistant wax pastels. Fabric markers will also work well.
|
|
Cutting:
|
| For the cental part, out of light blue batik, cut a piece of about 16" x 18". |
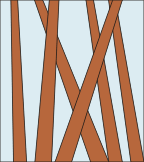
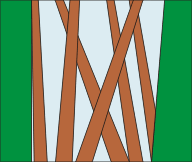
| Out of paper, cut out templates of the tree trunks and arrange them on the blue piece. Play around with them until you are satisfied. When you have worked out how to arrange the "trees", place the brown fabric over a sheet of Steam-a-Seam and cut the tree trunks out according to your templates.
Do not cut the green fabrics yet.
|
|
Assembly:
|
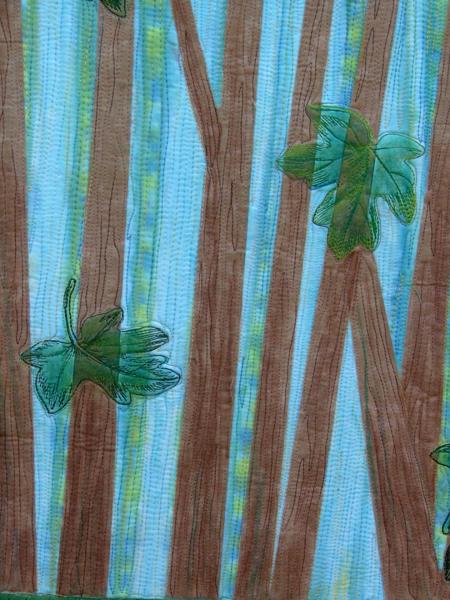
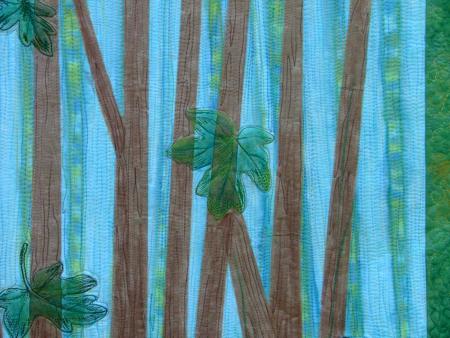
| Position the tree trunks on the blue piece. With a hot iron, attach the the trunks to the background. |
|
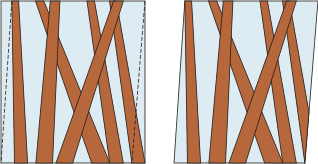
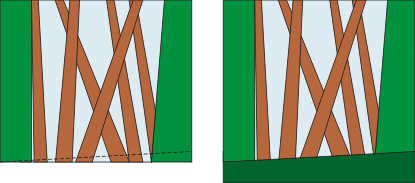
| Now attach the left and right borders. You can make them regular - cut out strips measuring 18" by 3-4". We made the borders slightly irregular, by trimming the central piece at a slant. |
|
| Attach a green strip to the right edge. |
|
| Attach another green strip to the left edge. The strip should be 18" long, the width not less than 3". Press the seam. |
|
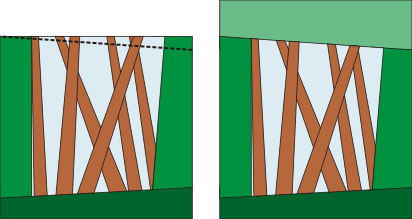
| Trim the lower edge of the working piece and attach the lower border, make it of a darker green fabric, approximately 5" wide. |
|
| Trim the upper edge of the working piece. Attach a lighter green strip on top. make the upper strip about 5" wide. You'll trim the quilt after quilting. |
|
|
Embroidery
|
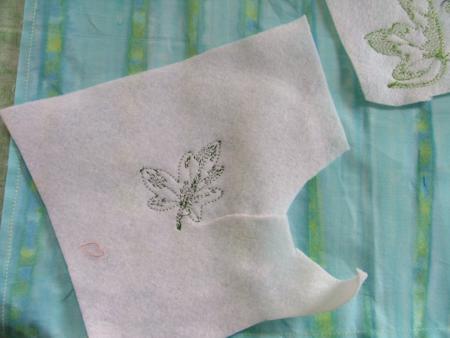
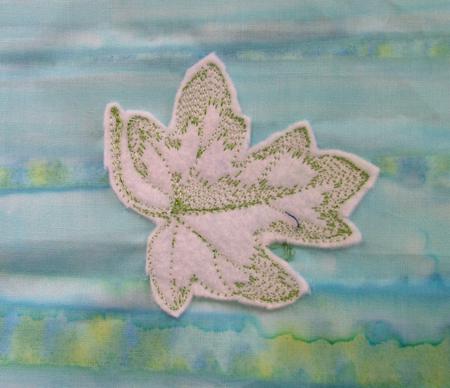
| Mark the position of each leaf on the top. You can use embroidery print-outs. Stabilize with polyester craft felt instead of stabilizer and embroider the leaves.
After the embroidery is finished, cut away the excess felt around the embroidery.
We embroidered the designs from the Autumn Leaves Set.
|
|
|
|
|
|
Quilting and finishing:
|
| Now place the backing on a flat surface (table) face down. Cover with batting. Spread your working piece over it. Pin all three layers together with 1" pins and start quilting.
|
| We quilted in a free-motion style all over the wall hanging. |
|
| After the quilting is finished, press the work with heavy steam and trim the edges. In this case, we are not trying to achieve a perfectly rectangular quilt. A little bit of irregularity just adds to the charm. Finish the raw edges with the binding.
|

|
| Now take the water-resistant pastels or fabric markers and highlight the leaves. If your fabrics are not bright enough, add some color. |
|
|
|
The wall quilt is ready. Enjoy!
|
|
Happy Stitching!
|
|
Back to the Projects Page
|