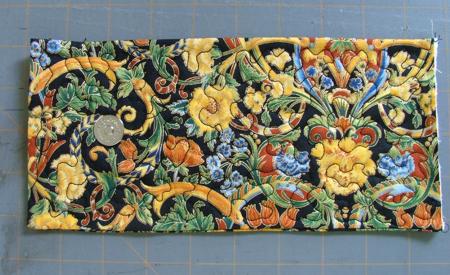
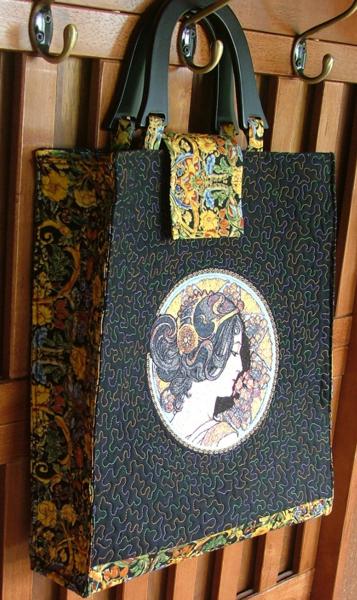
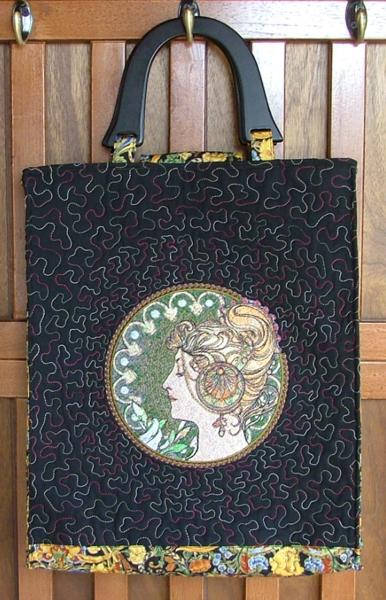
| This elegant tote uses the artwork of the famous Art Nouveau painter Alphonse Mucha: La Plume and The Cowslip. The result is very charming -- our photos hardly do it justice. The finished size of the handbag about 15" wide x 4" deep x 17" (high). It's the perfect size for carrying around knitting, sewing notions and other "necessities".
|

|
For the project you will need:
- 1/2 yard of black cotton fabric,
- 1 yard of patterned cotton fabric,
- purse handles,
- magnetic closure,
- craft polyester felt
- iron-on cut-away light-weight stabilizer,
- rayon or polyester embroidery threads and size 12/80 embroidery needle;
- sewing and quilting threads and size 12/80 quilting needle,
- black upholstery thread and size 16/84 jeans/upholstery needle.
|
|
Cutting:
|
Out of black fabric cut 2 panels measuring 16" x 19".
Out of patterned fabric cut:
- 1 strip measuring 6 1/2" x 16" (for the bottom)
- 1 strip measuring 6" x 20" (for the flap)
- 2 strips measuring 4 1/2" x 35" (for side panels)
for the lining cut
- 1 strip measuring 15" x 42"
- 2 strips measuring 6 1/2" x 19" (for the pockets)
|
|
Sewing:
|
| Sew the black panels and the 6 1/2" x 16" patterned strip together. |

|
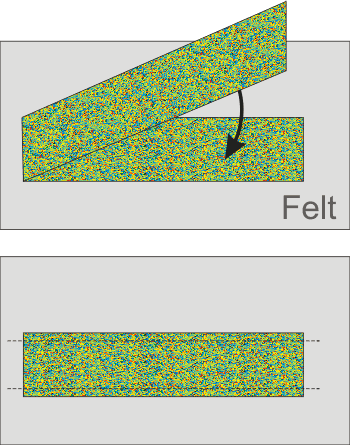
| To make the side panels, fold the 4 1/2" x 35" strips in half widthwise, face inside. Place on a piece of felt. Stitch the side seams. The seam allowance should be 1/4". Trim the felt. |
|
| Turn the side panels out. Tuck the raw edges 1" inside. Press. Then stitch close. |
|
To make the flap, fold the 6" x 20" strip in half widthwise. Place on a piece of felt. Stitch the side seams. Seam allowance 1/4". Trim the felt. Turn it out. Press.
Insert one part of the magnetic closure 1 1/2" from the closed short side of the panel. |
|
|
Embroidery and Quilting:
|
| Place the top on polyester felt. With you hands smooth all lines, so that the felt clings to the fabric. Place both layers on a piece of iron-on cut-away light-weight stabilizer. Press to make the stabilizer adhere to the felt.
|
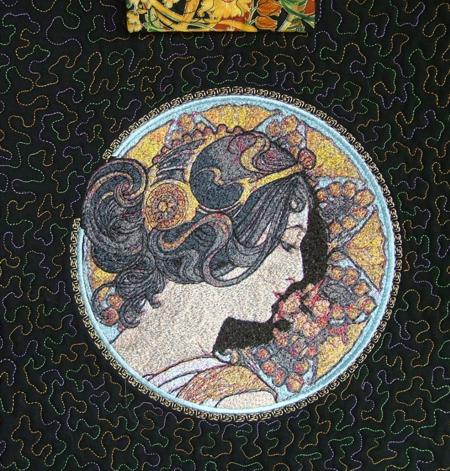
| Make the embroidery on both panels 3" from the patterned strip. |
|
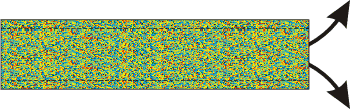
| Quilt the top all over. Note that you have 3 layers: top, felt and cut-away stabilizer. You do not need any additional layers of batting or backing. Press with heavy steam. Trim to 15" x 42".
|
|
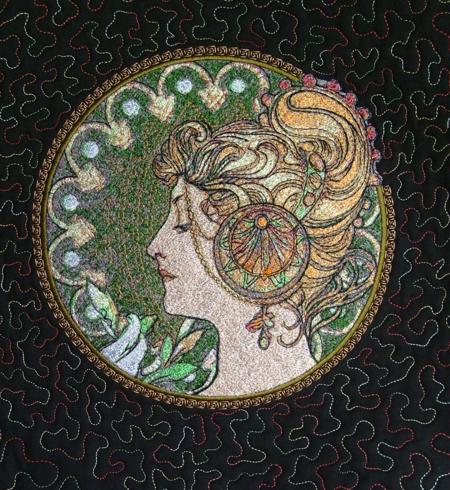
| We embroidered Mucha's La Plume on the back panel and Mucha's The Cowslip on the front. |
|
| Quilt the side panels and the flap. |
|
The Lining:
|
| Fold the strips for the pockets (2 strips measuring 6 1/2" x 19" ) in half widthwise, face inside. Stitch the side seams. Seam allowance 1/4". Turn right side out. Tuck in the raw edges 1/2". Press. Topstitch. |
Fold the lining piece in half widthwise and slightly press to mark the bottom line.
Place the pockets on the lining 6" from the crease. Pin. Topstitch in place. |
|
Assembly:
|
| Place the bag's top and the lining face to face. Sew the side seams. Seam allowance 1/4". |
| Turn the working piece right side out. Press. |
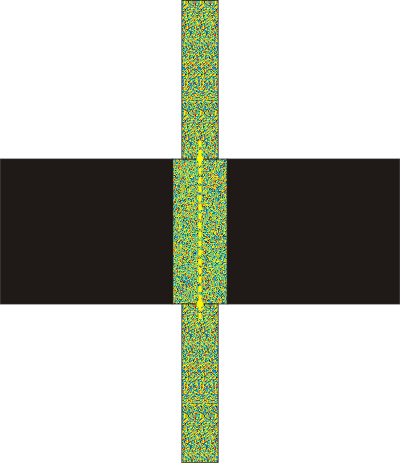
| Align the center of each side panel with the center of the bottom of the bag (see diagram). Starting from this point, pin the side panel and the bag together. |
|
| Sew (from the side of the panel) to attach the side panel to the bag. Note that 2" of the bag stay open at the top because the side panels are shorter than the front and back of the bag. Note that the seam will be on the right side of the bag. |
|
| Repeat for the second panel. |
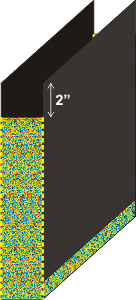
| Tuck the upper raw edges of the bag 2" inside. Press. |
|
Attaching the Handles and the Flap:
|
| Choose the position of the magnetic closure. Attach it to the top through all the layers of the bag, except the lining. |
| Choose the position of the flap in the center of the back panel's edge. Insert the raw edge of the flap between the lining and the top. Baste in place. |
| Turn the back right side inwards. Now we'll work from the side of the lining to attach the handles. |
| Take the 3 1/2" x 5" strips. Fold them in half lengthwise. Press. Fold the raw edges inside to the fold and press again. Topstitch 1/8" from the edges.
Fold in half and press.
Insert through the ends of the handles. Align the raw short edges and either baste or topstitch them close.
Insert the ends between the top and the lining about 4" from the side seams. (Note that this distance will depend on the size of the handles. Pin and baste in place.
|
| Pin or baste the edges of the lining and the top together. Topstitch along the edge, attaching the lining, the flap and the handles at the same time. Step 1/8" from the first stitch and topstitch again, reinforcing the handle loops.
|
|
|
The bag is ready. Enjoy!
|
|
|
Happy Stitching!
|
|
Back to the Projects Page
|


