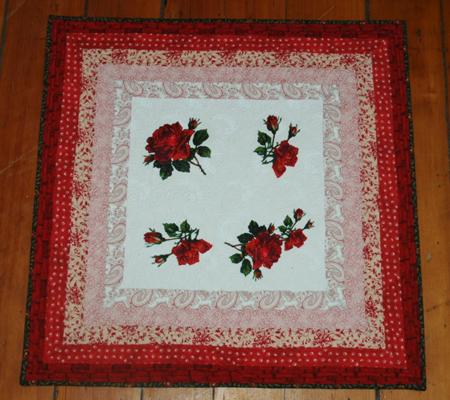
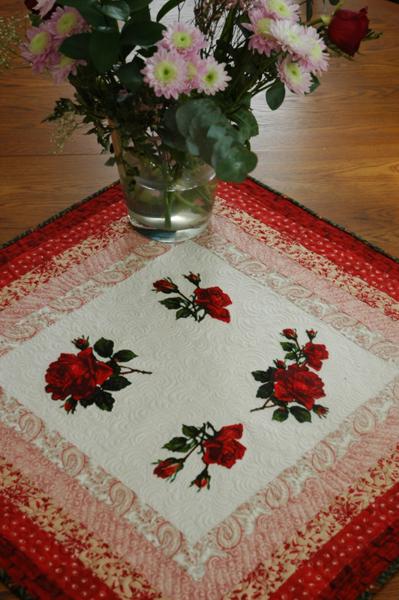
The bright red colors in this table topper really make it stand out. It'll instantly liven up your dining room or living room.
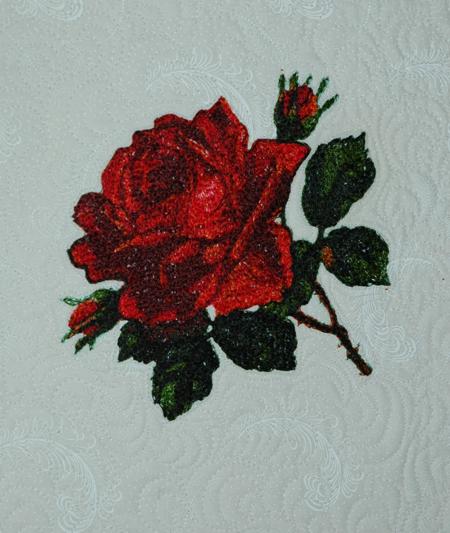
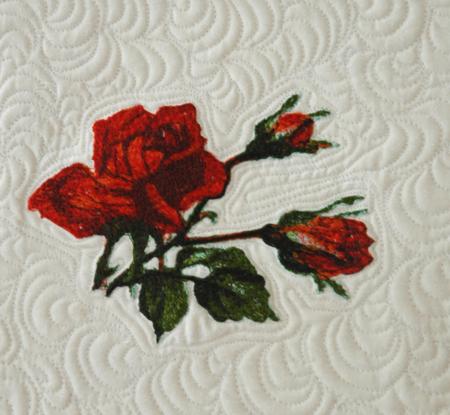
The embroidery designs used are from the Scarlet Rose Set.
The finished size of the tabletopper is about 30" x 30".

We used about a fat quarter of light cream fabric for the central part with embroidery, and about 1/4 yard each of 5 different fabrics in pink and red hues. For the binding, we used about 1/4 yard of green fabric.
You will also need a piece of batting and fabric for backing.
For embroidery, we used embroidery rayon threads.
Out of light cream fabric, cut 1 square measuring 16 1/2" x 16 1/2".
For the border, decide in which order you'll arrange your pink and red fabrics.
Out of the first fabric, cut 4 strips measuring 2" x 20".
Out of the second fabric, cut 4 strips measuring 2" x 24".
Out of the third fabric, cut 4 strips measuring 2" x 28".
Out of the forth fabric, cut 4 strips measuring 2" x 32".
Out of the fifth fabric, cut 4 strips measuring 2" x 36".
For the binding cut 3 strips measuring 2 1/2" and the length of the width of the fabric.
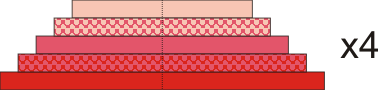
Step One: Fold each of the strips in half and press lightly to mark the center of each. Align the center of the first strip with the center of the second strip and sew them together. Repeat for the other 3 first and the second strips.
Step Two: Now repeat this for all the other strips. You should get 4 "stepped pyramids" as shown below.
Step Four: Mark the center of each side of the central square. Align the center of the first border with the center of the square. Sew them together. Start stitching 1/4" from one edge of the cream square and finish 1/4" from the other, as shown in the diagram.
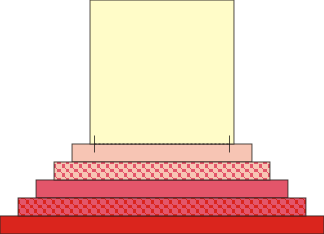
Step Five: In the same way, attach the second border to the adjacent side of the central square.

Step Six: Fold the square diagonally and align all edges. Align the strips of the borders. Pin together. With the help of a ruler and a pencil, draw a line over the border, continuing the folded diagonal.
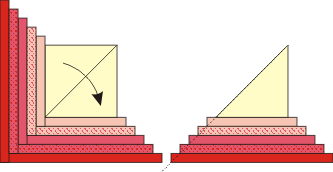
Stitch along the diagonal.
Trim the seam to 1/2". Open the seam and press.
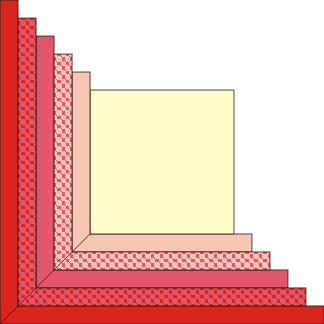
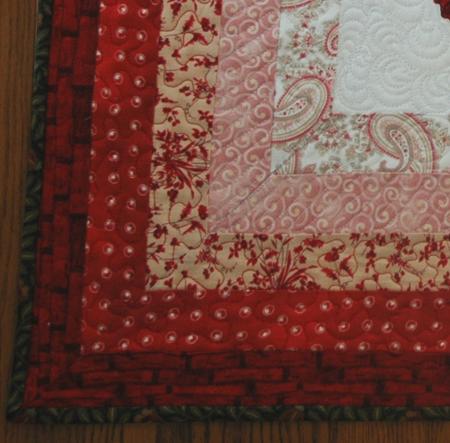
Step Seven: Repeat this procedure for the third and fourth borders. The mitered corners will look something like this:
Embroider the rose designs from the Scarlet Rose Set one by one. Use cut-away iron-on stabilizer. Cut away the excess stabilizer.
You can also use polyester craft felt instead of the stabilizer. After the embroidery is finished, cut away the excess felt around the embroidery.

Now place the backing on a flat surface (table) face down. Cover with batting. Spread your working piece over it.
Pin all three layers together with 1" pins and start quilting. We quilted along the lines of the embroidery and then in free motion style all over the topper.
After the quilting is finished, press the work with heavy steam and square the work -- all corners should be 90 degrees and opposite sides should be of the same length.
Finish the raw edges with the binding.


