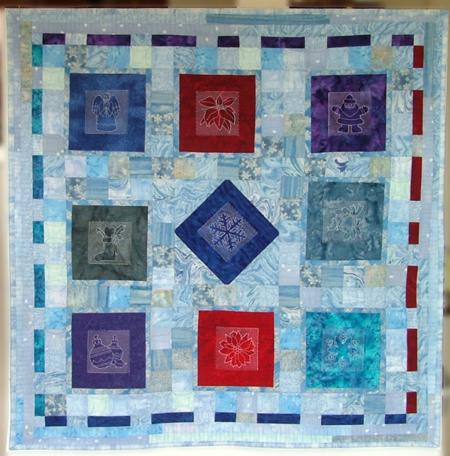
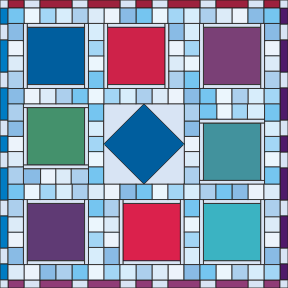
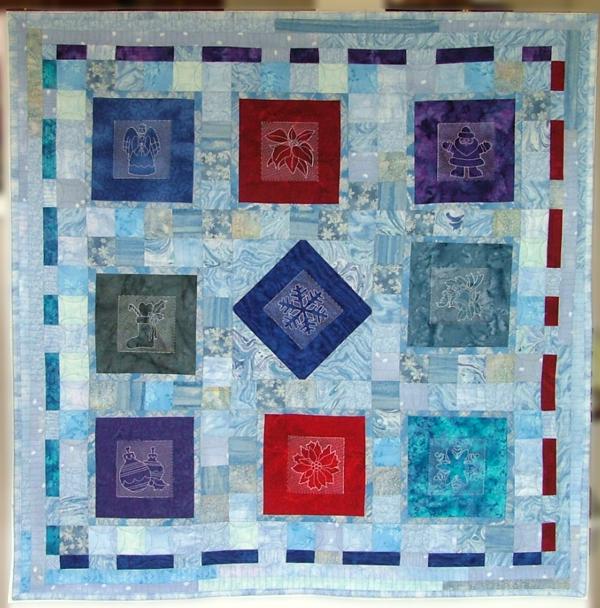
| This project is for those of you who are already preparing for the winter holiday season. The quilt combines cool blue hues with bright patches of color that make it really stand out. It's a great way to use up any left over scraps you might have lying around. We used the embroidery designs from the Christmas Quilting Set. The set is available in different sizes, and each design comes with three different backgrounds: no background, a free-motion background and a net background. We chose the 4" x 4" designs with the net background.
The finished size of the wall quilt is about 40 1/2" x 40 1/2".
|
Click to enlarge |
| For the project you will need a lot of scraps of light blue fabrics and 9 different batiks - we used burgundy, bright red, purple, violet, dark grey and dark blue. These were all scraps we head left over. You will also need fabric for backing and binding. We used light blue fabric, and low-loft batting.
|
|
Embroidery:
|
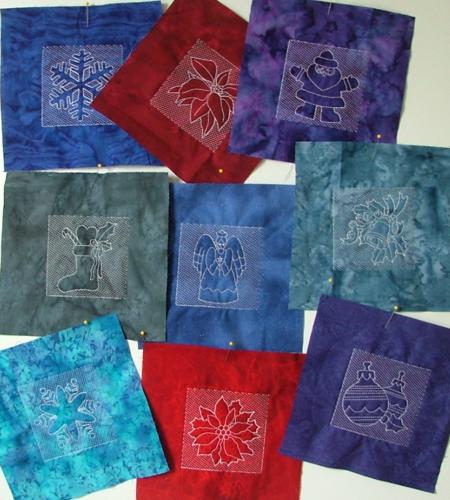
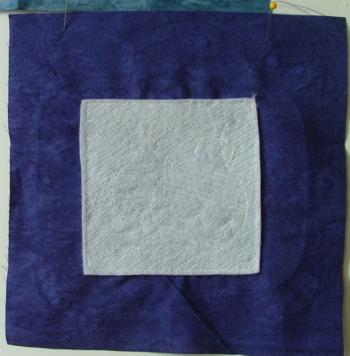
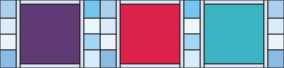
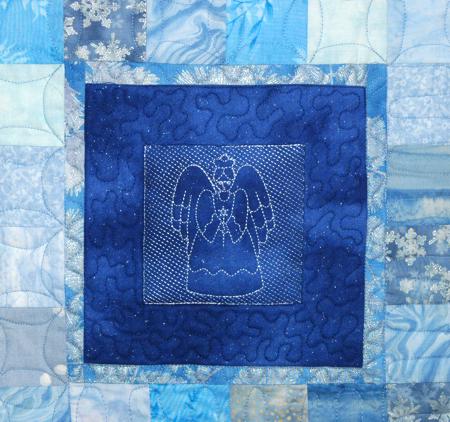
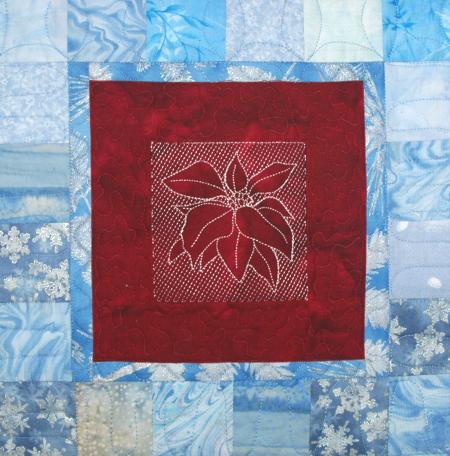
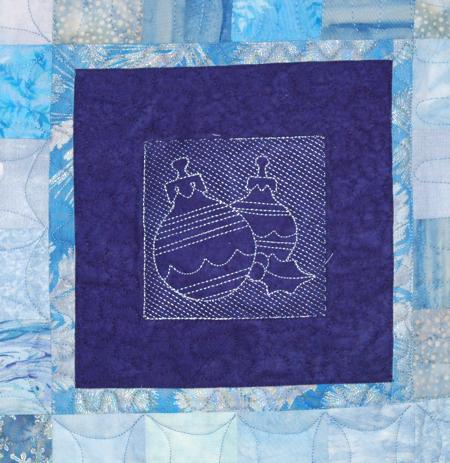
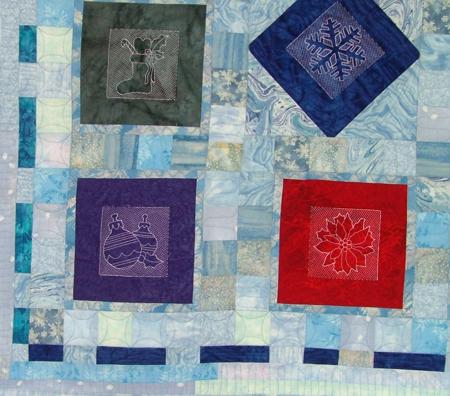
| Out of the batiks, cut nine squares measuring 9" x 9". Stabilize them with a cut-away stabilizer and embroider the designs... Try to place the embroidery in the center of each square. Note: We prefer to use low-loft polyester felt instead of stabilizer. After quilting, it gives the designs a puffy, trapunto effect.
|
| After the embroidery is finished, trim the blocks to an 8" x 8" size. |
|
| Cut away the excess stabilizer or felt on the back around the embroidery. |
|
|
Cutting and Sewing:
|
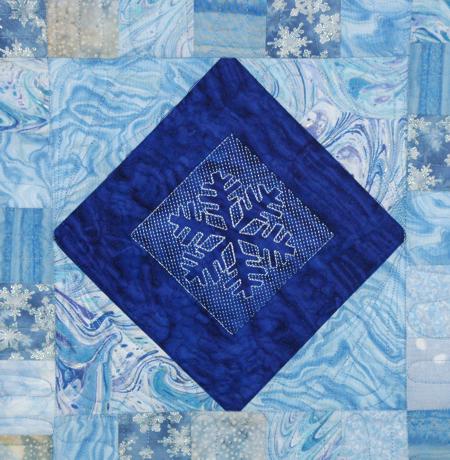
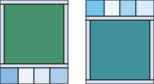
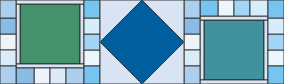
| Out of light blue fabric cut 2 squares measuring 5 3/4" x 5 3/4". Cut each one in half along the diagonal to make trinagles. You should get a total of 4 triangles.
|
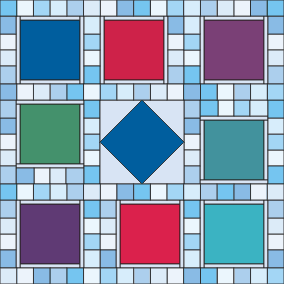
| Take one embroidered square and sew the triangles to its sides. You'll get a square measuing 10 1/2" x 10 1/2". Note: Choose a square that features one of the snowflakes or flowers, because these designs can be safely rotated.
This square will be the focal point of the quilt.
|
|
| Out of light blue fabrics cut 16 strips measuring 1" x 8" and 18 strips measuring 1" x 8 1/2". Sew the 1' x 8" strips to the upper and lower edges of all remaining embroidered squares.
Sew the 1" x 8 1/2" strips to the left and right edges of the squares.
|

|
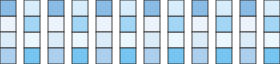
| Out of light blue scraps cut 136 squares measuring 2 1/2" x 2 1/2". Sew 48 of these squares into 12 strips, 4 squares each.
|
|
| Using the embroidered blocks and five 4-square strips, sew the first row of the quilt in the following order. Note that there are 2 strips to the right of the central block. |

|
| Using the embroidered blocks and five 4-square strips, sew the third row of the quilt in the following order: |
|
| You have two 4-square strips and two embroidered blocks remaining. Sew one strip to the upper edge of one of the blocks and the second strip to the lower edge of the second block. |
|
| Sew the 2 1/2" x 2 1/2" squares into four strips, 5 squares in each strip. |

|
| Sew these strips and the remaining embroidered blocks together in the following order: |
|
| Sew the remaining 2 1/2" x 2 1/2" squares into four strips, 17 squares in each. |
|
| Sew these strips together with the rows of quilt blocks to form the top of the quilt. |
|
|
Borders:
|
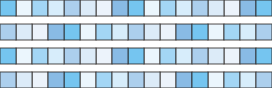
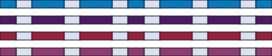
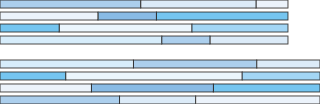
| For the first border, which imitates a ribbon, cut 24 light blue strips measuring 1 1/2" x 2 1/2" and 4 squares measuring 1 1/2" x 1 1/2"; Out of blue, purple, burgundy and violet batiks, cut 4 sets of the following strips.
3 short strips measuring 1 1/2" x 2 1/2";
4 long strips measuring 1 1/2" x 4 1/2".
|
Sew each border in the following way (the diagram below helps a lot):
color 2 1/2" strip - light blue 2 1/2" strip - color 4 1/2" strip - light blue 2 1/2" strip - color 4 1/2" strip - light blue 2 1/2" strip - color 2 1/2" strip - light blue 2 1/2" strip - color 4 1/2" strip - light blue 2 1/2" strip - color 4 1/2" strip - light blue 2 1/2" strip - color 2 1/2" strip. |
|
| Sew 2 borders to the left and right edges of the quilt. |
|
| Sew 1 1/2" squares to the ends of the 2 remaining borders. |

|
| Sew the borders to the upper and lower edges of the quilt. |
|
| Out of different blue fabrics, cut strips 1 1/2" wide and of varying lengths. Sew them together into long strips and subcut into 4 strips 36 1/2" long and 4 strips 40 1/2" long. |
|
| Sew the 36 1/2" long strips into two pairs and sew them to the left and right edges of the quilt top. |
|
| Sew the 40 1/2" long strips into two pairs and sew them to the upper and lower edges of the quilt top. |
|
|
Quilting and Finishing:
|
| Place the backing on a flat surface (table) face down. Cover with batting. Spread your working piece over it. Pin all three layers together with 1" pins and start quilting. We quilted along the lines of the embroidery and then in free motion style all over the piece.
After the quilting is finished, press the work with heavy steam and square the work -- all corners should be 90 degrees and opposite sides should be of the same length.
Finish the raw edges with the binding.
|
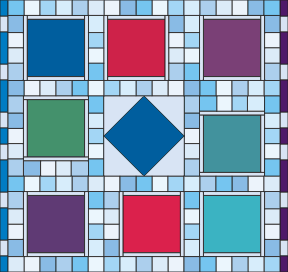
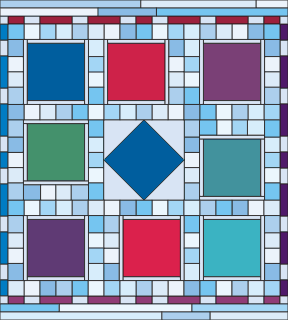
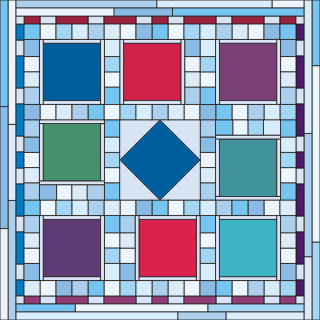
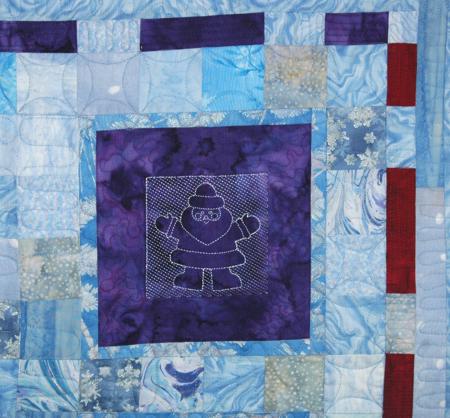
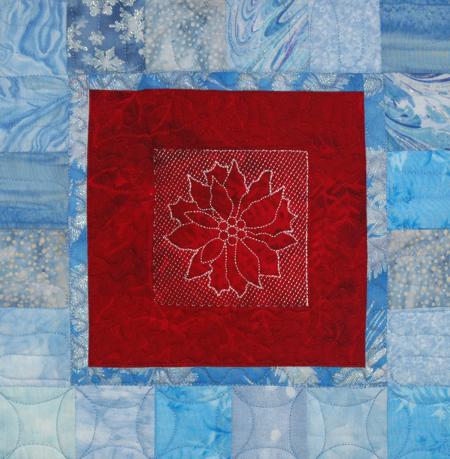
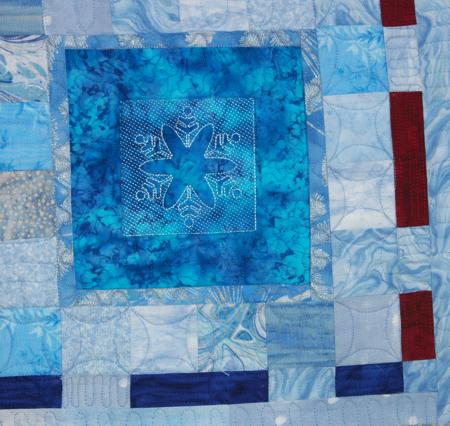
| Here are more close-ups of the quilt: |
|
|
|
|
|
|
|
|
Happy Stitching!
|
|
Back to Christmas Quilting Set
|
|
Back to Projects page
|
|
|


