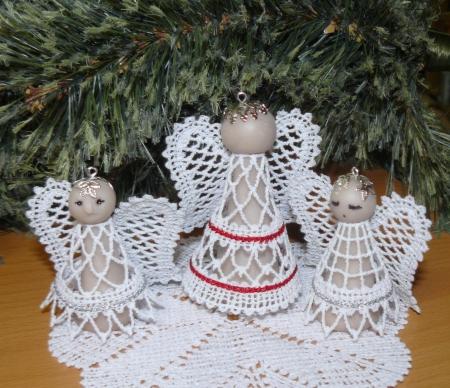
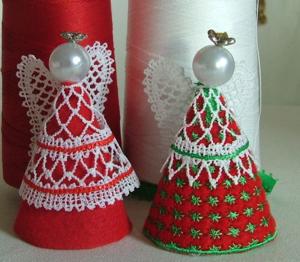
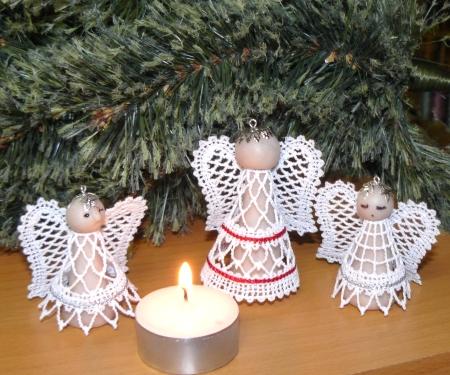
Small lace angels are a great Christmas ornament with a traditional, old-fashioned appeal.
Our set consists of 3 lace dresses with wings. Here are the instructions on how to embroider the lace and make small angels. We'll describe several ways.
To embroider this type of lace, please read our recommendations first.
Stabilizers: We recommend to use water-soluble mesh, such as Vilene. Vilene D0102 is a non woven dissolvable stabilizer which is imported into the US, is sold in large rolls and is sometimes repackaged under different brand names. Two of these brand names are Wash-Away and Aqua Magic.
Film-like water soluble stabilizers, such as Solvy, are not suitable for the project.
Threads: The thinner the thread, the finer the final product will be. That is why we recommend that at least one of the threads, either in the bobbin or in the needle, should be cotton, which gives bulk to the lace and makes it look hand-made. Embroidery polyester thread will make very fine web-like lace.
Embroidery rayon thread is too soft, it does not keep its shape and very often its color fades under the influence of chemicals from the water-soluble mesh.
If you are using 50- or 60-weight cotton, you can use it both in the bobbin and in the needle. If you use 40-weight cotton thread for the needle, you can use regular polyester bobbin thread.
We used Signature machine quilting cotton thread, but similar threads from other companies should work just as well.
Needles: We use size 80/12 embroidery needles and 80/12 metallic needles. Our experience shows that cotton thread used with metallic needles gives less lint. The needles should be sharp, so it's advisable to change them after every project.
Most Importantly: ALWAYS make a test stitch-out of the design and wash away the stabilizer. This helps you to select the threads, needles, stabilizers and settings of your machine correctly. DO NOT embroider several designs in one hoop.
First embroider the angel dresses with wings, wash away the stabilizer and let them air dry. From here, you can proceed in a few different ways to complete the angels.
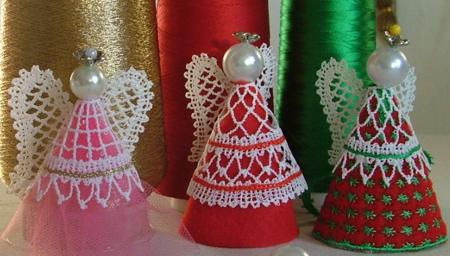
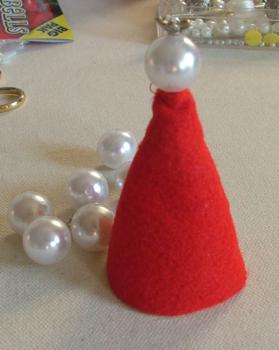
You will need craft felt, large pearl beads and bead caps.
Out of felt cut a small piece about 3" x 4".
Fold the piece in a cone. Thread a needle with a matching thread and hand-sew the cone.
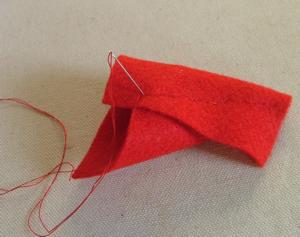
With scissors, cut away the excess felt around the stitches and on the bottom.

Sew a bead with a cap to the cone.
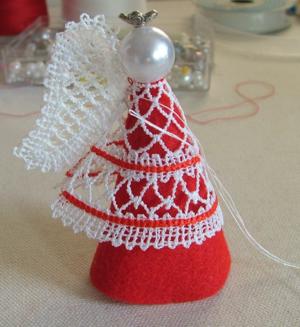
Now put attach one of the dresses over the cone (we chose the largest one). Thread the needle with white thread and hand-sew the back seam of the dress closed.
To make the angel smaller, cut the cone shorter.
You can download our machine embroidered cone from the Free-Standing Lace Tutorial. Please scroll down that page. Embroider the cone on craft felt.
After you embroider and sew the cone, attach the bead.
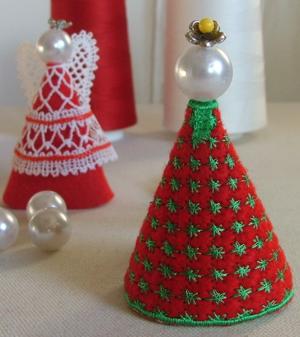
Now attach a lace dress over the cone and sew the back seam closed.
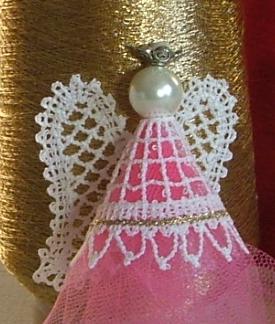
Cut a strip of tulle or organza, about 2" x 8"-10". Baste one of the long sides of the strip. Then pull the thread to gather the tulle into a rosette.
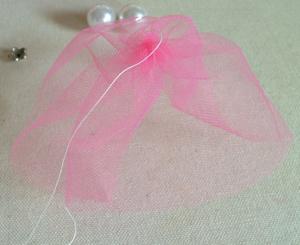
Sew a bead with a cap to the rosette. Then put on a dress and sew the back seam closed.
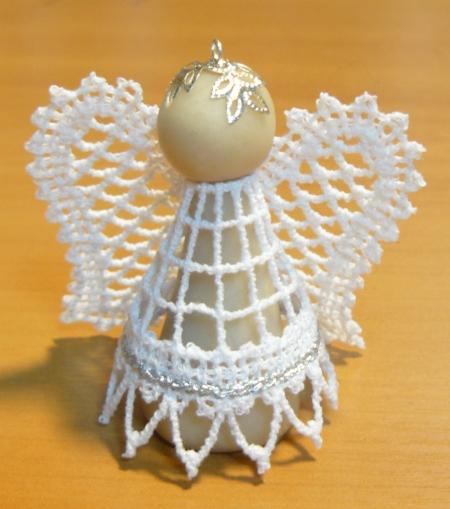
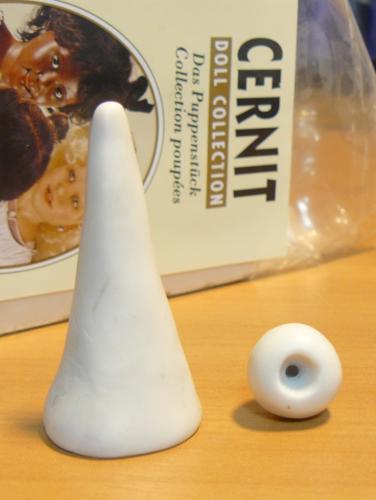
For these angels you will need polymer clay of any type.
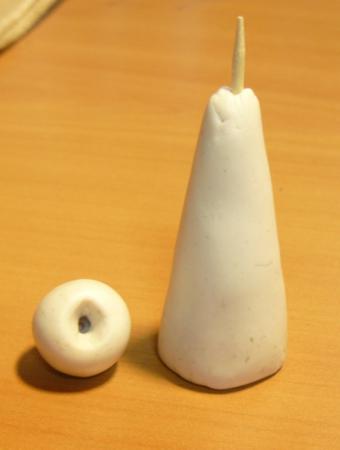
Using polymer clay, shape a small cone and a ball. Try fitting the dress over the cone to make sure it is the right size.
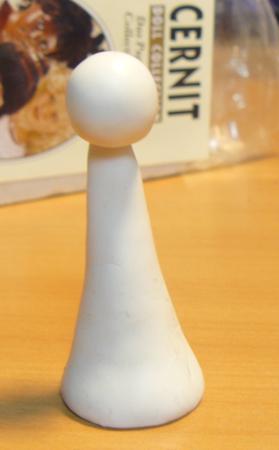
To attach the ball to the cone, use a toothpick.
Connect the head and the body. Depending on the type of clay, either let it air dry or bake in a oven. Follow the manufacturer's directions.
Put on a dress and hand-sew the back seam closed. Glue a bead cap on the head.
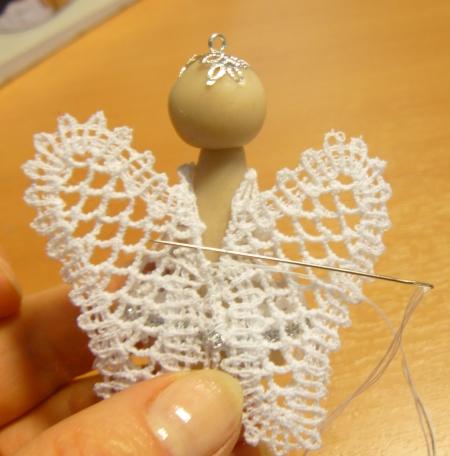
Your clay angel is ready! You can draw or sculpt a face, if you like.