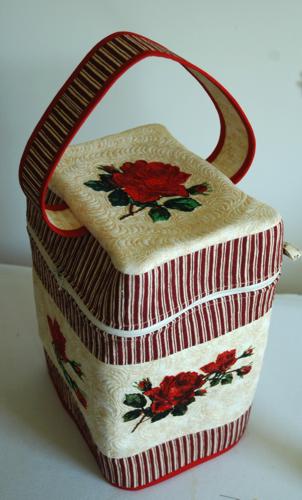
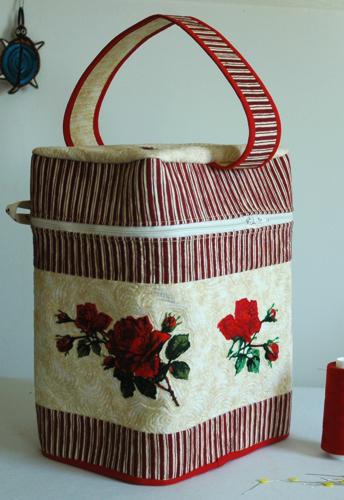
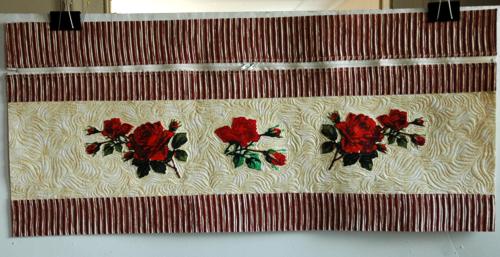
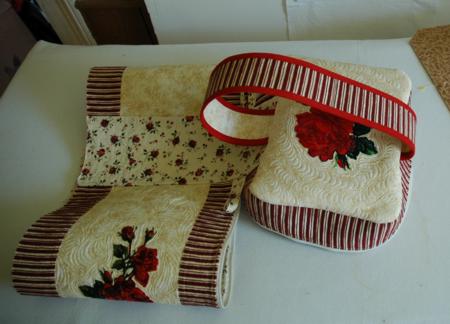
The quilted craft basket has a square, roomy shape that makes it handy for organizing your supplies when you want to bring them with you. It's great for knitters, quilters, beadcrafters, and others. We embellished it with the Scarlet Rose Set.
This is a perfect Mother's Day gift if your mom is into crafts.
You will need light-colored and patterned fabrics for the top and the lining, about 2 yards in all. We did not have enough fabric with the same pattern, so we used different fabrics, but tried to match the colors as closely as posisble.
You will also need:
Out of light-colored fabric, cut a strip measuring 7" x 33",
Out of striped or any other patterned fabric of your choice, cut
Out of fabric for the lining, cut
Out of low-loft batting, or craft felt, cut
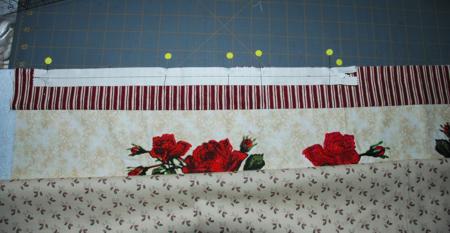
Sew the colored 2 1/2" x 33" strip to the upper edge of the light-colored 7" x 33" strip. Sew the 3" x 33" colored strip to the lower edge of the light-colored strip.

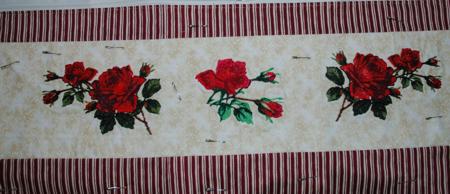
Mark the placement of the roses on the light-colored strip and embroider the designs one by one. Use either medium-weight iron-on stabilizer or polyester craft felt.
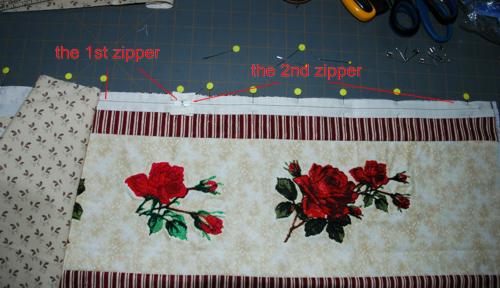
After the embroidery is finished, place the 10" x 34" batting strip on the table. Cover it with the embroidered piece. Align the upper edges. Mark the center of the upper edge.
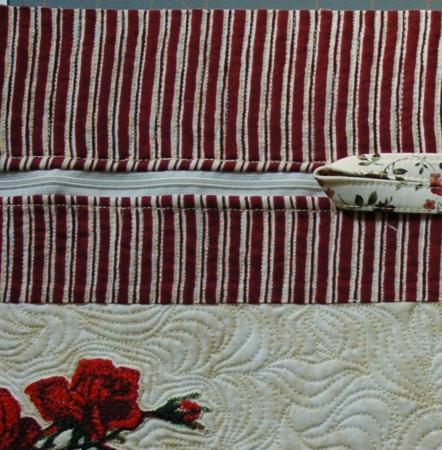
Take the first zipper. Place it face down, beginning from the center to the left, along the upper edge. Pin in place.
Take the second zipper. Place it face down, beginning from the center to the right, along the upper edge. Pin in place.
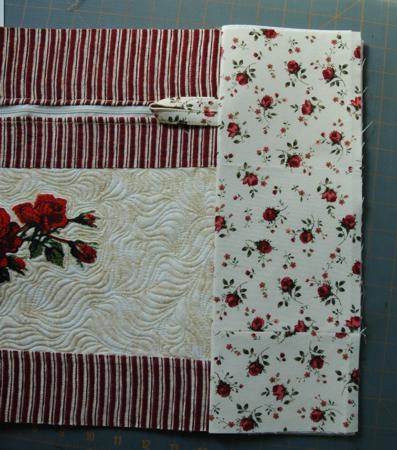
Cover the working piece with the lining 9 1/2" x 33" strip, face down. Align the upper edge. Pin.
Topstitch 1/4" from the edge. You should stitch through 4 layers: top, batting, zippers and lining.
Turn the work right side out. Press. Pin 3 layers with safety pins. Topstitch 1/8" from the upper edge of the fabric.
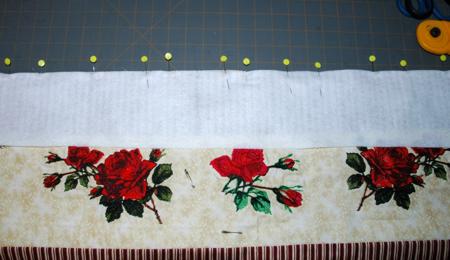
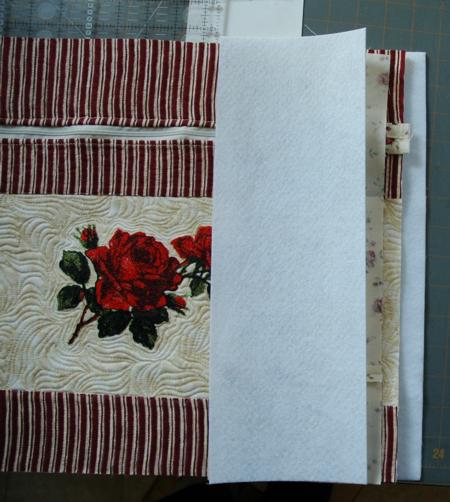
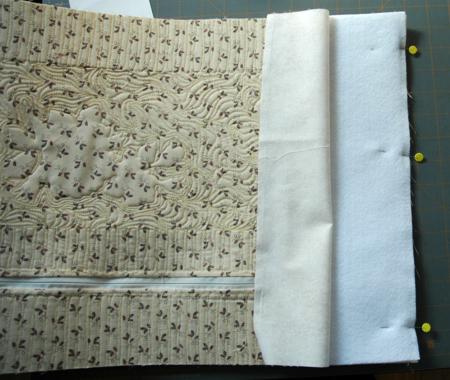
Attach the upper part of the basket. On the table, place the 3 1/2" x 33" lining strip face up. Place the working piece, face up, over the lining strip, align the upper edge of the strip with the free edge of the zippers.
Place the 3 1/2" x 33" colored strip over the upper part of the working piece. Align with the free edge of the zippers.
Cover this strip with the 4" x 34" piece of batting, align its upper edge with the zippers. Pin all 4 layers in place.
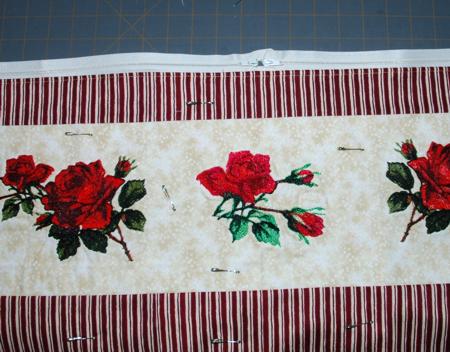
Topstitch 1/4" from the edge. Turn the work right side out. Press. Pin 3 layers with safety pins. Topstitch 1/8" from the edge of the fabric over the zippers.
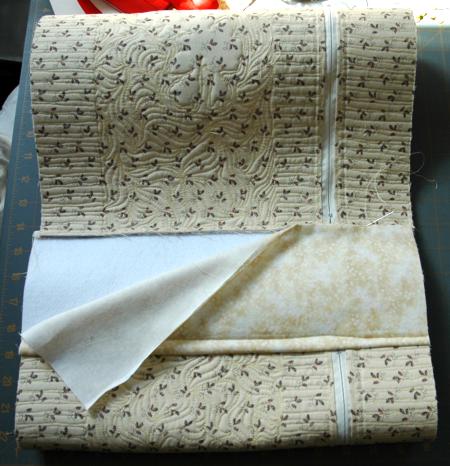
You should get a piece similar to what you can see below:
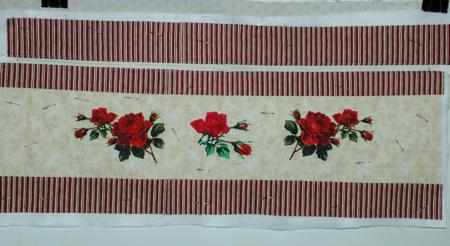
Now quilt the piece as densely as you can. Press with heavy steam and trim to get the piece 14" x 32 1/2".
Loops: Out of the fabric for the outer side of the basket also cut 2 strips 2" x 5". We'll use these to make 2 loops to make the zippers easier to open.
Fold the 2" x 5" strips lengthwise, face outside. Press.
Fold the raw edges 1/2" inside. Press. Topstitch along the long edges.
Place each loop on the left and right edges of the working piece over the zippers. Topstitch in place.
Now we need to make the back panel of the basket. For this you need to cut 5 1/2" x 14" strips out of each of the following:
Place the lining strip over the interfacing strip and align all edges.
Place the outer strip over the batting and align the edges.
Place the lining+interfacing strip on the table, with the lining face up.
Over it, place the quilted piece, face up, and align the right edges.
Cover with the outer strip+batting, face down. Pin all layers together. Stitch 1/4" from the edge.
Turn all layers out. Press. The right end of the working piece will look like this from the outside:
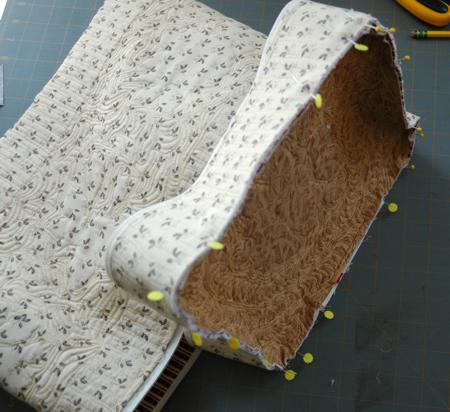
Fold the working piece, face inwards, to make the short edges meet.
Fold back the lining and pin the remaining layers together.
Stitch through all layers, except the lining of the back panel, from the edge.
Unfold the lining. Tuck in the raw edge 1/4" inside and handstitch it closed.
Quilt the back panel. It's somewhat tricky, but manageable. Quilt in a free-motion style, starting from the center and moving to the raw edges. You will get a tube similar to ours:
For the lid and bottom cut 4 rectangles measuring 11" x 13". Note that one of the rectangles should be of light-colored fabric for embroidery. The three other rectangles can be of any fabric of your choice. The fabric that you used for the lining is a good choice, if you have enough left over.
Also cut 2 rectangles measuring 11" x 13" out of batting.
Embroider the large single rose from the Scarlet Rose Set in the center of the light-colored rectangle.
Make 2 sandwiches - backing (face down) - batting - top (face up). Pin the layers together and quilt densely.
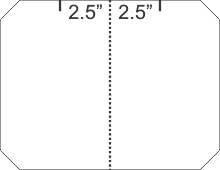
Take a sheet of letter-size paper (11" x 8 1/2").
Measure 1" from a corner along one edge and make a mark, then measure 1" from the corner along the other edge. Connect the marks and cut the corner off. Repeat for the remaining corners.
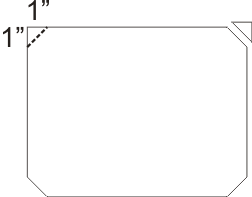
Fold the sheet in half, widthwise, to mark the central points of the long sides.
From the central point measure 2 1/2" along the edge in either direction and mark the points. These are the marks for positioning the back panel of the basket.
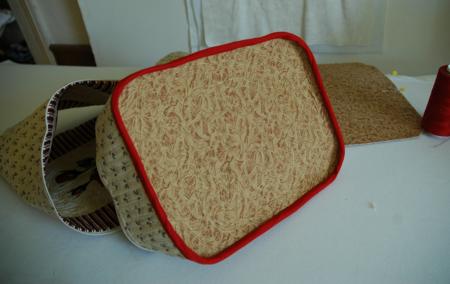
The result is a paper template for the lid and the bottom.
Position the template on the embroidered piece so that the embroidery stays in the center. Pin the template and trace it with a pencil or disappearing fabric marker. Don't forget to transfer all the marks.
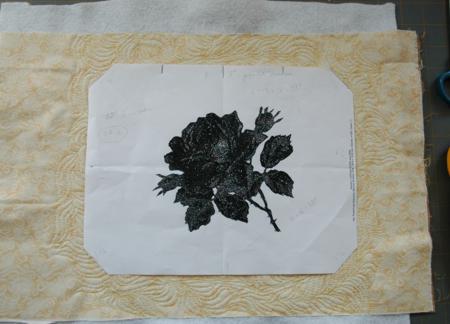
Cut the lid out leaving 1/4" on all sides for seam allowance.
Take the second quilted piece and repeat the procedure to make the bottom of the basket.
For the handle, out of fabric, cut 2 strips measuring 2 1/2" x 22", and out of batting one strip slightly larger. Make a sandwich out of the lining (face down), batting and top (face up). Quilt densely. Trim to 2" x 21- 21 1/2". Finish the long sides with binding.
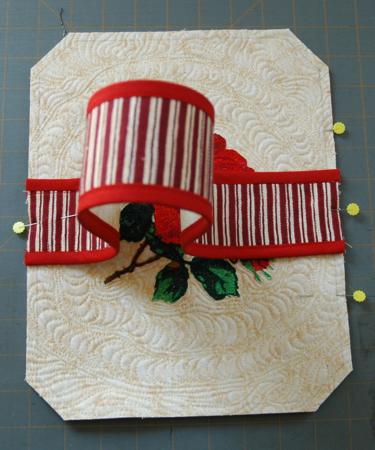
Position the handle, face up, on the lid. Align the centers of the short sides of the handle with the centers of the long sides of the lid. Pin. Topstitch in place 1/4" form the edges.
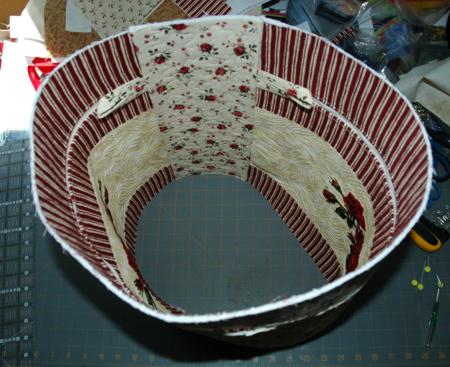
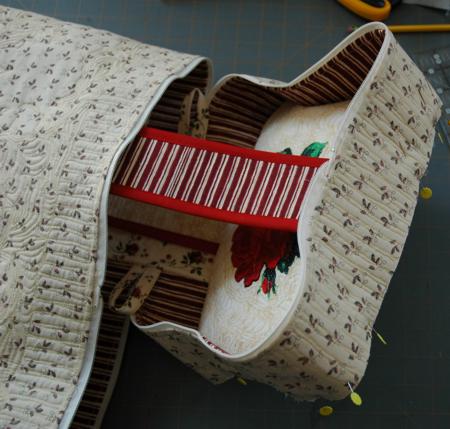
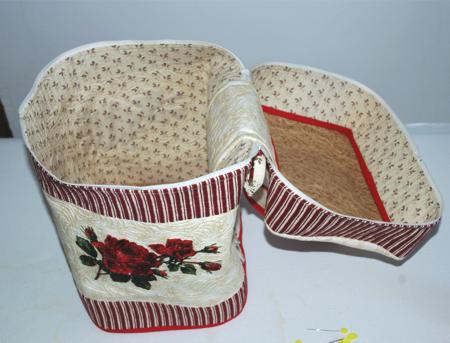
Turn the tube right side in. Open the zippers.
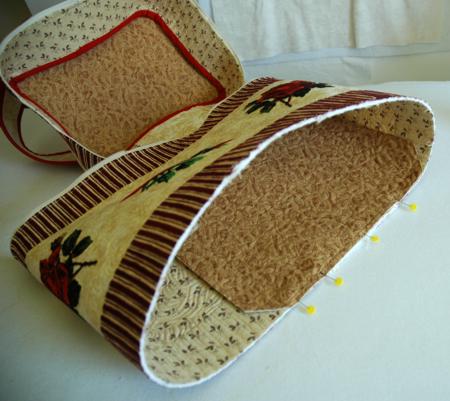
Pin the top you just made to the upper part of the tube (the embroidery and handle should face inwards. First align the marks on the lid with the back panel. Then pin all the other sides. Baste, removing the pins. Topstitch 1/4" from the edge. See the photo below.
Finish the raw edge with the bias tape.
Turn the work right side out.
Start inserting the bottom from the right side so that the seam will look out. Align the markings with the back panel, pin the bottom, then pin all other sides. Baste, removing the pins.
Finish the raw edge with the bias tape.
If you need any inner pockets, make them now. We recommend trying velcro closures for them.
Fold the lid back and close the zippers.