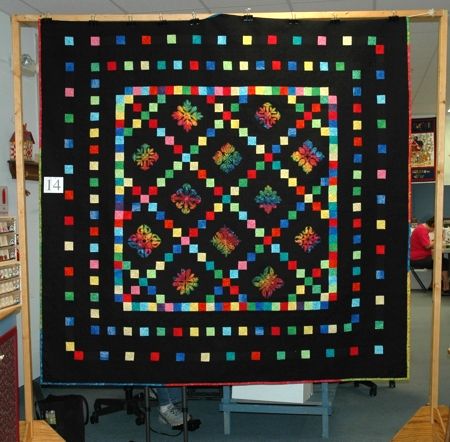
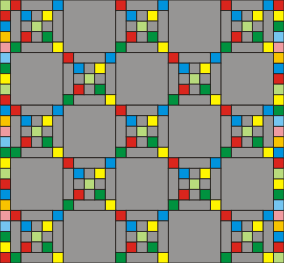
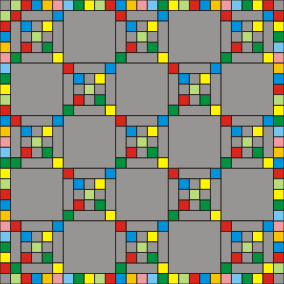
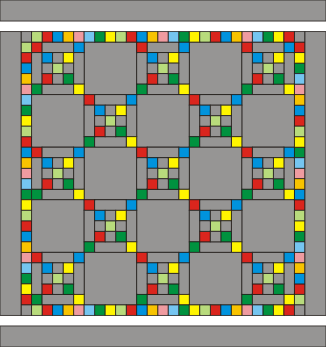
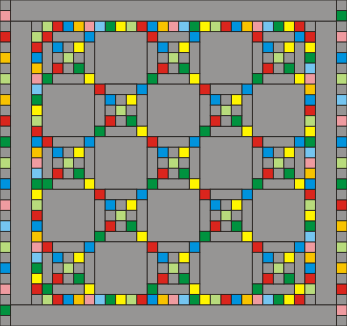
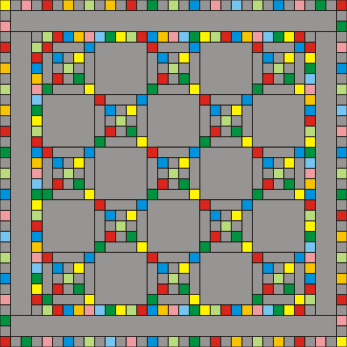
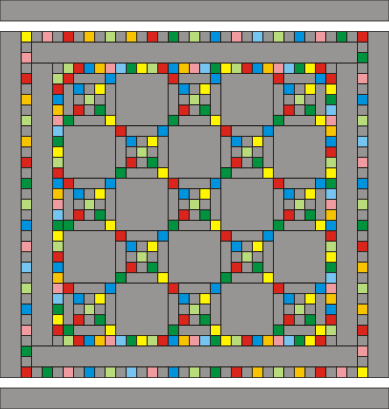
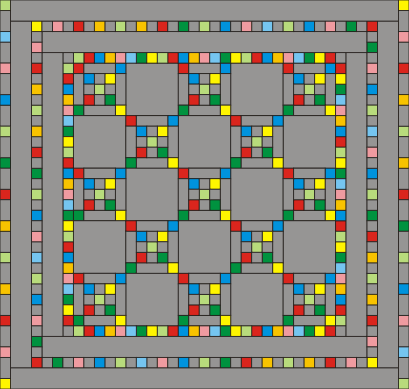
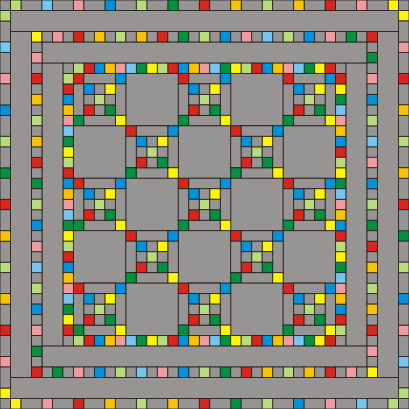
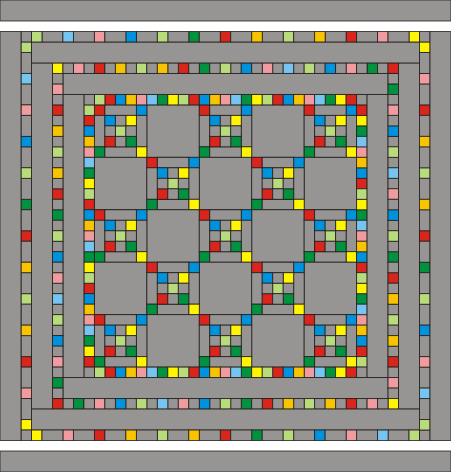
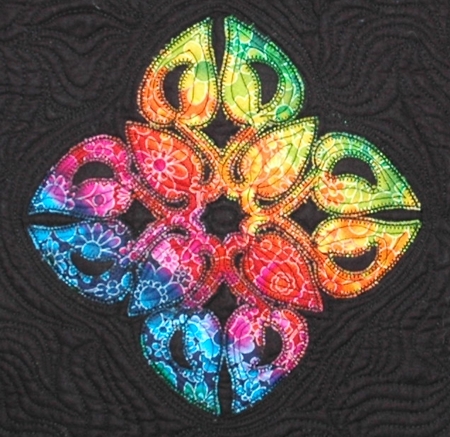
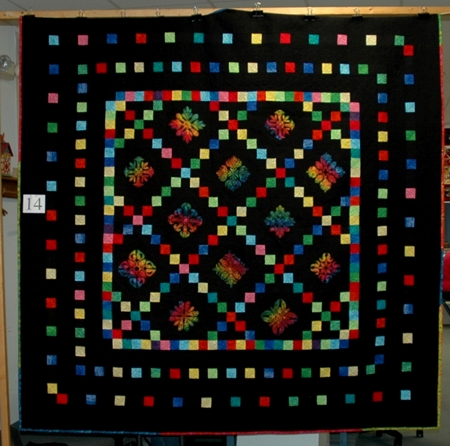
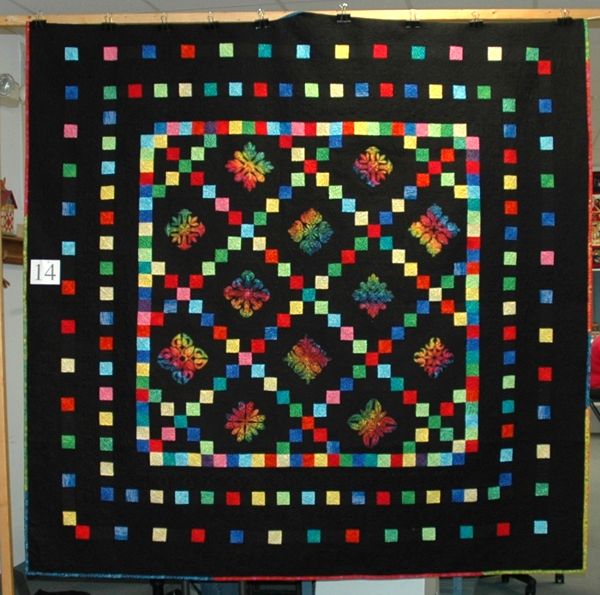
| This beautiful quilt uses a Single Irish Chain pattern as its centerpiece. Meanwhile, the bright colors and Hawaiian applique motifs give it a charming tropical look. The embroidery designs used are the Hawaiian Motif Applique Set I and Hawaiian Motif Applique Set II.
The finished size is about 85" x 85".
|
Click to enlarge |
You will need:
- 4 yards of black cotton fabric,
- multi-colored scraps to be cut into 321 squares measuring 2 1/2" x 2 1/2" each. You can use any colors - red, blue, yellow, green, pink, turquoise, etc.
- fabric for the applique
- low-loft black batting - we used a pre-cut queen-size piece,
- fabric for the backing.
For machine embroidered applique, we used cotton machine quilting threads, and polyester felt as stabilizer.
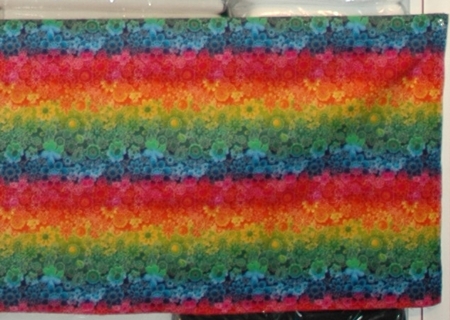
For the applique and binding we used 1 1/2 yard of Flower Power fabric by Yuko Hasegawa, a product of RJR Fabrics. You can either search for the same fabric in your local shop or use bright batiks to substitute. Here is a picture of the fabric:
|
|
|
Cutting:
|
Out of black fabric, cut
- 12 squares measuring 10 1/2" x 10 1/2";
- 122 squares measuring 2 1/2" x 2 1/2";
- 52 strips measuring 2 1/2" x 6 1/2";
- 48 strips measuring 2 1/2" x 4 1/2".
For the first black border, cut
- 2 strips measuring 4 1/2" x 54 1/2"
- 2 strips measuring 4 1/2" x 62 1/2"
For the second black border:
- 2 strips measuring 4 1/2" x 66 1/2"
- 2 strips measuring 4 1/2" x 74 1/2"
For the last outer border:
- 2 strips measuring 6 1/2" x 78 1/2"
- 2 strips measuring 6 1/2" x 86 1/2"
Out of the fabric scraps cut 321 square measuring 2 1/2" x 2 1/2".
|
|
|
|
The Block
|
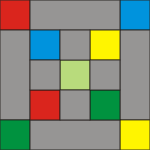
| Take 4 black squares measuring 2 1/2" x 2 1/2", 4 black strips measuring 2 1/2" x 6 1/2" and 9 multi-color squares. Sew them into the following block: |
|
| Make 13 such blocks. |
|
|
|
Assembling the Top
|
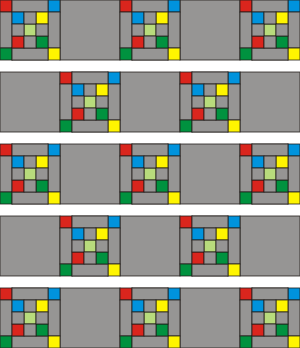
| Alternating the blocks and black 10 1/2" x 10 1/2" squares, sew them into 5 rows. |
The first, third and fifth rows should have the following order:
block - black square - block - black square - block |

|
The second and the forth rows should have the following order:
black square - block - black square - block - black square: |

|
| Sew the rows together to form the quilt top: |
|
|
Borders:
|
| For the first border, out of colored squares, sew 2 strips with 25 squares in each. |

|
| Sew the strips to the left and right edges of the top. |
|
| Sew 2 more strips with 25 colored squares in each. Add a black 2 1/2" x 2 1/2" square to each end of the strips. |

|
| Sew the strips to the upper and lower edges of the top. |
|
|
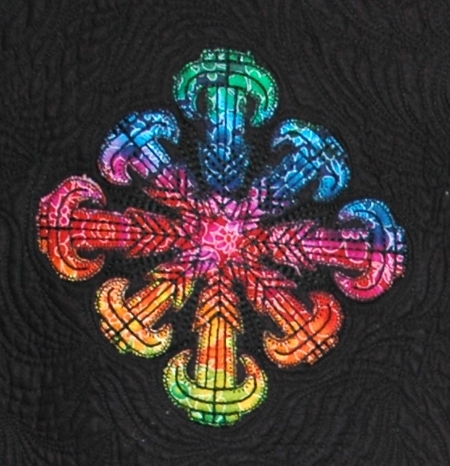
Embroidery
|
| We made the applique after the first border was attached (there are a total of 5 borders). If you first finish the top and then embroider, the top will be much larger and heavier, and a lot more difficult to work with. Stabilize each black square with a piece of polyester craft felt. The piece of felt should be slightly larger than the square. Baste the quilt top to the felt in the ditch along the colored borders. After the embroidery is finished, rip the baste and cut away the excess felt around the embroidery.
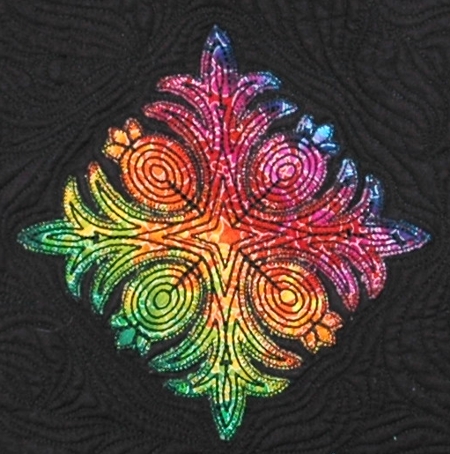
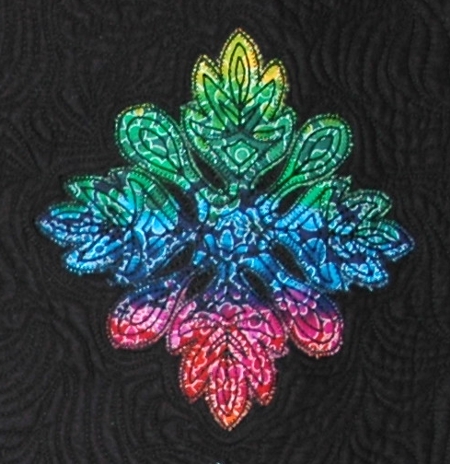
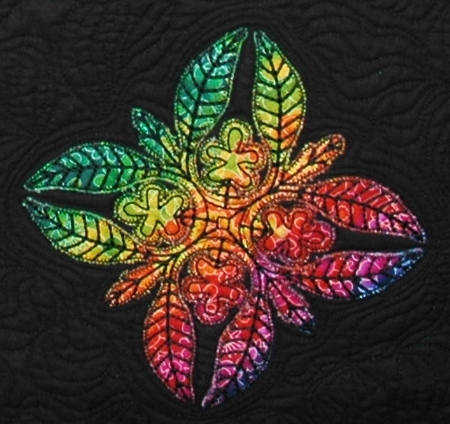
For embroidery we used machine quilting cotton thread. The Hawaiian applique designs have a zig-zag finish to imitate raw-edge applique, and that is why embroidery thread, which is very fine, will not look as well as the cotton.
|
|
|
| After you are done the embroidering, continue with the rest of the borders. |
| Sew the black strips measuring 4 1/2" x 54 1/2" to the left and right edges; sew the black strips measuring 4 1/2" x 62 1/2" to the upper and lower edges. |
|
| For the next border, sew the strips out of alternating colored and black 2 1/2" x 2 1/2" squares. Sew 2 strips with 31 squares in each, and 2 strips with 33 squares in each. |

|
| Sew the 31 square strips to the left and right edges of the top. |
|
| Sew the 33 square strips to the upper and lower edges of the top. |
|
| Sew the 2 black strips measuring 4 1/2" x 66 1/2" to the left and right edges of the top. Sew the 2 black strips measuring 4 1/2" x 74 1/2" to the upper and lower edges of the top. |
|
| For the fifth border sew 4 strips alternating the colored squares with black 2 1/2" x 4 1/2" strips. Each strip contains 12 strips and 14 colored squares. Add black squares to each end of two of the strips. |

|
| Sew the shorter strips to the left and right edges of the top. |
|
| Sew the longer strips to the upper and lower edges of the top. |
|
| Sew the 2 black strips measuring 6 1/2" x 78 1/2" to the left and right edges; sew the 2 black strips measuring 6 1/2" x 86 1/2 to the upper and lower edges. |
|
|
Quilting:
|
| Now place the backing on a flat surface (table) face down. Cover it with batting. Spread your working piece over it. Pin all three layers together with 1" pins and start quilting.
|
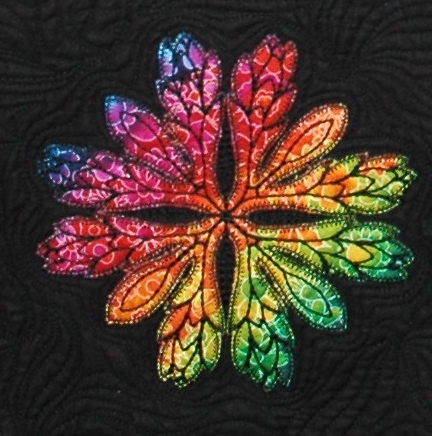
| Please note that the designs from the 2 sets of Hawaiian applique are slightly different in style. The first set has no embroidery inside, the second set has embroidery inside the applique. To make them look alike, we quilted the designs from the first set on the inside. |
|
| We quilted in a free-motion style. After the quilting is finished, press the work with heavy steam and square the work -- all corners should be 90 degrees and opposite sides should be of the same length.
Finish the raw edges with the binding.
|
|
|
|
|
The quilt is ready. Enjoy!
|
|
|
|
|
Happy Stitching!
|
|
Back to Hawaiian Motif Applique Set I
|
|
Back to Hawaiian Motif Applique Set II
|
|
Back to Projects Page
|


