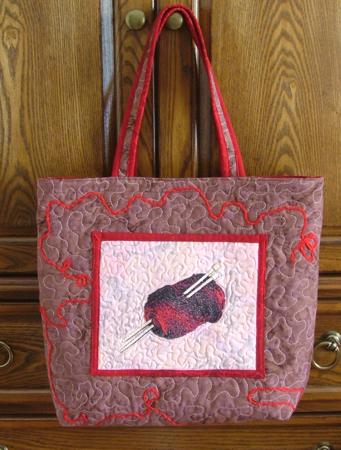
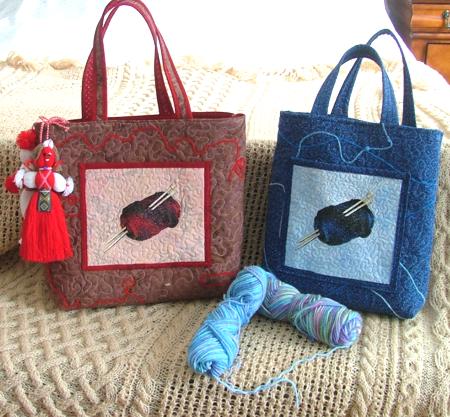
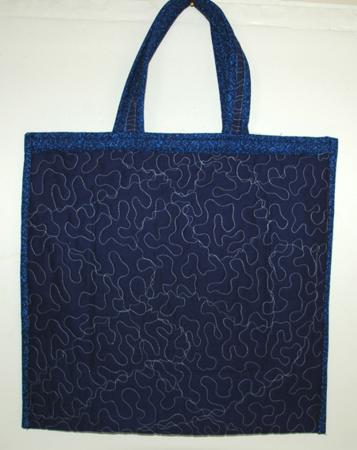
These simple totes are very good for holding your current knitting project no matter whether you knit at home or carry it around with you during your day. The embroidery on the outside pockets features the Yarn and Needles design.
You will need:
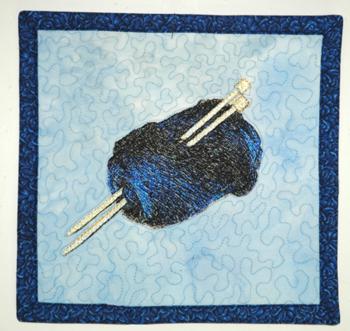
Stabilize light-colored fabric with polyester craft felt instead of stabilizer. Use a piece of felt larger than the piece of fabric. Make the embroidery of the design in the color scheme you want.
After the embroider is finished, place a piece of lining fabric underneath, pin all 3 layers together and quilt in a free-motion style. We quilted around the embroidery and made stippling all over the fabric.
Press with heavy steam. Trim to about 7" x 9" and square (all corners should be 90 degrees and opposite sides should be of the same length).
Finish the raw edges with binding. The outside pocket is ready. Set it aside for the time being.
Cut 1/2 yard of the lining fabric. Spread the piece on a flat surface (table) face down. Cover with batting. Spread the top fabric over it, face up.
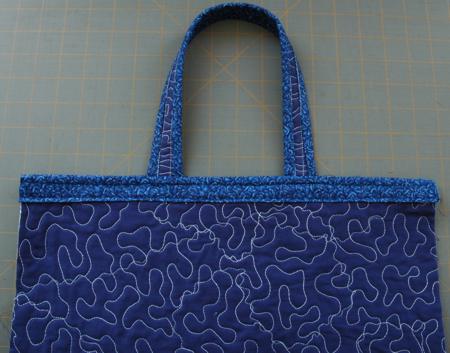
Pin all three layers together with 1" pins and start quilting. We made meandering all over the piece.
Press with heavy steam and square the piece (all corners should be 90 degrees and opposite sides should be of the same length). After squaring, your piece would be about 17" x 40".
Place the piece on the cutting mat. With a rotary cutter, cut a strip 1" wide from one of the long sides of the working piece.

From one of the short sides of the working piece, cut a strip 10" wide.

Out of fabric for the lining cut 3 strips 2" wide and the length of the width of the fabric (about 40"), and 2 strips 3" wide and the length of the width of the fabric (about 40").
Fold all strips in half lengthwise and press.
If you want to decorate the tote with yarn, do it now - topstich some yarn on to working piece.
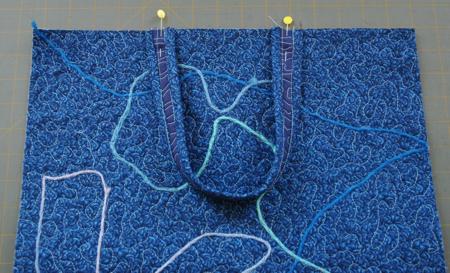
To make the handles, finish both long sides of the 1" wide strip you cut from the quilted piece with the 2" binding strips you cut from the lining fabric. Press and cut the strip in half.
Pin the handles to the edges of the short sides of the tote as shown below. Topstitch in place 1/4" from the edge.
Place the strips of 3" wide binding over the handles. Align the edges. Topstitch 1/4" from the edge. Topstitch again about 3/8" from the edge.
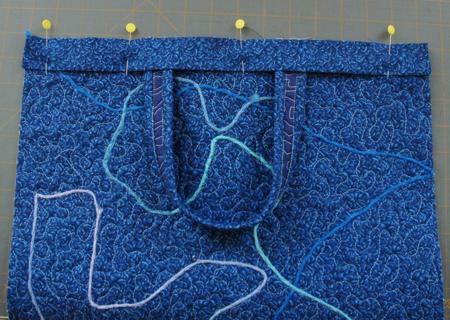
Fold the binding back and the handles up. Pin. Topstitch from the side of the lining. Stitch 1/8" from the edge of the binding and 1/4" from the upper edge of the tote.
Finish the long sides of the 10" x 16" piece with 2" wide binding. This will be the inner pocket.
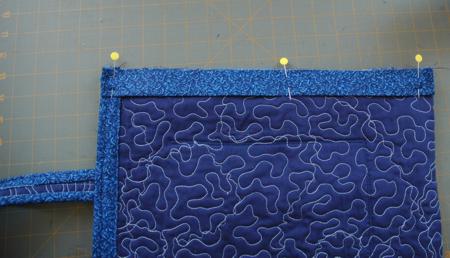
Position the inner pocket over the lining 2" from the upper edge. Align the short sides. Topstitch 1/4" from the edges.
Note that the lower stitch will be seen on the outside of the tote and choose bobbin thread to match the fabric of the top.
Position the pocket with embroidery on the outside of the tote, on the side without the inner pocket. Pin it and then topstitch in place.

Fold the tote, face inwards. Align all edges. Pin the sides together. Stitch 1/4" from the edges, then 3/8" from the edges.
Finish the raw edges with 3" wide binding strips. For this, place the folded binding with the raw edge along the edge of the bag. Pin. Topstitch in place.
Fold the binding over the raw edge of the tote and handstitch in place.
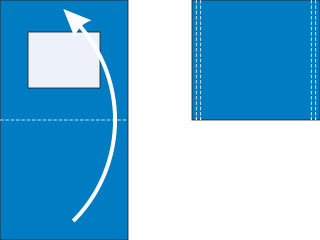
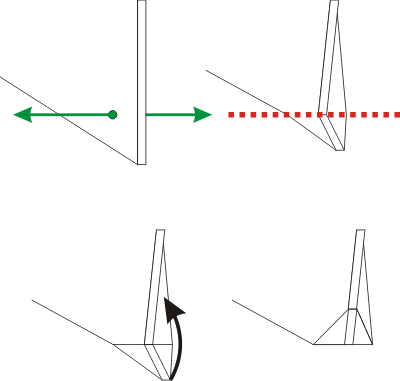
Make box corners at the bottom of the bag. For this, separate the front and back sides at the corners. Center the side seam with the central line of the bottom. Measure 1 1/2" along the seam from the corner and machine-stitch perpendicular to the seam across the corner. Do not trim the seam. Fold it onto the side seam and attach with several manual stitches. Repeat for the second corner.
Turn the tote right side out.