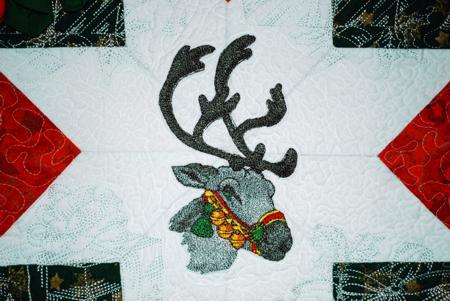
This quilted wall hanging is very simple to piece and embroider, and it has a distinctive rustic look. It's a great decorative piece to hang in your living room or den. The design used on the central panel is Santa's Reindeer for a large hoop. We quilted the panels using the Christmas Ornament Quilting Set.
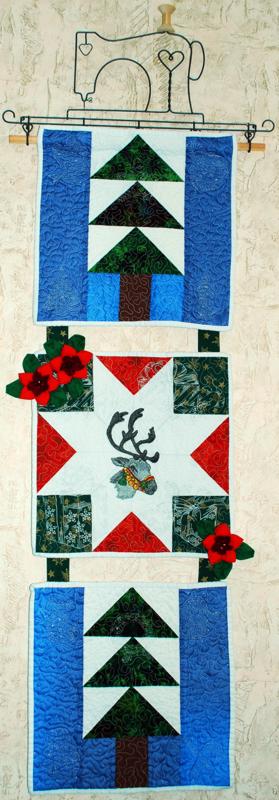
The wall hanging consists of 3 quilted panels. Each panel is about 16" x 16".
You will need a fat quarter of blue fabric, scraps of white or light blue fabric, green and brown fabrics.
For each panel out of blue fabric, cut
Use green and white squares to make half-triangle blocks. For this place them in pairs face to face. You will get 3 pairs. Align all sides. With a pencil draw a diagonal.
Sew 1/4" on both sides of the diagonal.
Cut through the diagonal. Open the new squares - half white-half green. Press the seams to the green triangles.

Place the units in pairs, green edge to green edge and sew. Press the seams. You'll get 3 strips for the fir tree.
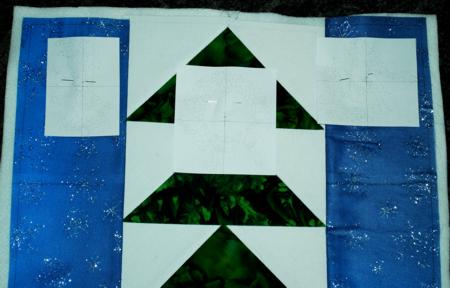
Sew the strips together to get a fir tree.
Take the 3 1/2" x 4 1/2" blue parts and 2 1/2" x 4 1/2" brown part and sew them together to get the trunk.
Sew the row to the tree unit. Press all seams.
Sew the 4 1/2" x 16 1/2" blue strips to the left and right edges of the tree unit. Press the seams.
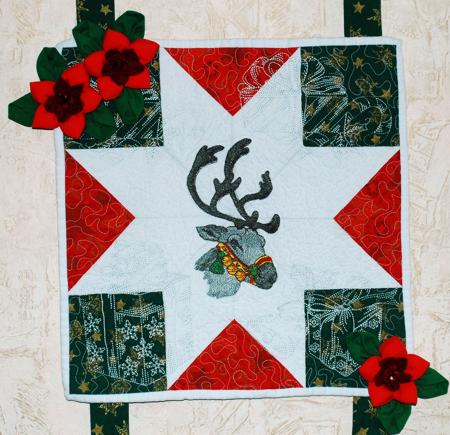
You will need green, red and white fabrics.
Out of green fabric cut four squares measuring 4 1/2" x 4 1/2".
Out of red fabric cut 8 squares measuring 5" x 5".
Out of white fabric cut a square measuring 8 1/2" x 8 1/2", and 8 squares measuring 5" x 5".
Using the 5" x 5" red squares and 5" x 5" white squares, make 8 red-and-white half-triangle blocks, as explained earlier.

Stitch the half-triangles together in pairs:

Take 2 of the resultant strips and sew the green squares to their ends:

Sew the remaining two strips to the left and right edges of the 8 1/2" x 8 1/2" white square.
Sew the green, red and white strips to the piece.
Stabilize the Star Panel with polyester craft felt (you can also use your favorite cut-away stabilizer) and make the embroidery of Santa's Reindeer for a large hoop
Cut away the excess felt or stabilizer.
Now place the backing on a flat surface (table) face down. Cover with batting. Spread your panels over it.
Pin all three layers together with 1" pins in the corners and mark the areas for quilting with embroidery designs. from the Christmas Ornament Quilting Set.
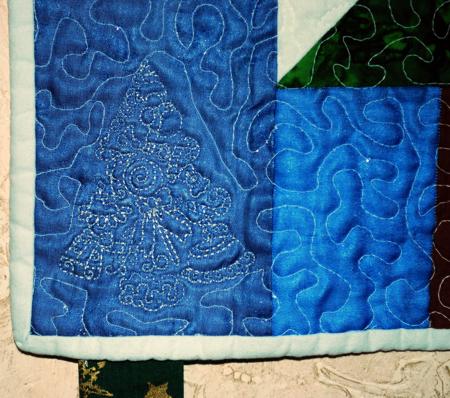
We made the embroidery and added some stippling in a free-motion style all over the pieces.
After the quilting is finished, press the work with heavy steam and trim the work - the opposite sides should be straight and of the same length.
Finish the raw edges with binding.
To connect the panels in a wall hanging, use ribbons, or make fabric strips. Cut four strips measuring 2 1/2" x 4 1/2". Fold them face inwards, and sew the long sides together 1/4" from the edge. Turn the piece right side out. Press. Handstitch them to the back of the panels to connect them together.
You can further decorate the piece with any Christmas ornaments. We added some fabric flowers.