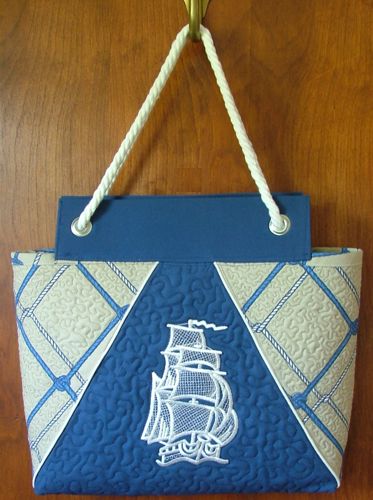
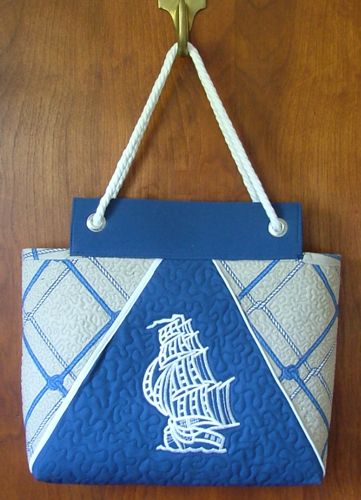
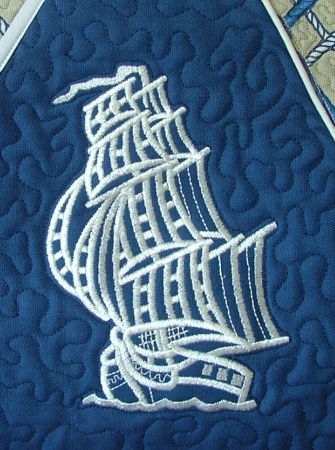
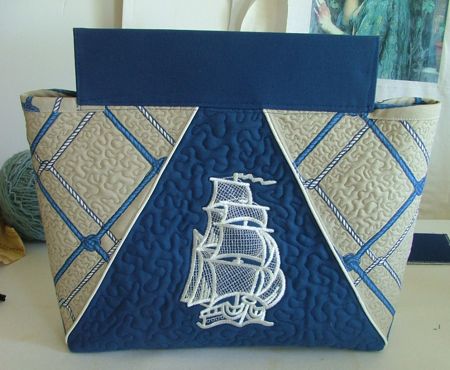
We came across some fabric with a pattern of ropes, and that was what inspired this nautically-themed tote. It's great for the beach or just carrying around every day during summer season. The designs used on the front and back panels are Frigate and Brigantine.
|
|
| For the outer bag we used outdoor canvas - 1/2 yard of patterned canvas and 1/2 yard of solid blue canvas. For the lining, we used 1/2 yard of blue cotton fabric. You will also need:
- white piping,
- narrow white bias tape,
- four 1/2" grommets,
- 1 1/2 yard of cotton cord about 1/2" thick,
- a piece of Pellon Peltex 71 (or similar) interfacing, and
- low-loft polyester batting.
For embroidery, we used embroidery polyester threads, and medium-weight cut-away stabilizer.
|
|
|
Template:
|
On a piece of paper draw a rectangle measuring 18" x 14".
Measure 7 1/2" from the upper left corner along the upper edge, and place a mark.
Measure 7 1/2" from the upper right corner along the upper edge, and place a mark. |

|
Using a ruler, connect the right mark with the lower right corner.
Connect the left mark with the lower left corner. |
|
| Cut out the template. |

|
|
Cutting:
|
Using the template, cut out 2 blue canvas pieces and 2 patterned canvas pieces.
Out of patterned fabric, cut 2 bias strips measuring 2" x 7 1/2".
Out of the blue canvas fabric, cut 2 rectangles measuring 7" x 13".
Out of Pellon Peltex 71 interfacing cut 2 strips measuring 6" x 12", and one strip measuring 4" x 14".
Out of fabric for the backing/lining cut a strip measuring 8 1/2" x 15". |
|
|
|
Assembling the Top
|
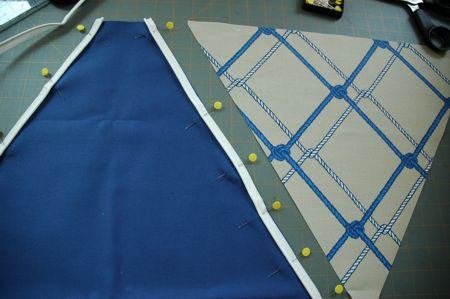
| On your working table, place the blue panels with the wide sides down and short sides up. Place the patterned panels between the blue panels with their wide sides up and short sides down. |

|
| Pin the white piping along the sides of one of the blue panels. |
|
| Place the patterned panel over the blue panel, face down. Align the right edges and machine-stitch. Seam allowance 1/4". This will attach the piping that you pinned. Press and unfold. |
|
| Place the second patterned panel face down over the same blue panel. Align the left edges and machine-stitch. |
|
| Pin the white piping to the right edge of the remaining blue panel. Use the same procedure as above to attach it to the left of the working piece. |

|
|
Embroidery
|
| Stabilize the blue panels with medium-weight cut-away stabilizer and make the embroidery. On one blue panel we embroidered the Frigate and on the second panel we emboidered the Brigantine. |
|
|
Quilting:
|
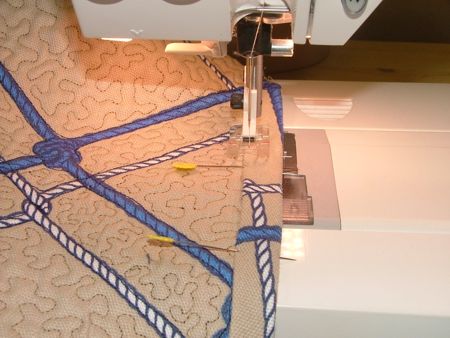
| Now place the backing/lining on a flat surface (table) face down. Cover with batting. Spread your working piece over it. Pin all three layers together with 1" pins and start quilting. We quilted around the embroidery and made stippling all over the piece. Straight-stitch along the piping.
After the quilting is finished, press the work with heavy steam and trim the work - the opposite sides should be straight and of the same length.
|
|
Now take the narrow bias tape and finish the raw edge of the blue panel.
Finish the raw edge of the patterned panel with zig-zag stitch. |
|
|
Sewing the Bag:
|
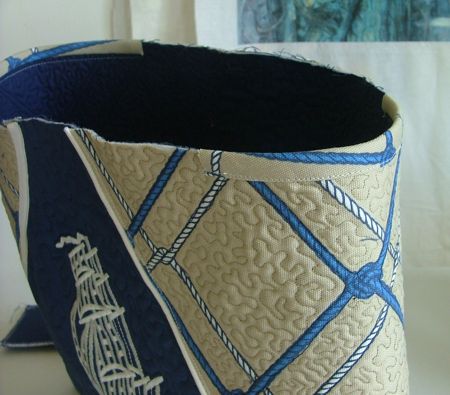
| Fold the working piece to align the edges of the end panels. Position the edge of the blue panel over the edge of the patterned panel. Baste, then top-stitch together. You'll get a tube. |
|
| Turn the tube right side inwards. Align the blue panels so that they are on opposite sides to each other. With pins mark the sides of the bag on the upper and lower edges. Pin the bottom, then topstitch 1/2" from the edge. Step 1/8" from the first line and topstitch again.
|
|
| Make box corners at the bottom of the bag. For this, separate the front and back sides at the corners. Center the bottom seam with the central line of the side. Measure 1 1/2" along the seam from the corner and machine-stitch perpendicular to the seam across the corner. Do not trim the seam. Fold it onto the bottom seam and attach with several manual stitches. Repeat for the second corner. |
|
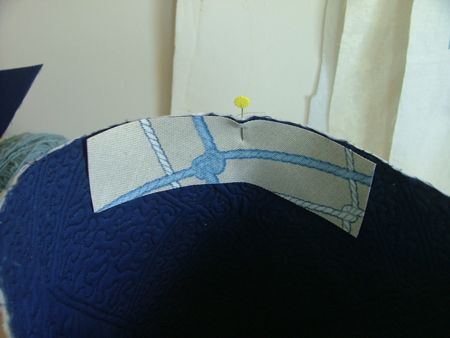
| Turn the bag right side out. Take the 2" x 7 1/2" strip. Fold in half widthwise and lightly press to mark the center.
Working with one strip at a time, position the strip, face down along the edge of the lining as shown in the picture below. Align the central line of the side with the center of the strip. Align the edges.
|
|
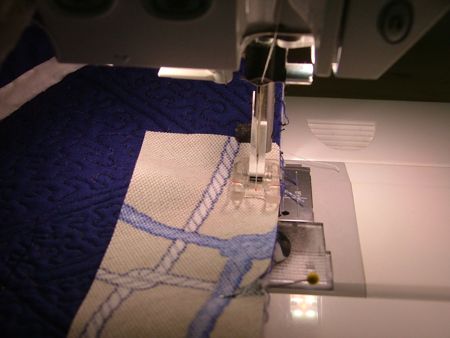
| Machine-stritch along the edge, with seam allowance slightly larger than 1/4". |
|
| Unfold the strip. Press. Fold the strip to the bag's face and press. Tuck in the raw edge, pin, top-stitch in place. |
|
| Repeat with the second side of the bag: |
|
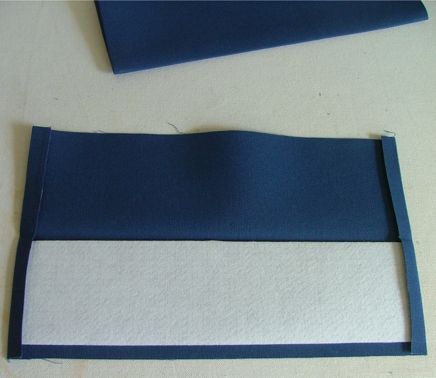
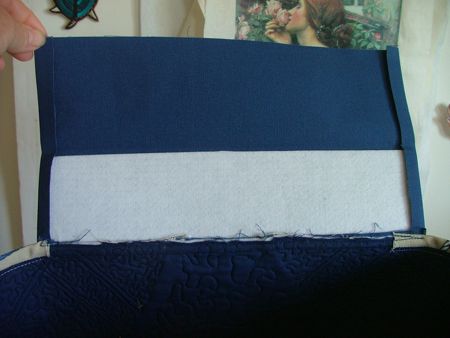
Now take the blue strips measuring 7" x 13" and Pellon Peltex 71 strips measuring 6" x 12".
Fold the blue strips in half lengthwise, wrong side inwards. Press.
Fold the short sides about 1/2" inside, press.
Position the interfacing strip along the central crease line with its sticky side to the fabric. Press firmly to adhere the interfacing to the fabric. You should get two pieces similar to the one in the picture below.
|
|
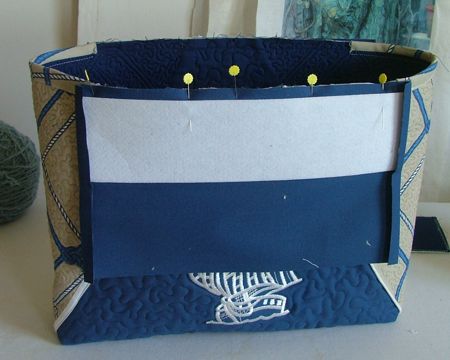
| Working with one strip at a time, pin them along the upper edges of the front and back panels, as shown. The short ends of the strips should overlap the binding of the sides at least 1/2" on each end. Stitch in place.
|
|
| Fold the strip up. Press the seam. Fold the strip along the crease line. It should cover all of the seams. |
|
Tuck the raw edge of the strip in about 1/2" and press. Top-stitch in place.
Then topstitch the sides of the strip. |
|
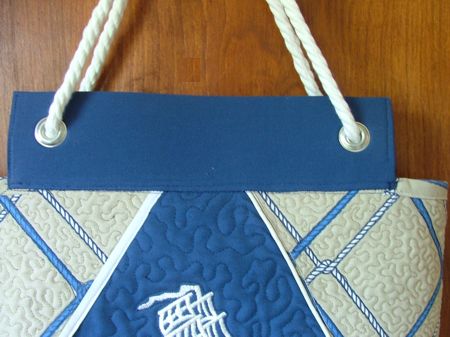
| Insert grommets near the ends of the blue strips. Cut the cord in half and thread the ends through the the grommets to make handles. |
|
| Knots the ends to prevent the cords slipping out. |

|
|
The bag is ready. Enjoy!
|
|
Happy Stitching!
|
|
Back to Frigate and Brigantine
|
|
Back to Projects Page
|


