This is a no-sew project! Everything is put together using glue.
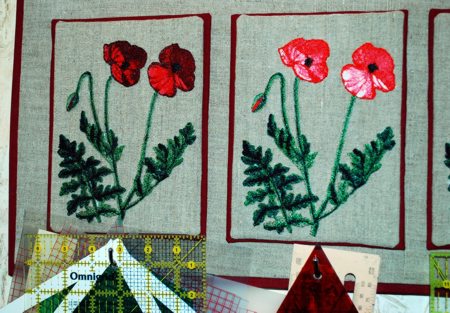
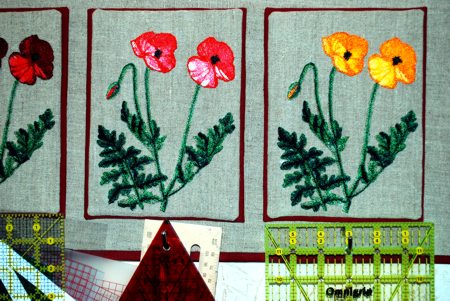
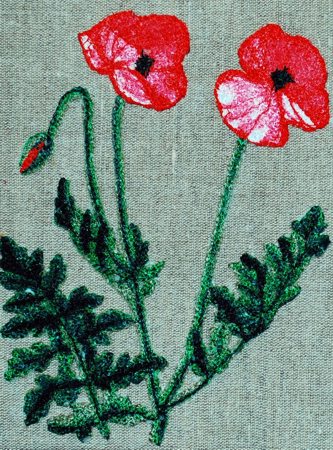
We originally made this simple quilted hanger board to organize our quilting rulers. It can be used to organize notions or other small objects. We decorated the project with California Poppy designs in the photo-stitch technique.

Materials and tools for the project:
You will need:
For the embroidery, you will need water-soluble mesh, organza and embroidery threads.
Out of cardboad, cut a rectangle measuring 14" x 23".
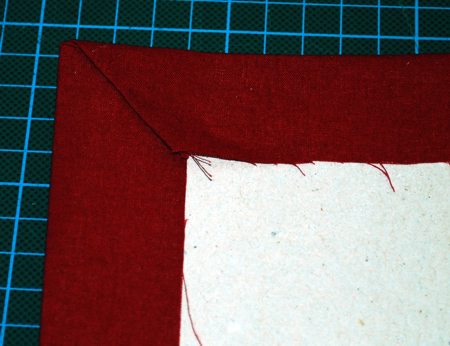
Out of red fabric, cut a rectangle measuring 18" x 27".
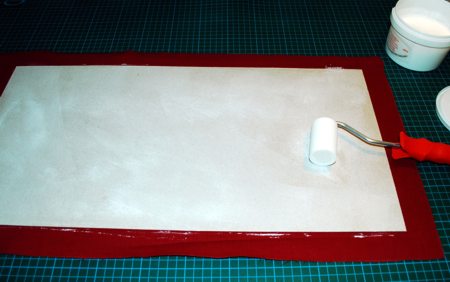
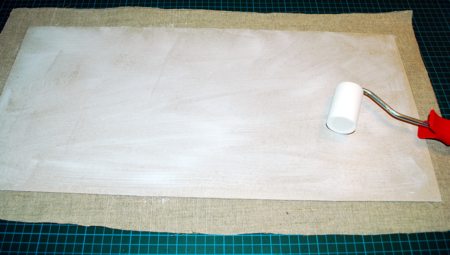
Apply a thin layer of glue to the cardboad sheet. Position the fabric on the working table, face down. Place the cardboard sheet over the fabric, glue down, leaving approximately equal margins on all sides.
Turn over so that the fabric is on top. Spread the fabric with your hands to eliminate creases. Leave to air dry.
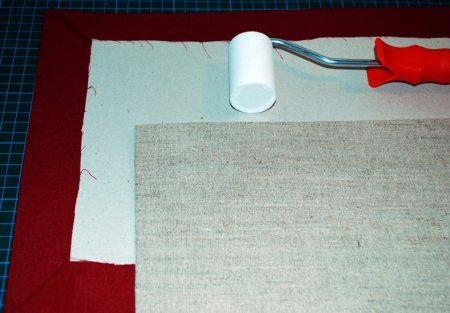
With a brush, apply a layer of glue along the long sides of the cardboard. Fold the fabric over the cardboard on the long sides. Press with your hands. Leave to dry.
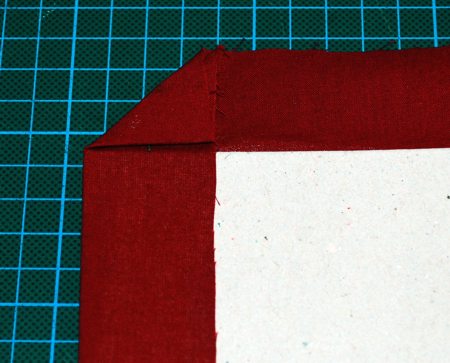
Fold the corners of the fabric, as shown below, and press with an iron.
With a brush, apply a layer of glue along the short sides of the cardboard. Fold the fabric over the cardboard on the short sides. Press with hands. Leave to dry.
Out of cardboad, cut a rectangle measuring 13" x 22".
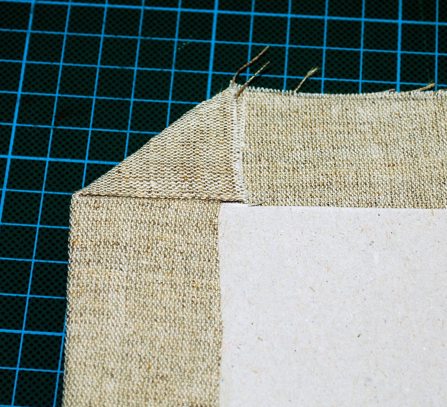
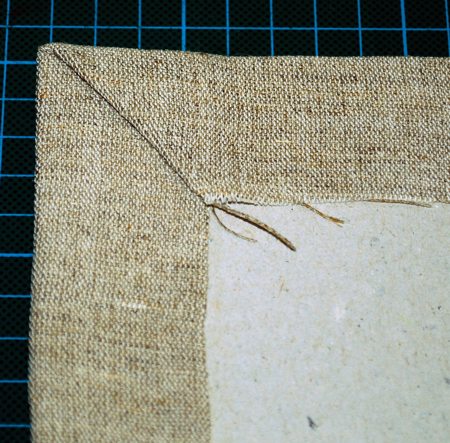
Out of natural-color fabric, cut a rectangle measuring 17" x 26".
In the same way as you made the board with the red fabric, make the natural-color board.
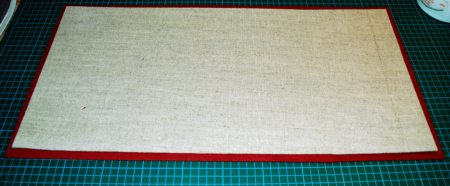
Place both boards on the working table, fabric-side down. Cover the cardboard sides with a layer of glue. Take the smaller (natural-color) board and position it over the larger (red) board, with the fabric facing outwards, and the glue-covered sides on the inside.
Leave to dry under a weight such as a few books.
Out of cardboard, cut 3 rectangles measuring 6" x 8".
Out of red fabric, cut 3 rectangles measuring 8" x 10".
In the same way as you did before, make 3 fabric-and-cardboard rectangles.
Out of cardboard, cut 3 rectangles measuring 5" x 7".
Out of natural-colored fabric, cut 3 rectangles measuring 7" x 9".
Use the parts to make 3 fabric-and-cardboard rectangles.
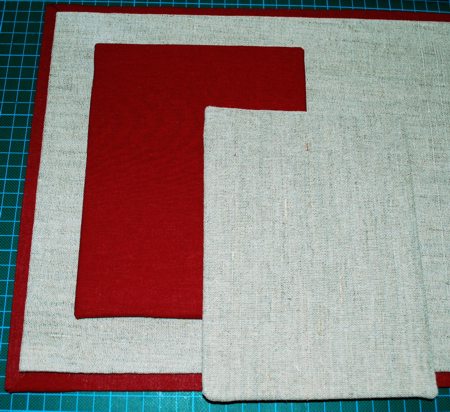
With a pencil, mark the placement of the small rectangles on the large one: 3" from the long edges, 1 1/2" from the short edges, with 1" between the rectangles.
Cover the back of the red rectangles with glue, and press them onto the large board along the marked lines.
Cover the wrong side of the natural-color rectangles with glue, and press them onto the red rectangles.
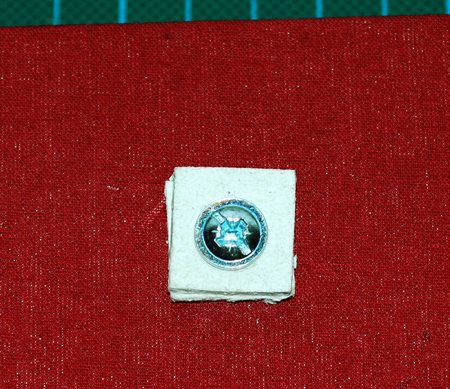
With the help of an awl or a screwdriver, make a small hole under each of the small rectangles.
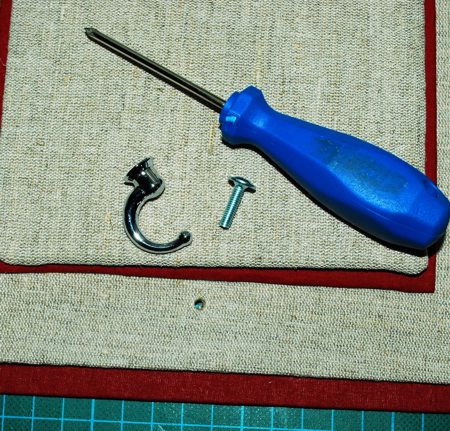
Insert the hooks and tighten the screws. If your cardboard is not thick enough, add 2 cardboard squares under the screw for reinforcement.
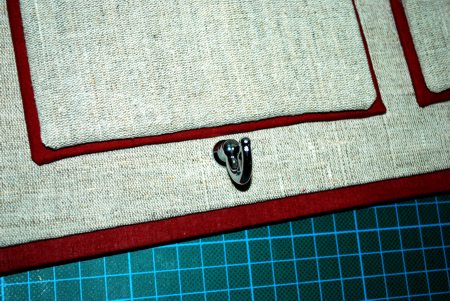
Attach the hangers to the back of the board along the upper edge using the hot glue gun.
Your hanger board should look similar to this at this point:

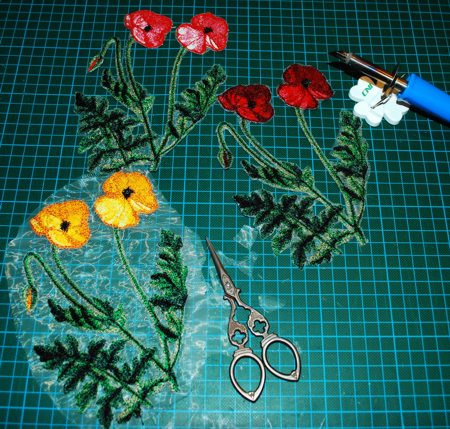
Hoop a layer of organza with 2 layers of water-soluble mesh. Embroider the California Poppy three times, each time using a different color card.
Rinse away the stabilizer. Spread the embroidery on a towel and leave to air dry. Press with steam.
Cut away the excess organza. With a soldering iron, melt the remaining organza along the edges of the stitch-outs.
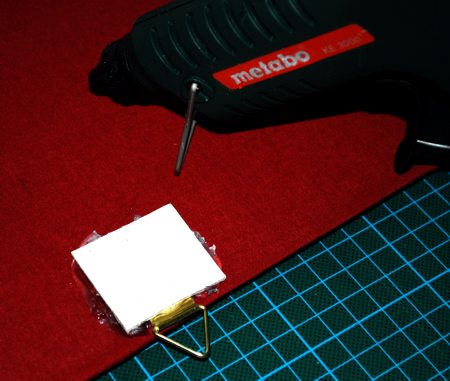
Cover the back of the stitch-outs with white glue.
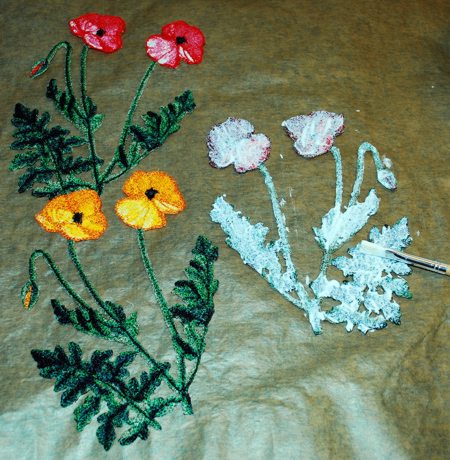
Position the stitch-outs over the small rectangles and press with your hands. Leave to air dry.
Use the hangers to hang the board from a wall. Hang your quilt rulers on the hooks.