These are instructions on how to embroider and assemble the FSL Crochet Lace Easter Doily with Pouches for Eggs.
To embroider this type of lace, please read our recommendations first.
Stabilizers: We strongly recommend to use water soluble fabric-like stabilizer, such as Fabri-Solvy by Sulky or Avalon Plus by Madeira.
Film-like water soluble stabilizers, such as Solvy, Avalon or Badge Master are not suitable for the project.
Threads: For crochet type lace we reccomend to use COTTON thread. Use the SAME thread in the needle and in the bobbin.
We used Signature machine quilting cotton thread, but similar threads from other companies should work just as well.
Thread Tension: Freestanding lace designs look best when the needle and bobbin threads meet halfway. Stitch a sample, and adjust the tension if needed. Consult your machine's manual and/or dealer on how to do this.
Needles: We use size 80/12 embroidery needles and 80/12 metallic needles. Our experience shows that cotton thread used with metallic needles gives less lint. The needles should be sharp, so it's advisable to change them often.
Most Importantly: ALWAYS make a test stitch-out of the design and wash away the stabilizer. This helps you to select the threads, needles, stabilizers and settings of your machine correctly. DO NOT embroider several designs in one hoop.
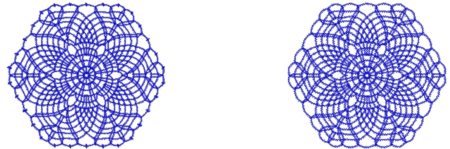
There are 2 files in the set - the central part and the panel.
|
Size: 122 x 112 mm Colors: 1 |
Size: 102 x 94 mm Colors: 1 |
Step One: Embroider the files on 2 layers of watersoluble mesh using cotton threads.
Embroider the panel 6 times and the central part once.
Rinse the mesh in lukewarm water. Slightly press the embroidery with a paper towel to remove excess water. Leave to air dry. Press.
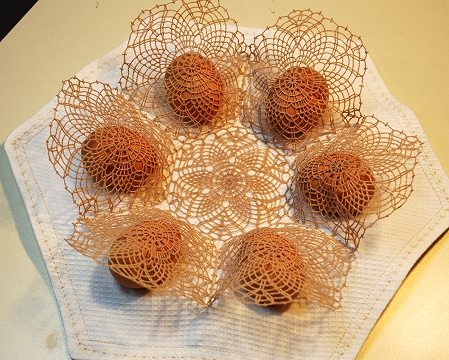
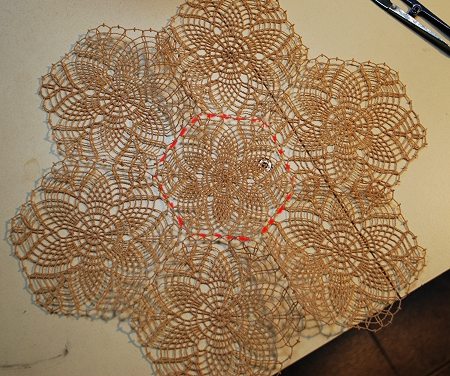
Step Two: Place the panels in a circle. Align the edges.
Using the same thread with which you made the embroidery, hand-stitch or machine-stitch with short zig-zag the edges of the panels.
Step Three: Place the circle of panels around the central part. Align the edges.
Using the same thread with which you made the embroidery, hand-stitch or machine-stitch the edges of the panels to the central part.
Please note that the doily will not lie flat - the panels will ruffle a little.
NOTE: If you want a flat doily, embroider the file "panel" seven times, use one panel as a center, and sew 6 panels around it.
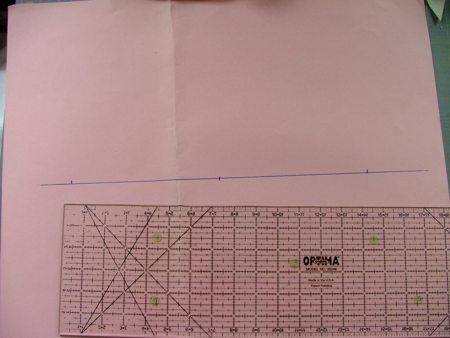
Now you need to sew a fabric base. You will need 2 pieces of fabric measuring 14" x 14" each, a piece of paper for a template, a pencil and a quilter's ruler.
If you have a disappearing fabric marker, you can work right on the fabric without a paper template.
With the help of a pencil and a ruler draw a line on a piece of paper. Mark a dot and measure 7" in both directions, mark the spots.
On the ruler, find the marking for the 60 degree angle. Position the ruler so that the marked line is on the drawn line and the edge of the ruler goes through the central dot. Draw the second line. Measure 7" in both directions and place dots.
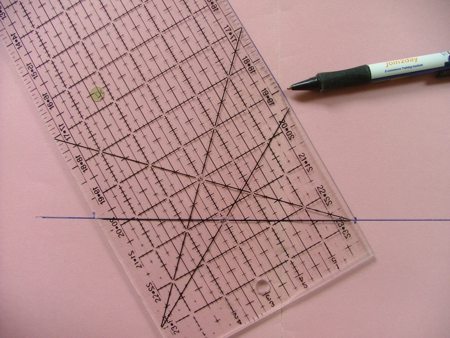
In the same way draw the third line. Measure 7" in both directions and place dots.
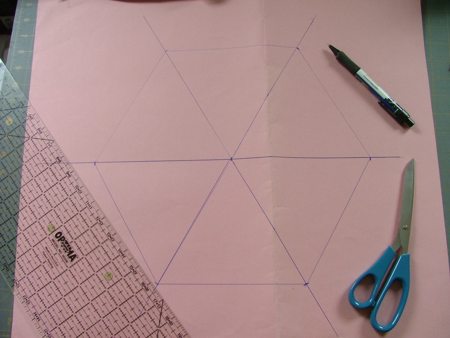
Now connect all neigbouring dots. You'll get a hexagon.
Cut it out.
Place the fabric pieces face to face. Pin them together. Position the template over the fabric. Trace the template.
On your sewing machine, stitch along the traced line. Stitch-close 5 out of 6 sides of the hexagon.
Trim the fabric hexagon to 1/4" seam allowance.
Turn the right side out. Press.
Tuck in the edges of the unfinished side 1/4" inside. Press.
Topstitch with a decorative stitch from your machine along all edges of the fabric hexagon.
NOTE: If you want a sturdier base, you can make a "sandwich" - 2 layers of fabric with batting between them. Densely quilt the sandwich, cut out a hexagon using paper template, finish the raw edges with binding.
With a disappearing fabric marker transfer the markings from your paper template to the fabric hexagon. You can also use pins, if you do not have a disappearing marker. Find and mark the center of the fabric hexagon.
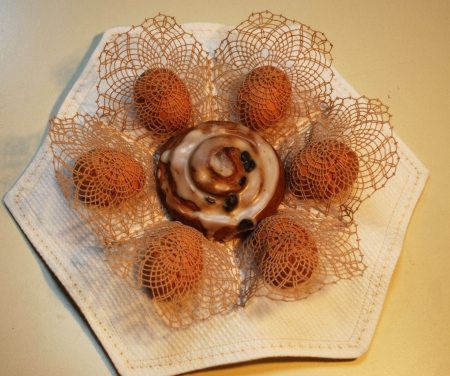
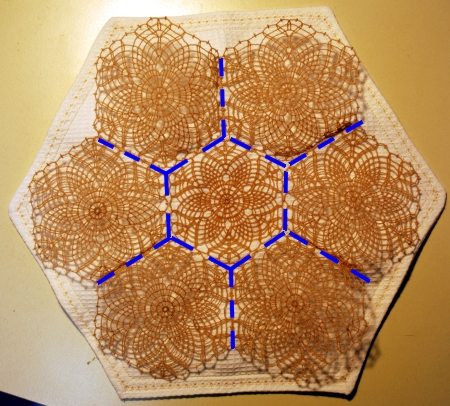
Position the crochet part over the fabric base so that the center of the crochet central part coincides with the center of the hexagon; the upper edges of the side panels are oriented towards the corners of the hexagon. Pin in place.
Topstitch the crochet to the base along the seams as shown on the picture below.
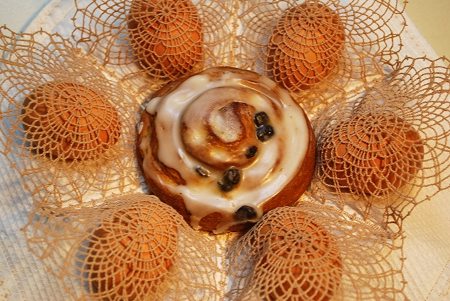
Place eggs into the pouches. The doily is ready for a festive table.

In the center you can place a candle or an Easter cake.