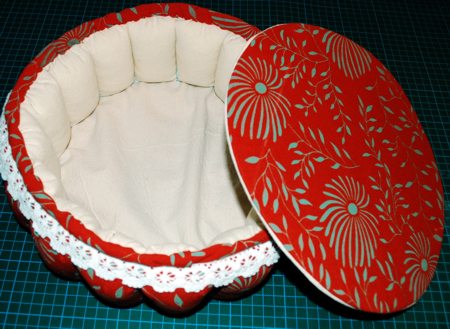
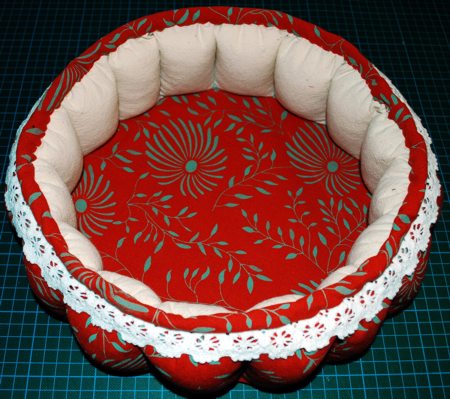
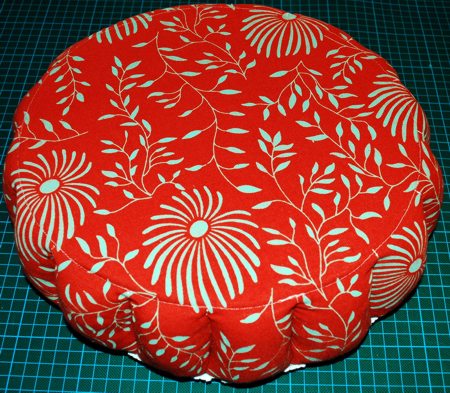
This covered basket is great for holding sewing notions and other craft supplies. It's an excellent gift to yourself or to a crafting friend.
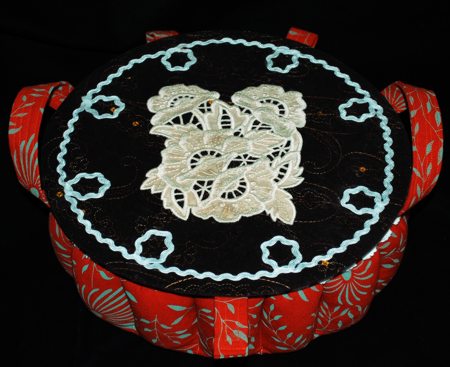
This basket features the Poppy Cutwork Lace design in the mega hoop size. We embroidered the design as applique.
You will need:
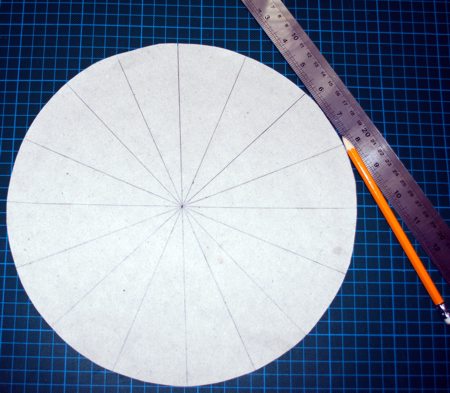
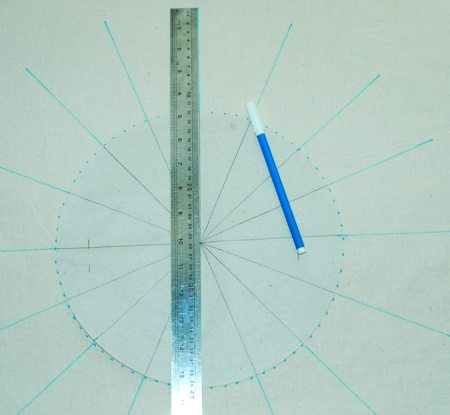
On a piece of cardstock, draw two perpendicular lines. Measure 5 1/2" along each of the lines from the center. Mark the spots.
Divide each quarter into 4 segments. You do not need to be super precise, but try to make the segments as even as possible.
Draw lines through the center. Measure 5 1/2" along each line from the center and mark the spot.
Now connect all the marks. You'll get a circle divided into 16 segments. Cut it out. This will be our template.
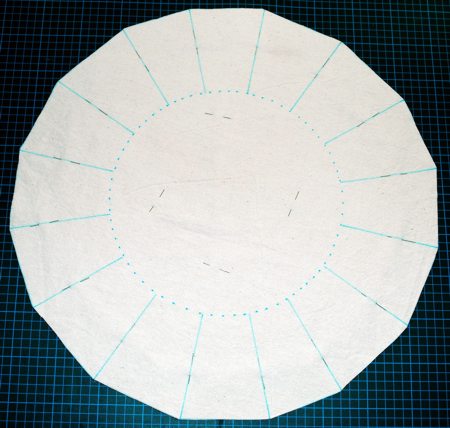
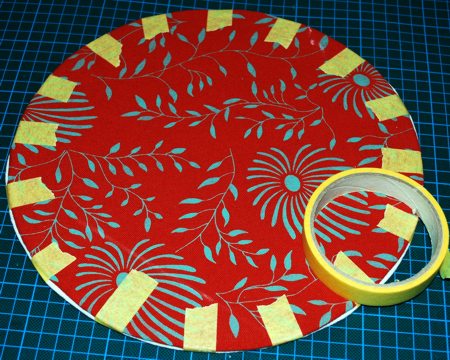
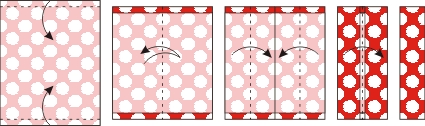
Place the fabric for the outside of the basket on your working surface, face down. Place the fabric for the lining on top of the outer fabric, face up. Pin them together.
Position the template over the lining. With a disppearing fabric marker, trace the circle. With the help of the ruler, continue the lines of the template by 5" in every direction.
Connect the ends of the lines. Cut out both fabrics.
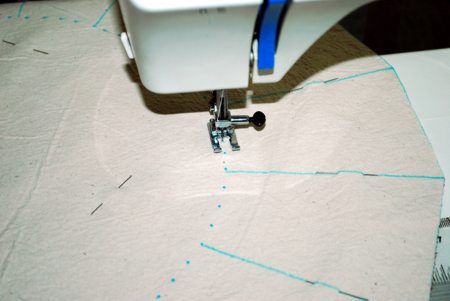
On your sewing machine, stitch around the inner circle, then along the lines you marked. This will make each section into a kind of pocket, with an opening in the outer edge.
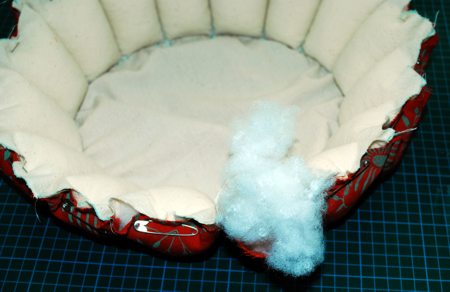
Insert stuffing through the openings. Fold the stuffed pockets upwards so that the lining is on the inside.
Baste the open edges closed.
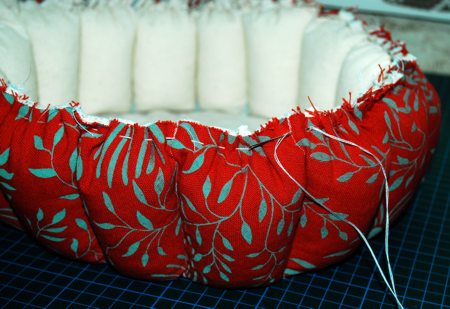
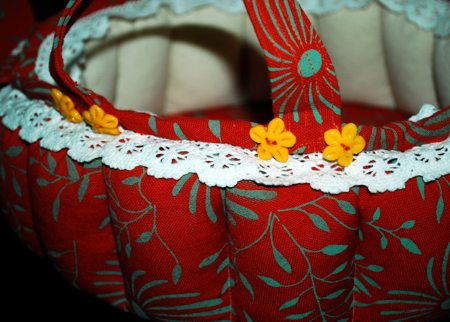
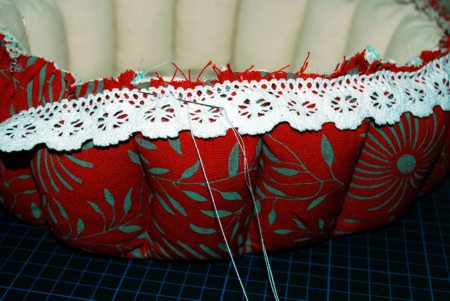
Baste lace trim to the edges. Finish the raw edge with the bias tape. You can use a ready-made tape or make it yourself.
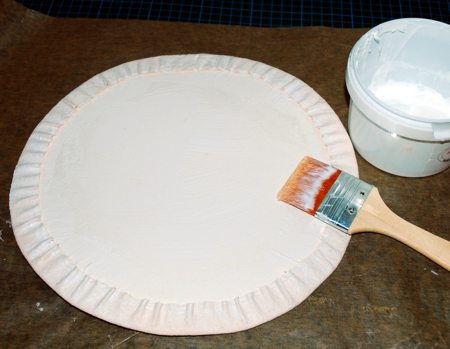
To reinforce the bottom, cut 2 cardstock circles using the template.
Position one of the circles over the fabric for the outside. Cut out the fabric circle about 5/8" larger than the paper one. Baste along the edge of the fabric circle.
Pull the thread to make the edges fold onto the paper circle.
In the same way, make another part using the second paper circle and the lining fabric.
Cover the back of each part (the side where the card stock is exposed) with all-purpose glue.
Place the parts on top of each other, back side to back side. To dry, you can place them under a press, or use fabric adhesive tape to hold them together, as shown.
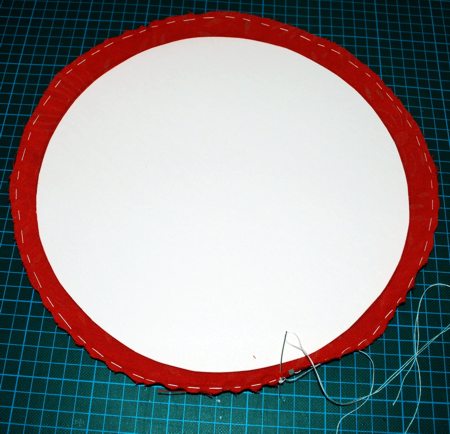
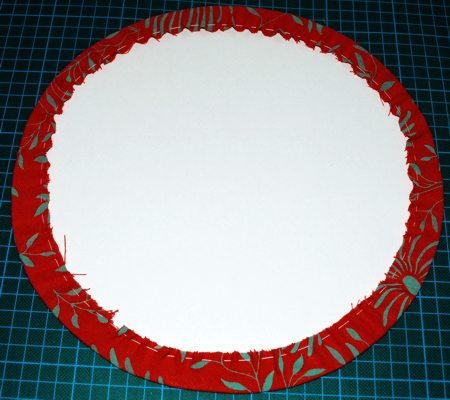
Insert the bottom into the basket.
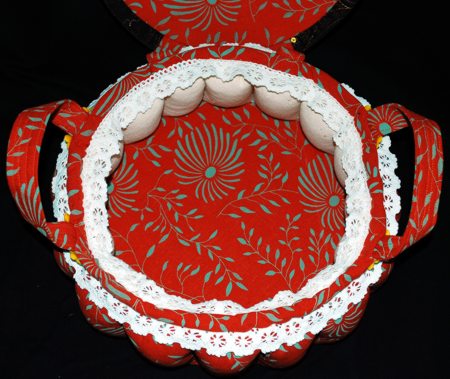
This is what it will look like from the inside
...and from the outside:
Out of the outer fabric cut 3 strips measuring 4" x 5", and 2 strips measuring 4" x 10".
Working with one strip at a time, fold the short edges 1/4" onto the wrong side of the fabric. Press.
Fold the strips lengthwise in half, wrong side inwards. Press, then unfold.
Fold the long edges so they meet in the center. Press.
Fold the strips in half. Press.
Topstitch the strips several times with 1/4" between the stitch lines. You'll have strips 1" wide.
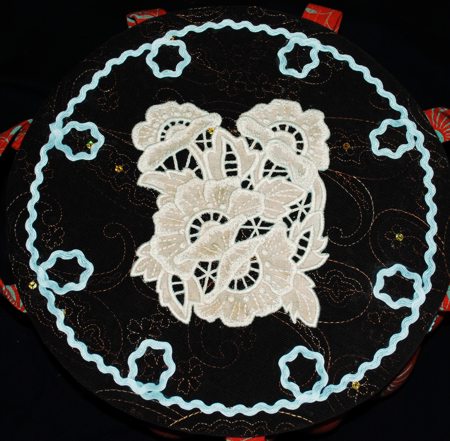
Using the template, trace another circle onto cardstock. Continue the radius lines 1" in each direction. Connect the ends and cut out the resulting circle, which will have a radius of 6 1/2".
Using the template, trace another circle on cardstock. Reduce the radius lines 1/2" and cut out a smaller circle. It will have a radius of 5".
Place each circle on fabric. Cut out each fabric circle 1" larger than the card stock circle.
Stabilize the larger fabric circle with light-weight cut-away/or tear-away stabilizer. Make the embroidery of the Poppy Cutwork Lace design as applique in the center of the circle.
Optional: Decorate the circle around the embroidery to your taste - add trim, beads, etc.
Position the paper circles on the fabric circles.
Baste the edges of the fabric circles and fold them onto the paper, as described above.
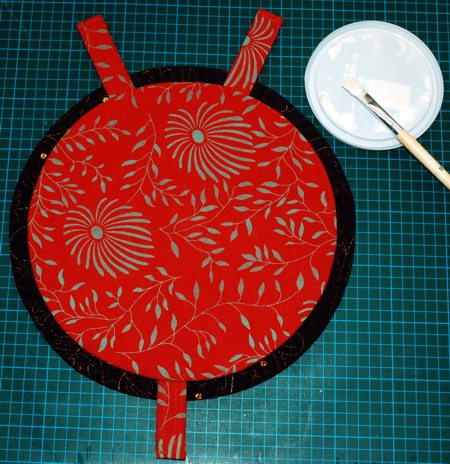
Position the 5" strips on the larger circle as shown. Pin. Sew to the fabric in place.
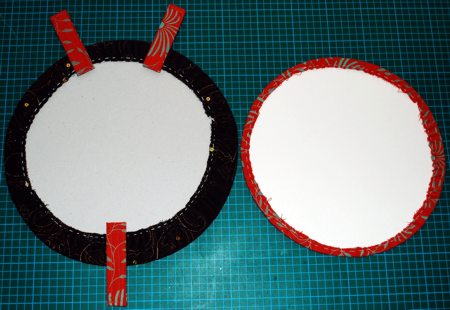
Apply a coat of glue to the wrong side of the smaller circle.
Place it in the center of the larger circle.
Place under a press and let the glue dry.
Hand-stitch the free ends of the 2 strips of the cover to the upper edge of the basket. These will be the hinges.
Hand-stitch the 10" long strips to the upper edge of the basket one opposite the other, as shown to make handles.
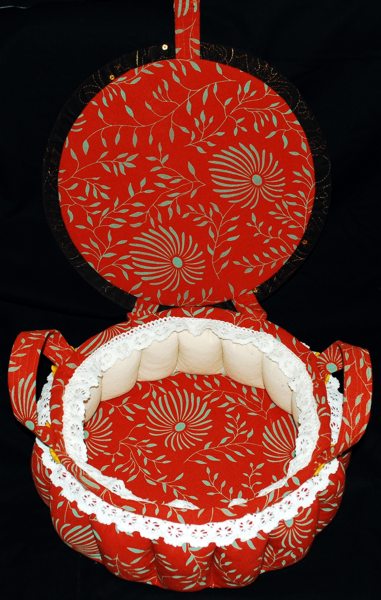
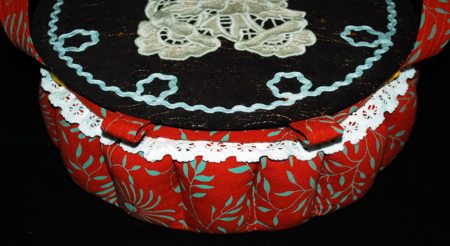
Sew decorative buttons to the handles.